Hey everyone!! Oh my god!! We are into Week 4!! Time is surely flying by!!
We are in the last week for the CAL instructions, but dont worry, we will be giving more time for people to ctch up and complete the Nifty Thrifty Eco Bag CAL with GoKraftz Yarns!! Dont forget to share your progress and tag us!!
We are completing the bag this week and we excited to begin with week 4 instructions!! Our Designer Divya of @stringtierey has again put together a video tutorial for this week to help understand better.
But if you havent caught up on the previous weeks, you can check out the instructions below and get onbaord with everyone.
You can find Week 1 Instructions HERE.
You can find Week 2 Instructions HERE.
You can find Week 3 Instructions HERE.
Come! lets complete the bag and get on with WEEK 4 of Instructions for the Nifty Thrifty Eco Bag!!

Lets look at some of the details once again before we begin.
KEY
ch: chain
sl st: slip stitch
sk: skip
sc: single crochet
st(s): stitch(es)
ch sp: chain space
dc: double crochet
yo: yarn over
sc2tog: single crochet 2 together
dc2tog: double crochet 2 together
dc5tog: double crochet 5 stitches together.
scdc2tog: single crochet double crochet 2 together (see special stitches)
dcsc2tog: double crochet single crochet 2 together (see special stitches)
MC: Main colour
CC: Contrast colour
MR: Magic Ring
WS: Wrong side
RS: Right side
SPECIAL STITCHES:
scdc2tog: single crochet double crochet 2 together
Insert hook into the next st (or ch sp), yo, pull up a loop, (2 loops on the hook), yo, insert hook into the next st, yo, pull up a loop, (4 loops on the hook) yo, pull through 2 loops, (3 loops on the hook) yo, pull through last 3 loops.
dcsc2tog: double crochet single crochet 2 together Yo, insert hook into the next st (or ch sp), yo, pull up a loop (3 loops on the hook), yo, pull through 2 loops, (2 loops on the hook), insert hook into the next st, yo, pull up a loop, (3 loops on the hook) yo, pull through last 3 loops.
NOTES:
- ch2/ch1 at the start of the Row, doesn’t count as a St.
- This bag is a constructed as a rectangular flat piece first and then the corners are worked to form the shape of the bag.
- Pattern is worked in flat rows by turning at the end of each row for the body, and in the round for the edging and shaping.
- The instructions are written in crochet shorthand, for eg. “sc 2” means single crochet in each of the next 2 stitches, “2sc” means make 2 single crochet in the same stitch.
- Stitch count is mentioned in Brackets as [#] at end of row.
- Blocking is a must for this project to achieve the desired look.
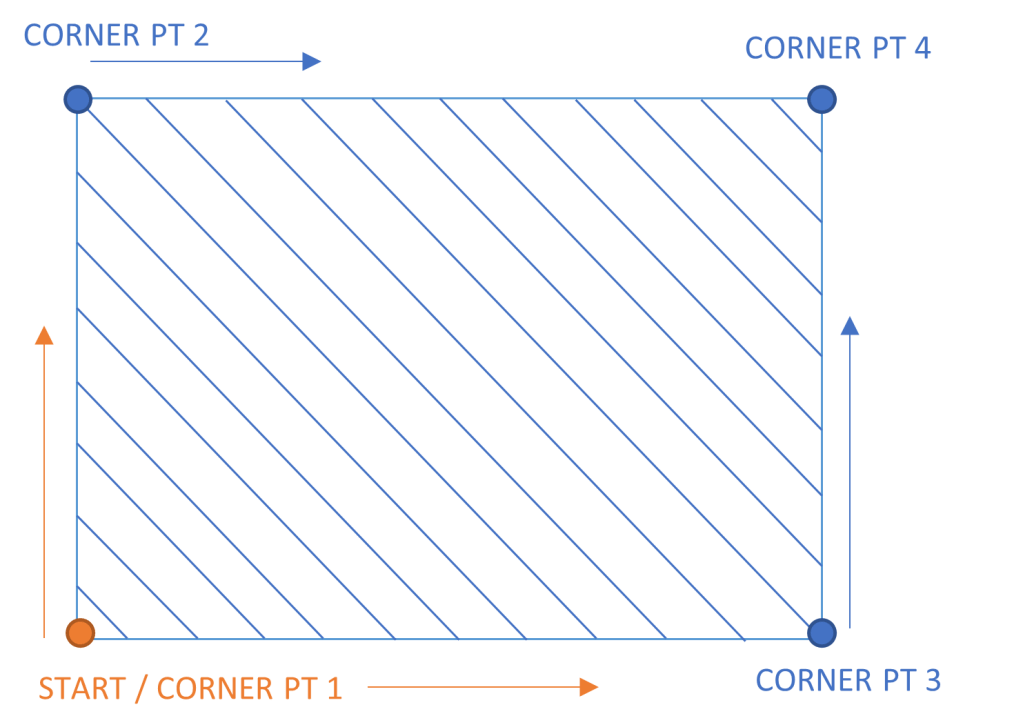
SCHEMATICS:
The bag is created by making a rectangle and then sinching the 4 corner points to create the shape. However instead or a normal rectangle we shall be starting from one corner and working our way u to create the remaining 3 corners of the rectangle.
RECAP:
We ended week 1 at Row 48 for gohibulky yarn users and Row 60 for gobulky users, both in contrast colour. This end was the corner point 2 for both options.
We continued Week 2 to get to corner point 3, and started decreasing both sides.
Week 3 ended with us completing the entire rectangle and wet blocking it.
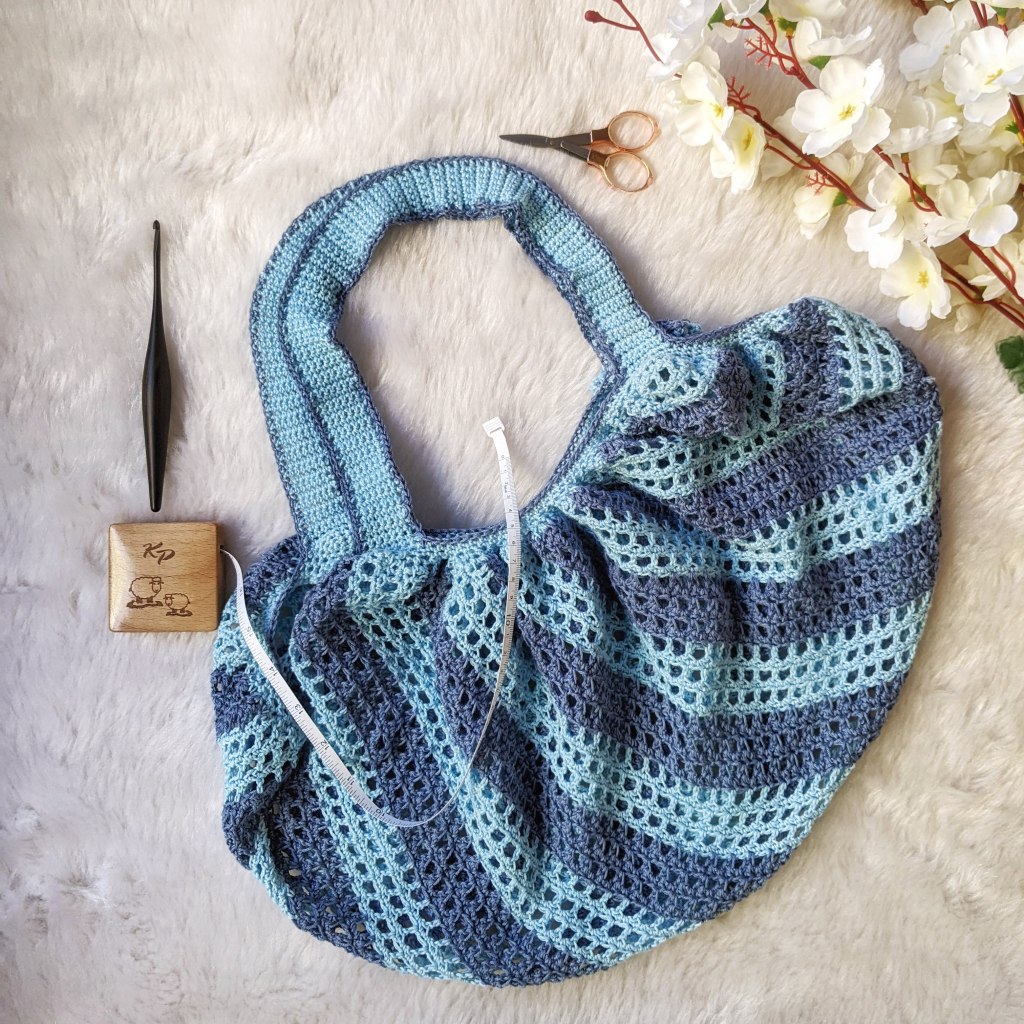
PATTERN INSTRUCTIONS – WEEK 4:
For this week, we will give shape to our bag and finish it with handles!
For this week we will be going down hook sizes and use 4mm hook size for gohibulky yarn and 3mm hook size for gobulky yarn. rest of the instructions remain same for both options.
The instructions remain the same for either yarn option you choose, unless specified.
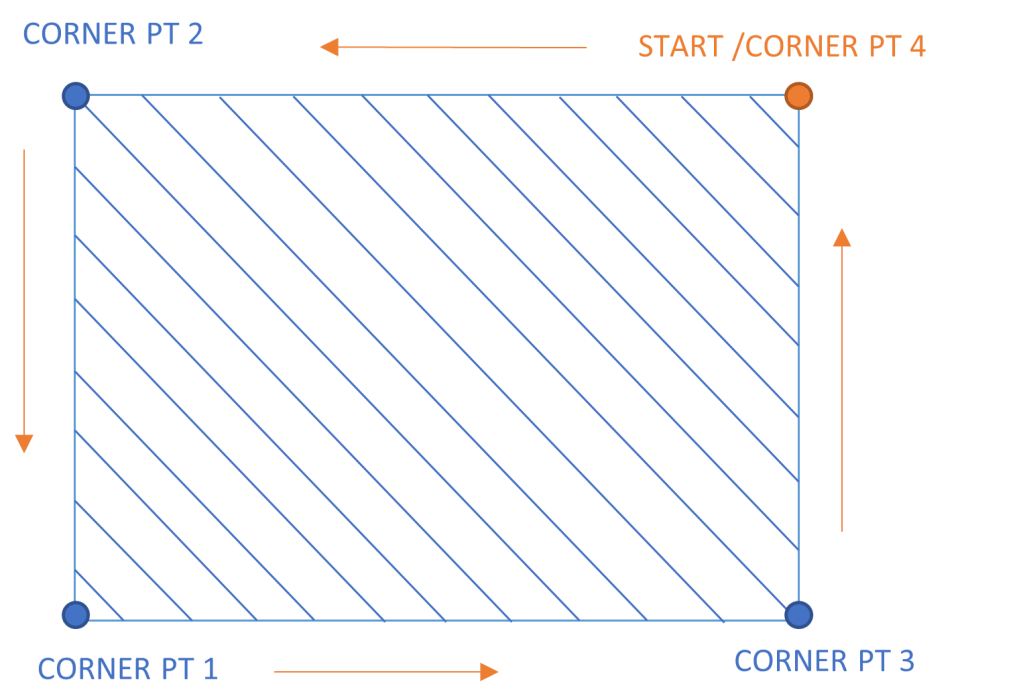
We will now put stitch markers into each of the corner stitches (4 corners). Also we completed week 3 on the right side of the fabric.
So with the right side facing towards you and the top right point being corner point 4 (where we fastened off our rectangle), we will begin at this point with the larger quantity yarn colour.
With the larger quantity yarn colour.
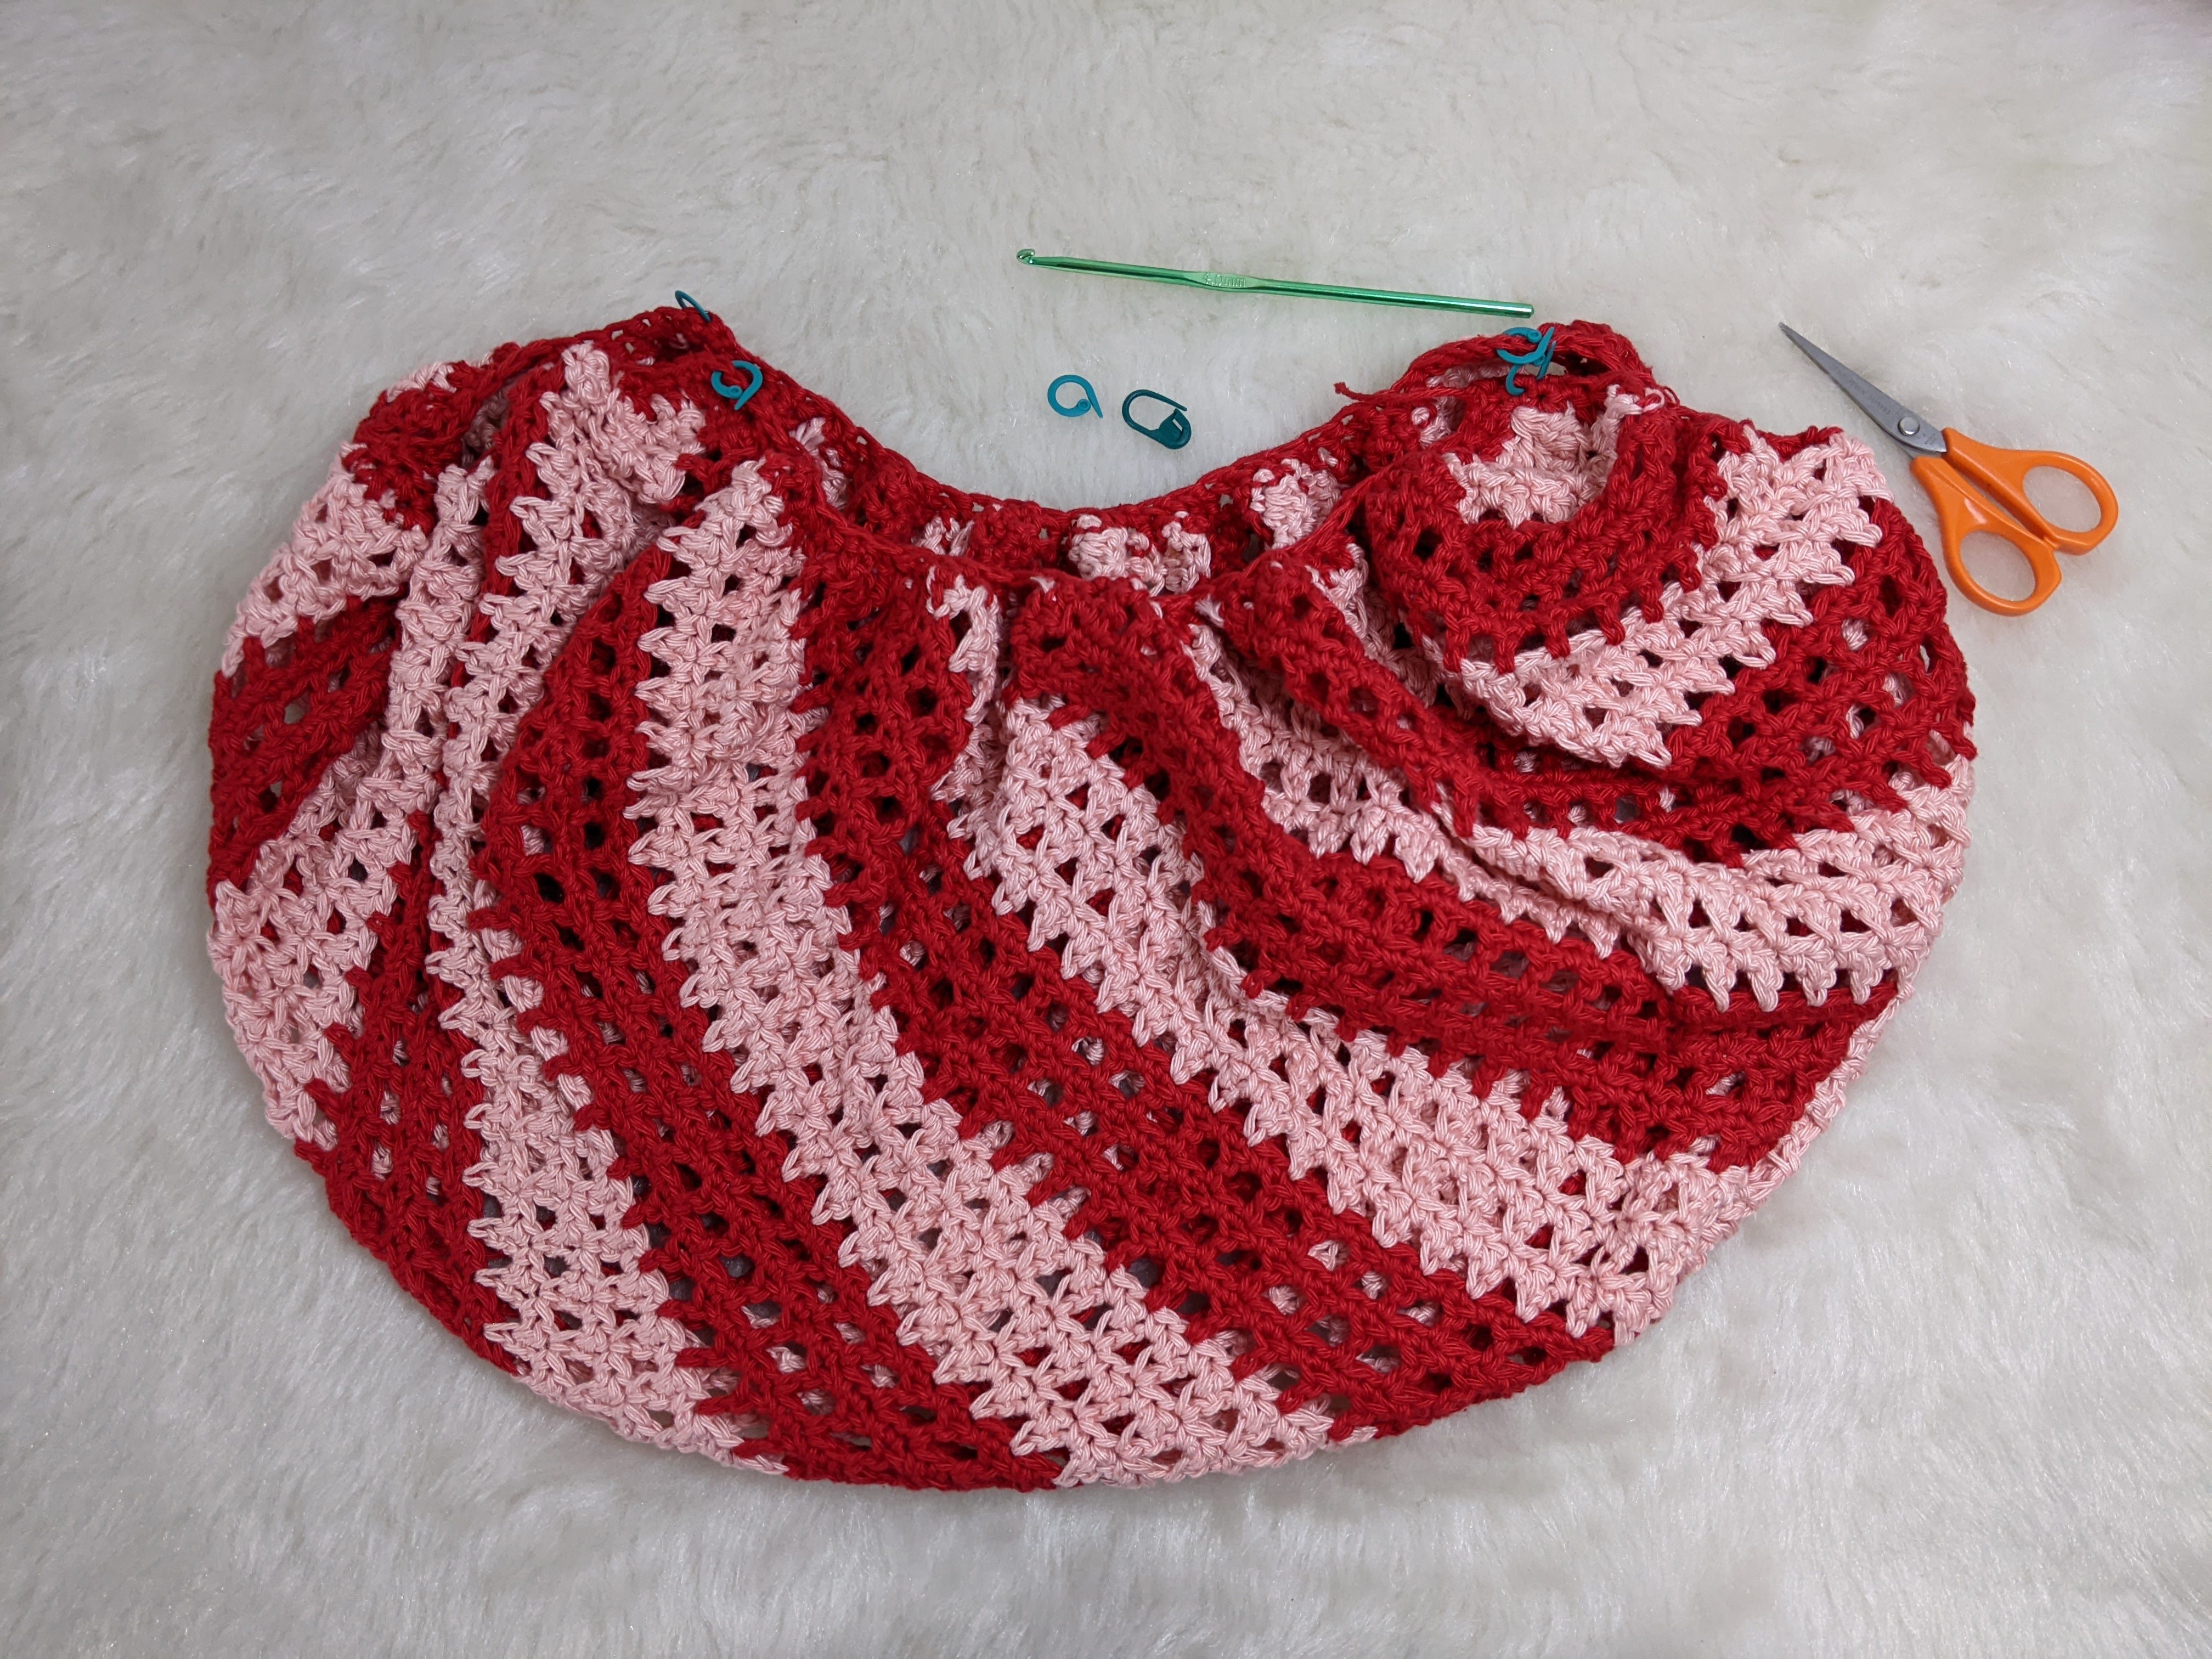
ROUND 1 (RS): ch1, *sc2tog, in each and every stitch edge till the next stitch marker. 3sc in the same stitch at the stitch marker, replace the stitch marker into the 2nd stitch of the 3sc*. Repeat from * to * till you reach back to the first stitch marker. 3sc in the 1st stitch marker and replace stitch marker into the 2nd st. Sl st into the 1st sc2tog to close the round.
ROW 2 (RS): ch1, *sc2tog, in each and every stitch edge till the next stitch marker. 3sc in the same stitch at the stitch marker, replace the stitch marker into the 2nd stitch of the 3sc, {sc, sc2tog} into every stitch till the next stitch marker, 3sc in the same stitch at the stitch marker, replace the stitch marker into the 2nd stitch of the 3sc*. Repeat from * to * till you reach back to the first stitch marker. 3sc in the 1st stitch marker and replace stitch marker into the 2nd st, sc in the last st. Sl st into the 1st sc2tog to close the round.
Before we start the Handle, we shall now pinch and hold, corner point 4 and corner point 3 together and corner point 2 and corner point 1 together. This allows us to see the shape of the bag and work on the handle accordingly.
To help you understand better, Divya has created a tutorial video that is perfect for beginners:
Now we will divide the leftover yarn of the same colour into 2 equal parts and wind into 2 seperate balls.
For the Handle, we shall start with corner point 4.
Mark 2 stitches to the right of the stitch marker at corner point 4 and attach the first ball of leftover yarn.
ROW 1: ch1, sc in the same st and the next 4 stitches. Turn. [5] remove stitch marker. ROW 2: ch1, sc in all st. Turn. [5].
Repeat Row 2 till around 6″-8″ of handle length or till yarn lasts. Count the number of rows and make sure you end on an odd numbered row.
So we will join the handle at corner point 2.. Now with the right side of the fabric and the right side of the handle facing each other. insert the hook into the first stitch of the handle and the 2nd stitch on the right of corner point 2 stitch marker and slip stitch both together for the next 5 stitches. Fasten off.
Repeat the same thing on the other side starting the handle at corner point 1 and joining it at corner point 3.
If you have CC yarn colour left, start at any point on the outside of the fabric and create an eding with either single or slip stitch into every stitch all around. You can repeat the same on the inner side of both the handles.
To help you understand better, Divya has created a tutorial video that is perfect for beginners:
And you are done!!! Your nifty thrifty eco bag is all finished!!
That is it for Week 4!! in case of any queries reach out to us via email or comment below this post or dm us on instagram. you can also address your queries directly with our designer Divya @stringtierey on instagram.
We would love to see your progress, so dont forget to tag us, gokratfz and stringtierey on instagram and use hashtags #goiyccal2022 #goiycecocal #niftythriftyecocal #iyccal2022 #goiyccal #niftythriftyecobag