Thank you so much, everyone, for showing such enthusiasm with your participation and making this mysterious MAL a huge success. ✨❤
We were very excited to see all the makes and it was a tough pick to select the winners!!!
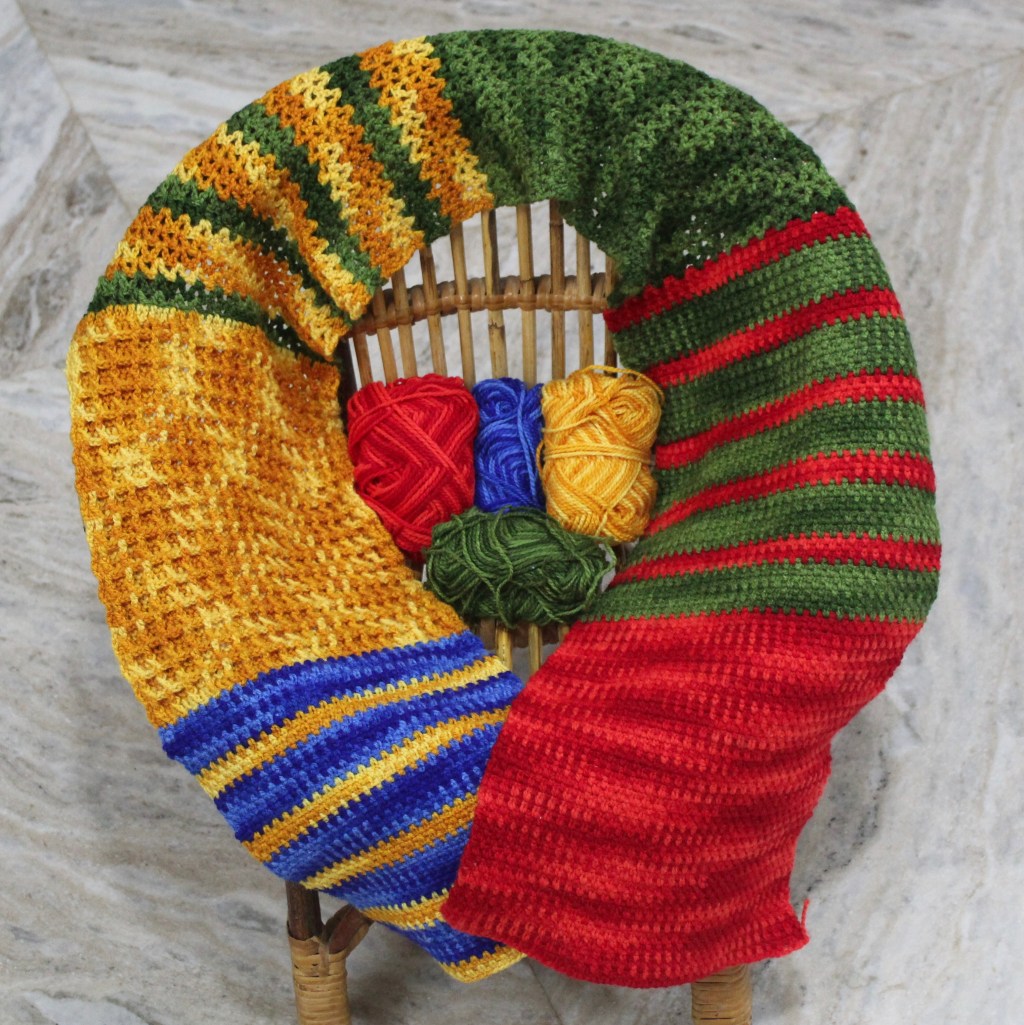
And here they are!!!
THE WINNERS!!!
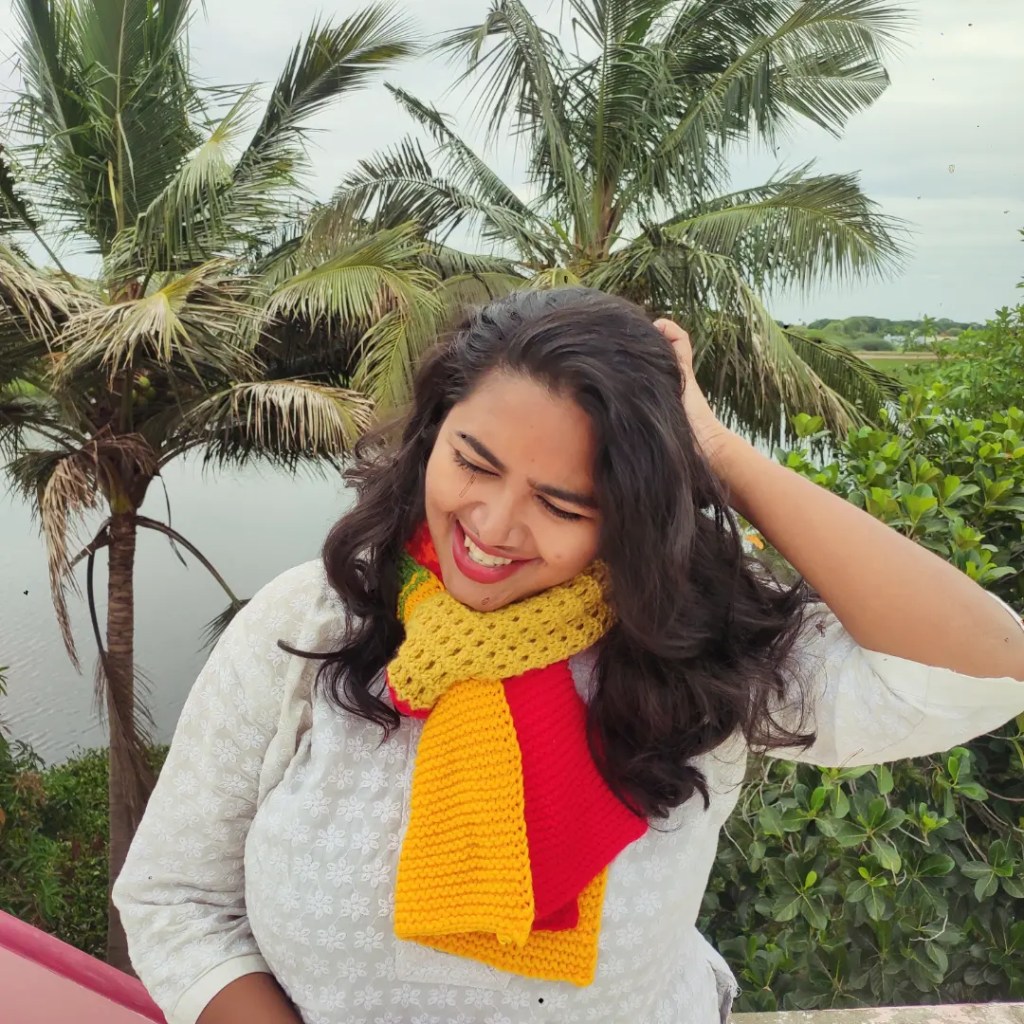
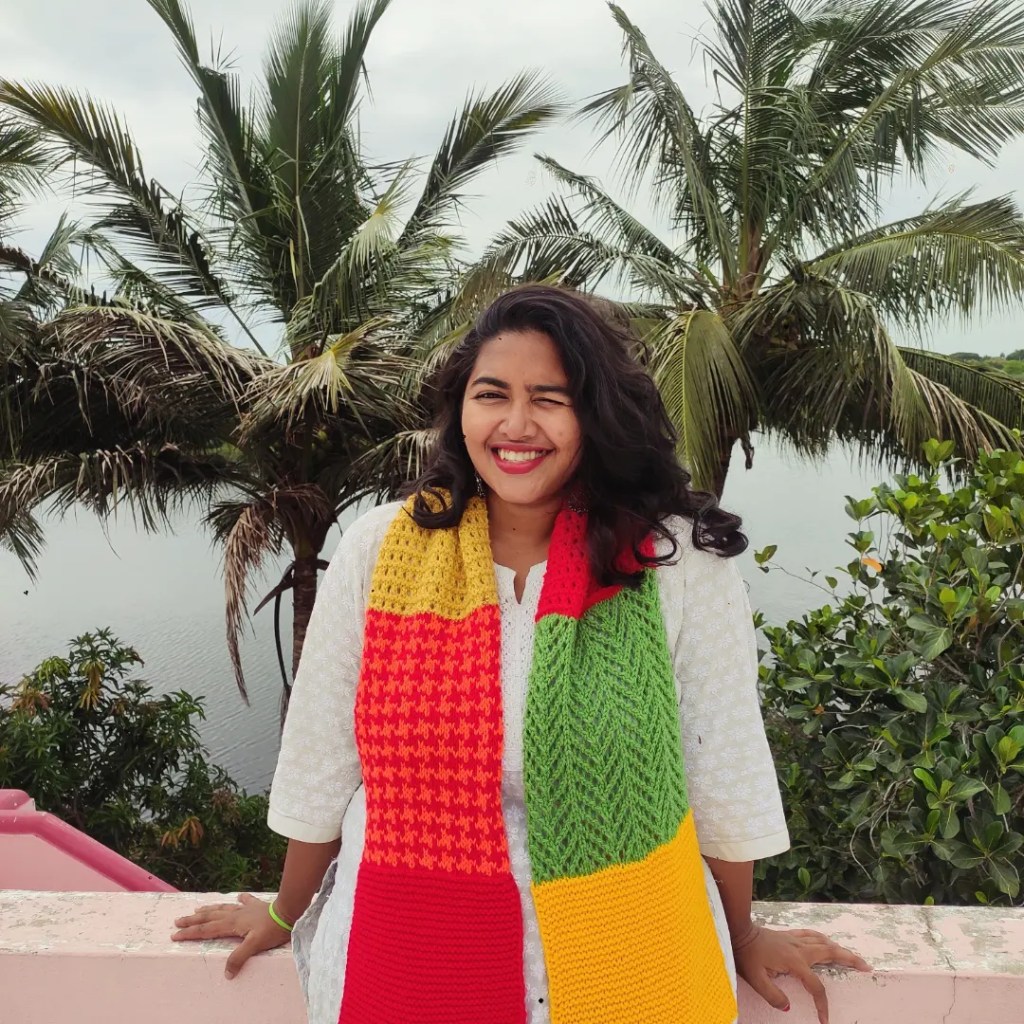
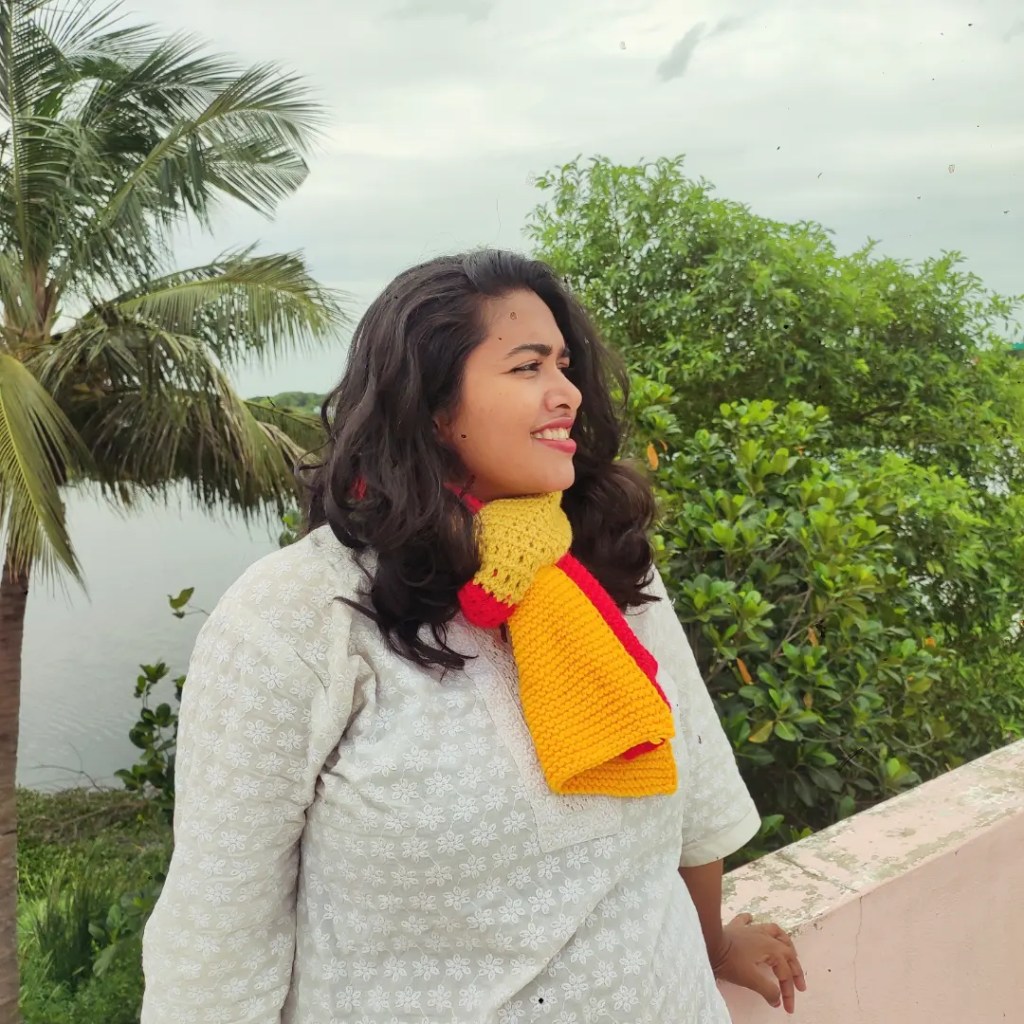
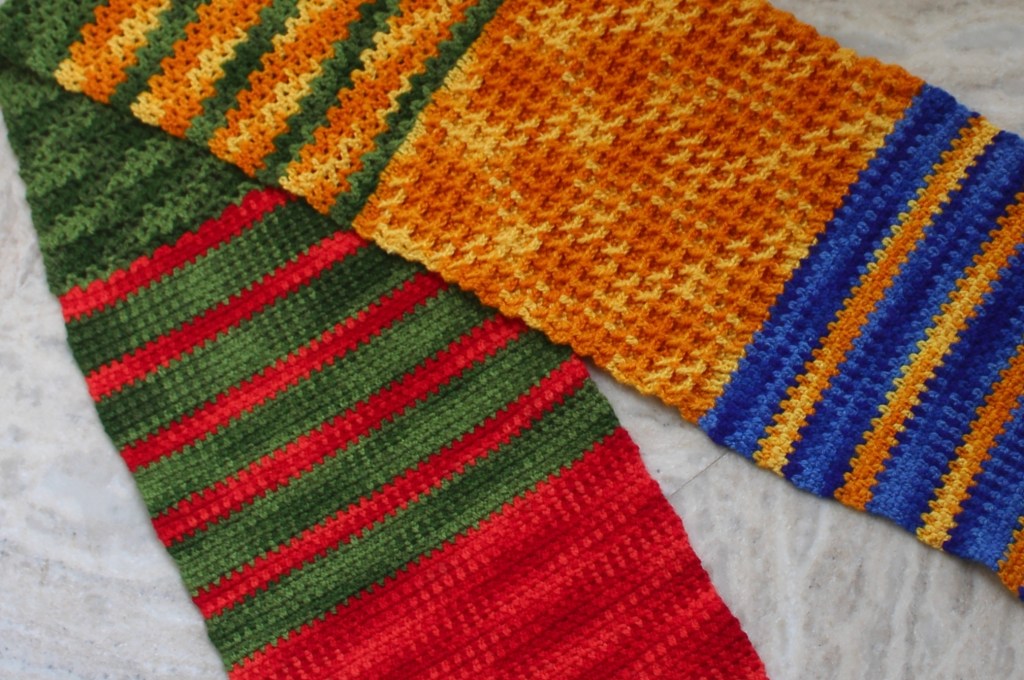
The first scarf that won everyone’s hearts has been created by @knitting_bae She created the scarf following all prompts wisely, and the colors and stitches were in rhythm.
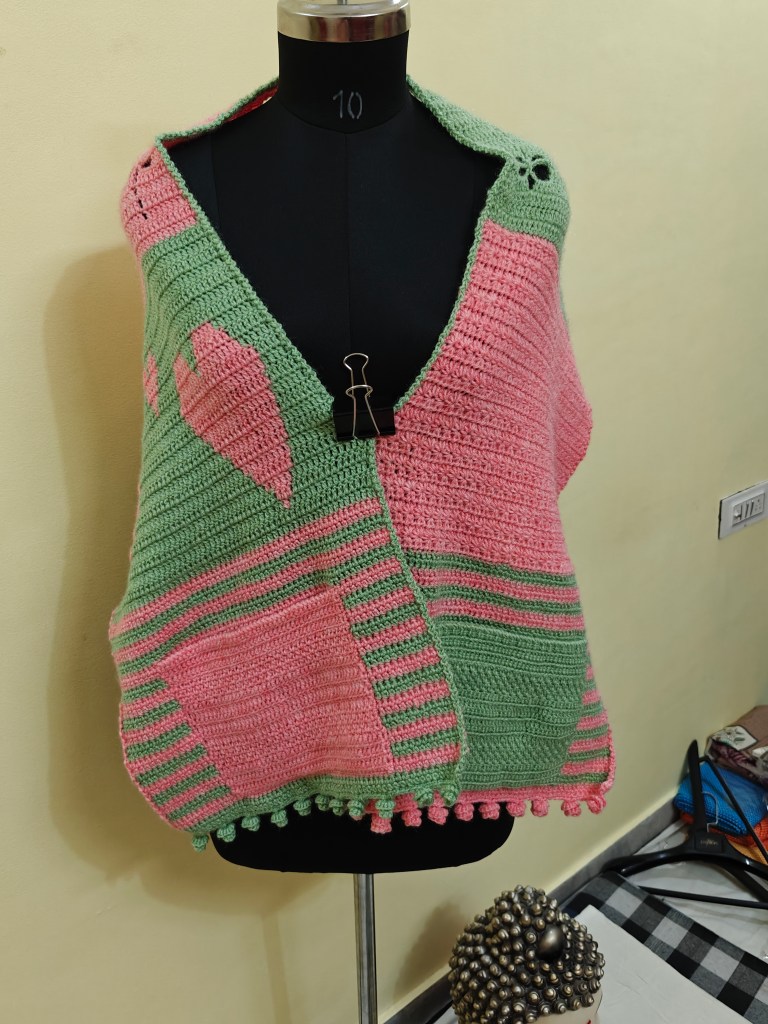
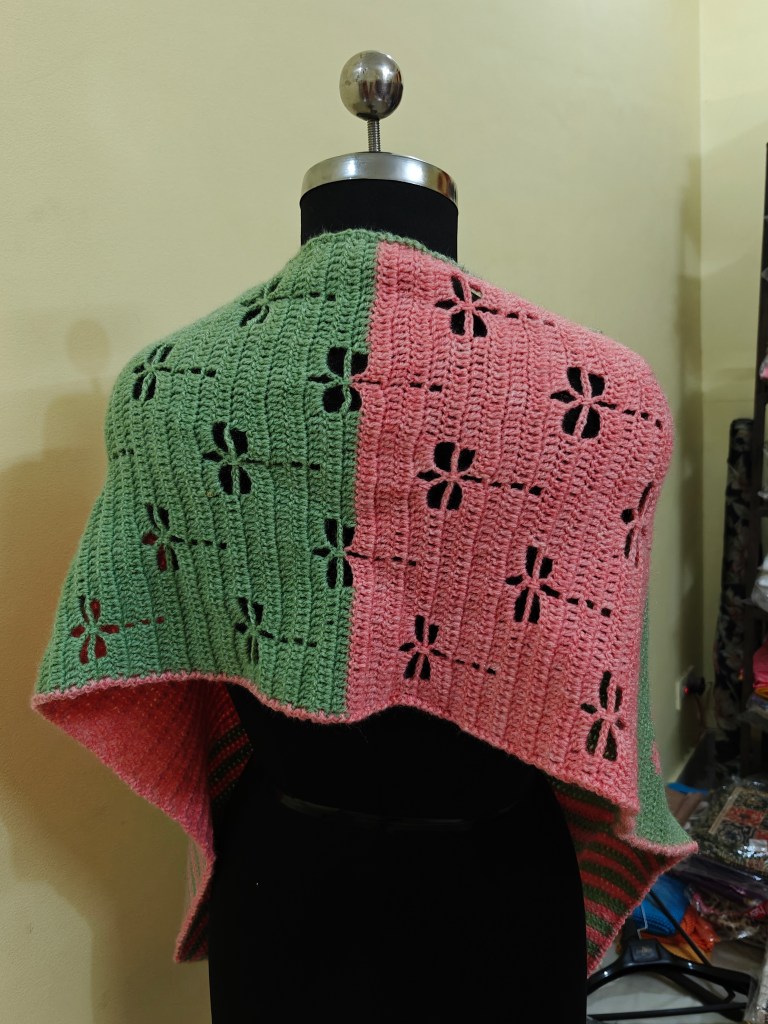
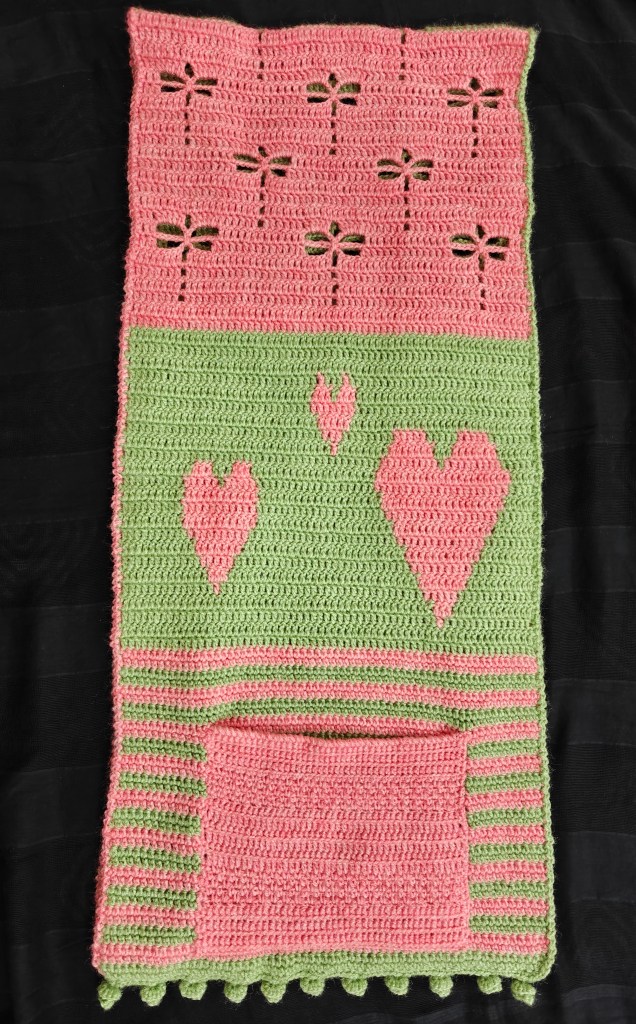
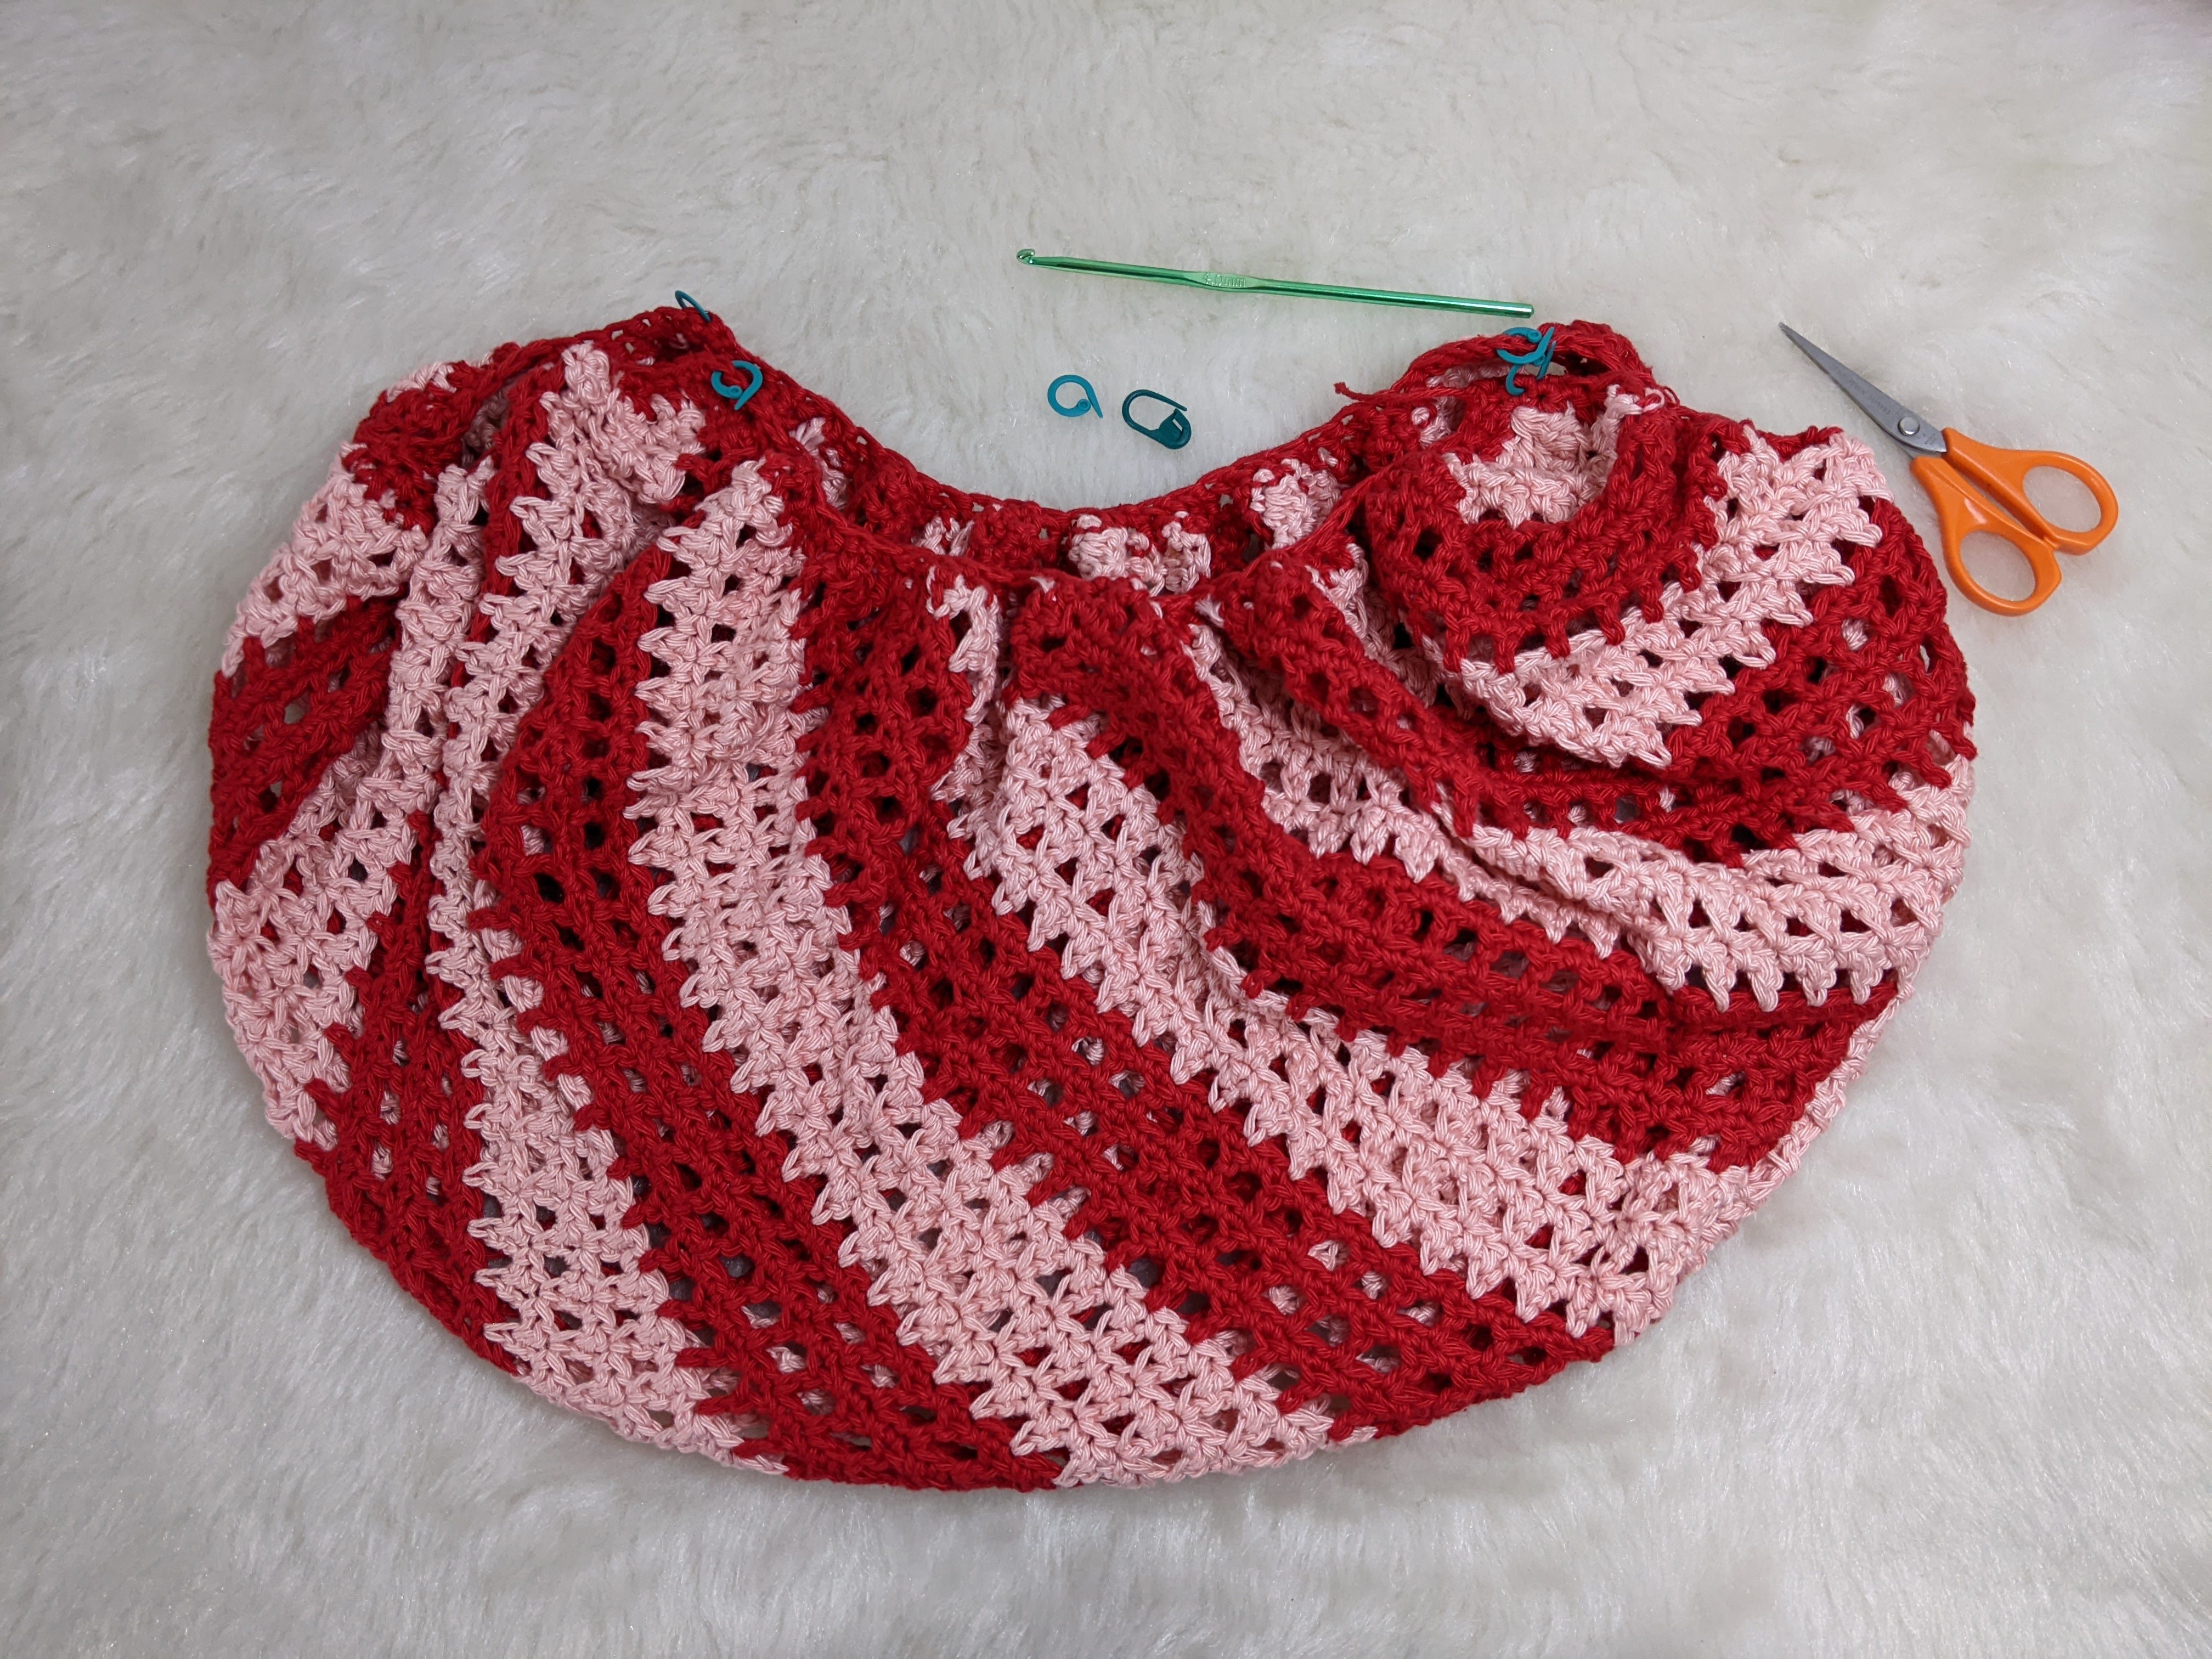
The second scarf is the crochet version of this MMAL, created by @07amritpaul. Her choice of stitches and colors is so beautiful and eye-pleasing. The added pockets made her scarf stand out.
oplus_3145760
Oplus_3145760
oplus_3145760
Oplus_3145760
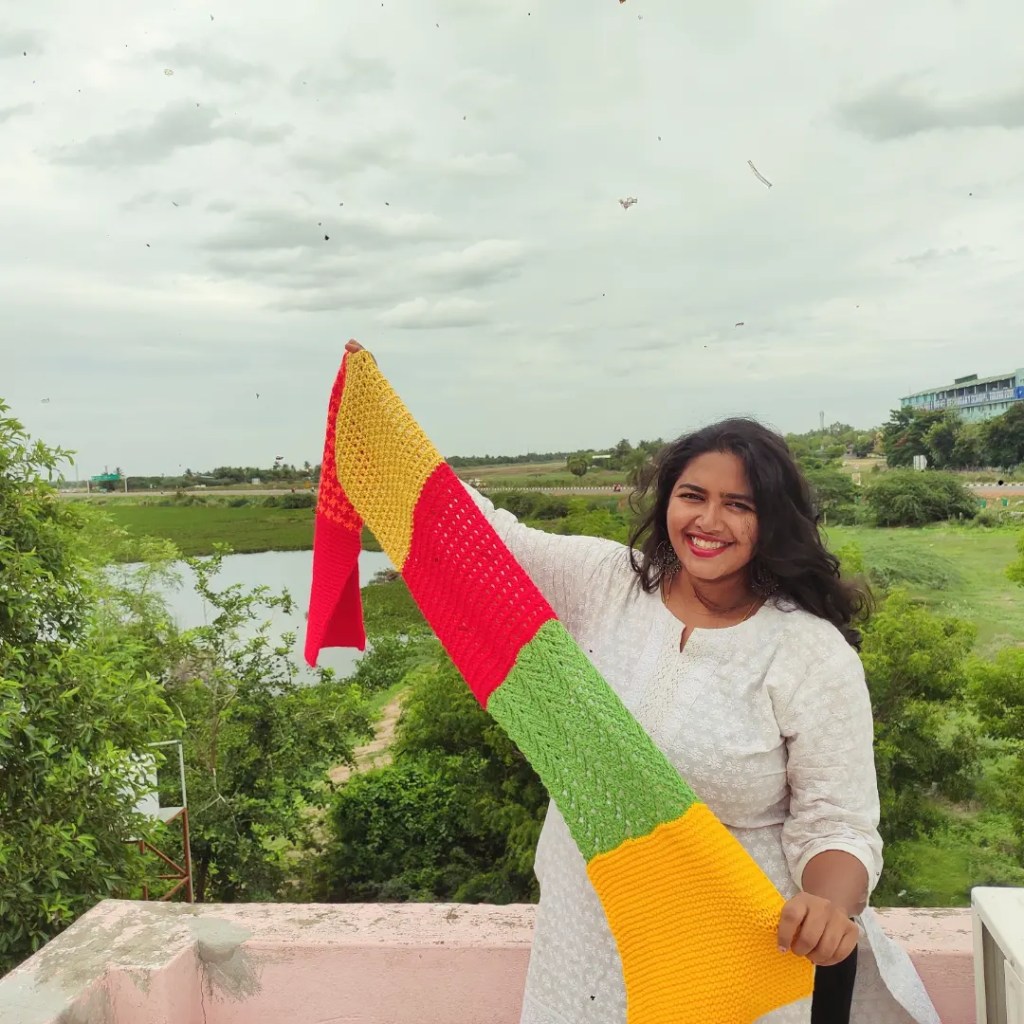
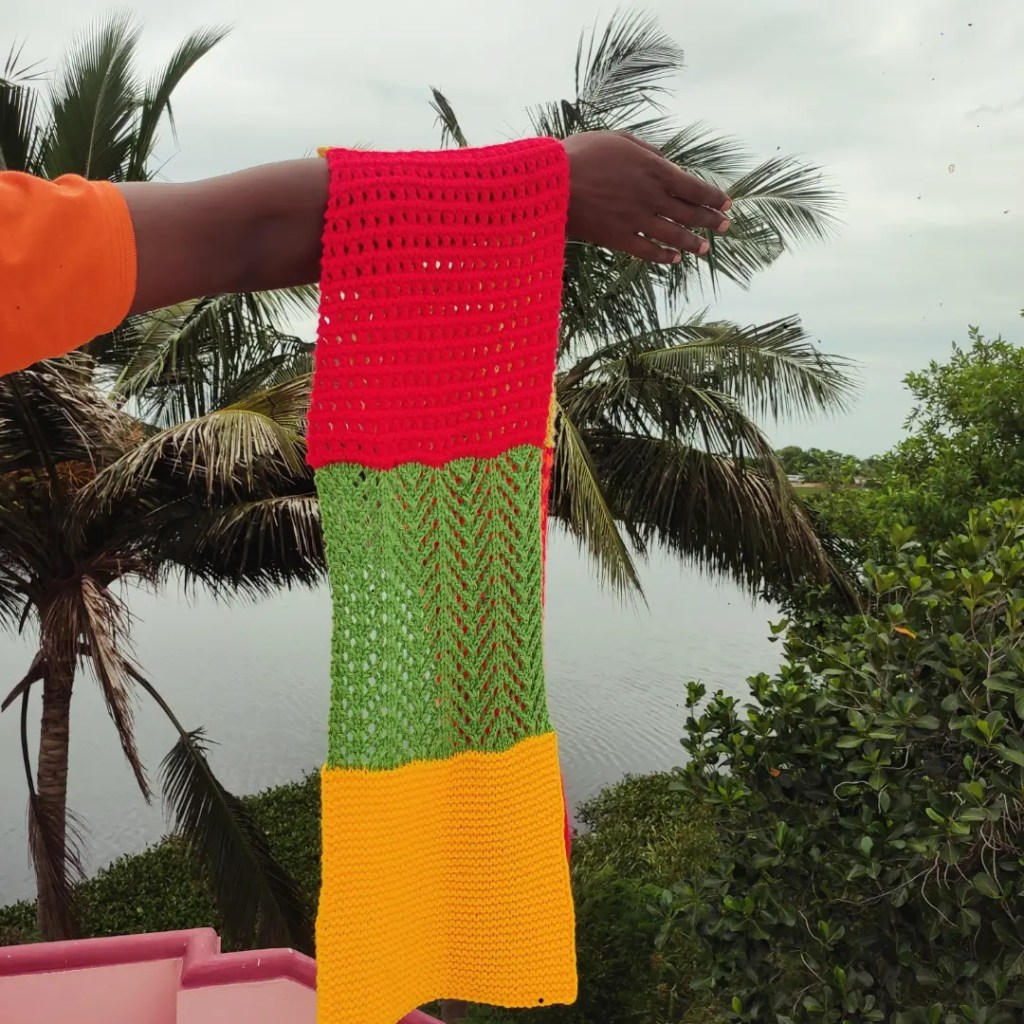
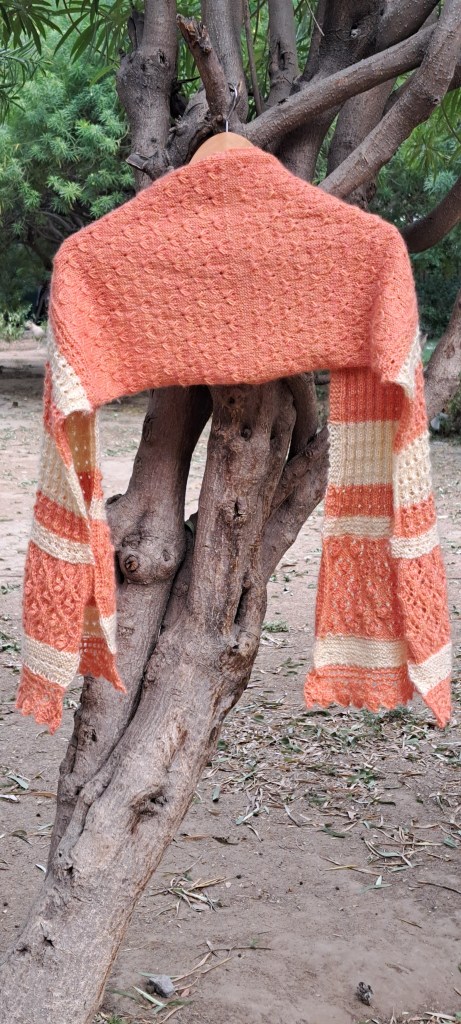
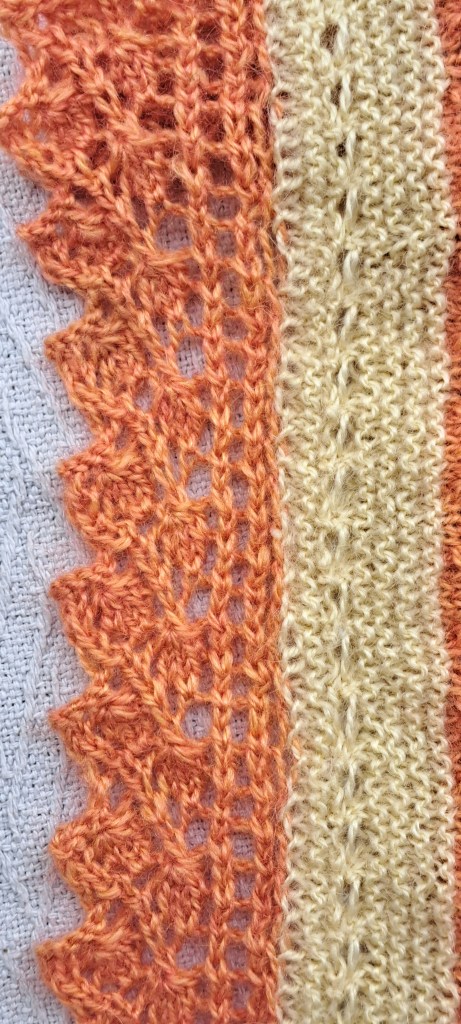
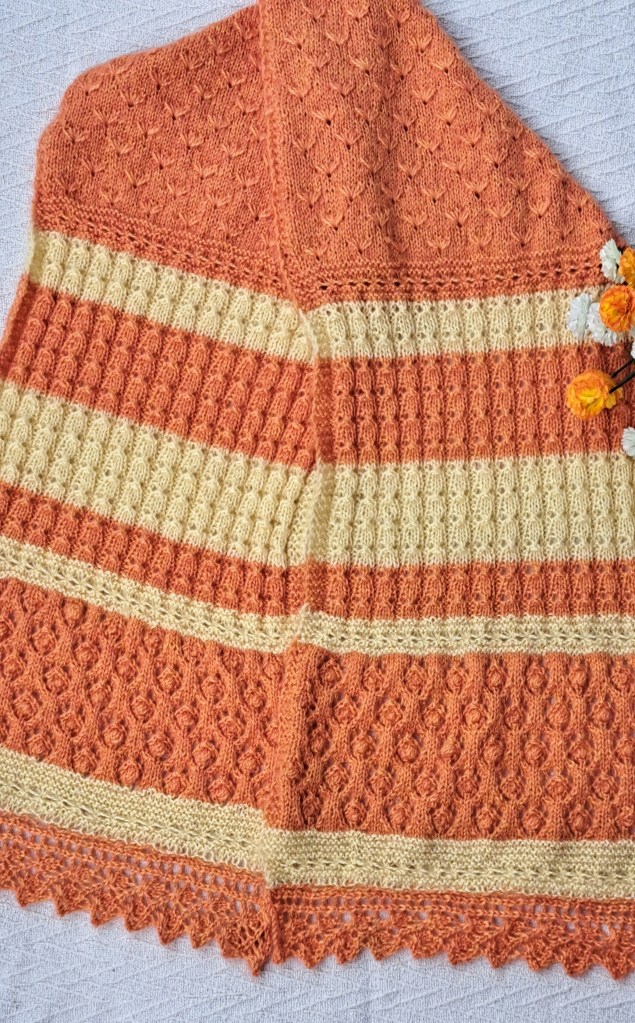
The Third scarf is the knitted scarf by @saviknits. Her choice of intricate lace and cable stitches made her scarf worth noticing. The idea of adding the lace edging deserves a round of applause.
The task was challenging and fun. We got to see so many beautiful scarves finished. So, we decided to feature all five finished scarves on our page and the website.
A big applause for everyone who has reached till final prompt promptly today!!! We are in our final week of the Mysterious MAL24. The excitement of revealing the final prompt is the same as that of the first one.
Are you excited? Here is your final prompt for MMAL24
Now, If you are a knitter, work as written below:
Work any stitch from the following ( Group A- garter/ moss/ double moss/ RIB 2×2)
If you are a crocheter, work as written below:
Work any stitch from the following ( Group A- miss stitch/single crochet/herringbone half double crochet)
Yes, you are right! Our final prompt is the same as our first prompt to ensure the symmetry of the scarf. Though, you are allowed to change the stitch from the group.
Hello Everyone!! Hope you all have enjoyed working on the first prompt and have been consistent!!
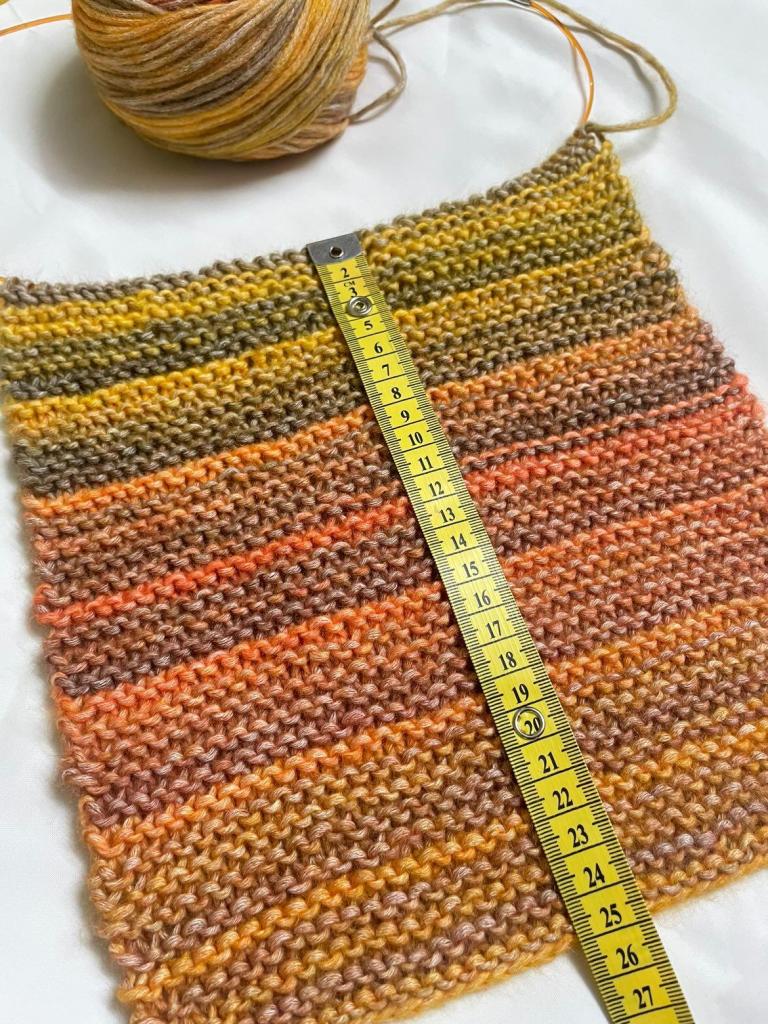
We are thrilled to see all of your WIP so far, and your enthusiasm for this M-MAL deserves a round of applause, and we hope you have already finished 25cm. Do share your progress pictures and tag us @indiayarn.circle and @knitting_library.
@knitting_library progress picture.
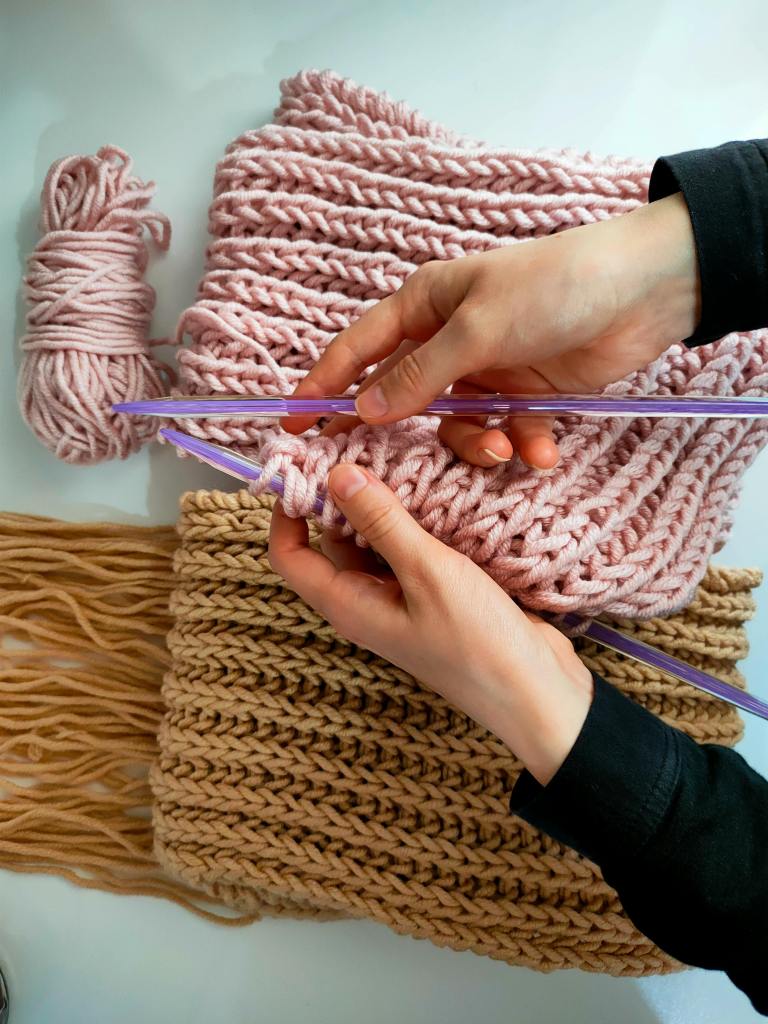
As we begin the second week and continuing the fun, we bring you the second prompt for your project!!
For both knitting and Crochet the second prompt is COLOURWORK!!
Instructions:
Add one or more colours as per your choice in any kind of colour work pattern.
You can make stripes, cheverons, motifs or any jacquard pattern in any stitch as per your choice.
These are some reference tutorials for begginers, but you are allowed to use any other colour work pattern of your choice!
For Knitting:
1. Stripes using two or more colours:
Note- If you are thinking of working with a stockinette stitch, be sure to work a few edge stitches (garter, moss, rib) on either side of your work to avoid curling up edges.
2. Intarsia with two colours:
3. Chevron using two colours:
4. Jacquard pattern:
5. Houndstooth / Fair isle:
For crochet:
1. Two colour stitch pattern:
2. Crochet chevron stitch
3. Mosaic crochet:
4. Tapestry crochet:
Now you have to follow this prompt until we reveal our next prompt.
Reminder: be consistent with 5cm of knitting/crochet daily. So that you can enjoy the fun of revealing the next prompt.
Now that you have registered, are you ready to begin??
So here we are…. drum roll please….. with our very first prompt!! Are you excited??
Grab your hooks and needles and your yarn and get started!!!
Choose your project.
Decide what type of make you want to begin with – either a scarf or a shawl.
For a scarf keep the width of your project at around 8 to 10 inches
For a shawl keep the width between 12 to 15 inches.
Based on your project you can start/cast on with the desired number of stitches or chains.
Knitting Prompt 1 – Group A:
Work on any ONE of the following stitches as per your choice of project.
1. Garter stitch: Garter stitch uses only one stitch – the basic knit stitch. You knit each and every stitch on every row (right side and wrong side), simply stopping to turn your work over when you’re ready to begin a row anew.
2. Double Moss stitch: Cast on an even number of stitches Row 1 and 2: *K1, P1; repeat from * to end of row Row 3 and 4: *P1, K1; repeat from * to end of row Repeat Rows 1-4 for Moss Stitch flat
3. Moss stitch / seed stitch: Cast On an Odd Number of Stitches Your knitting pattern ( * K1, P1 * K1 ) is repeated on every row.
4. Rib stitch 2*2: Cast On: number of stitches divisible by 4. Row 1 (RS): (k2, p2) till the end of the row. Row 2 (WS): (k2, p2) till the end of the row. Repeat these two rows.
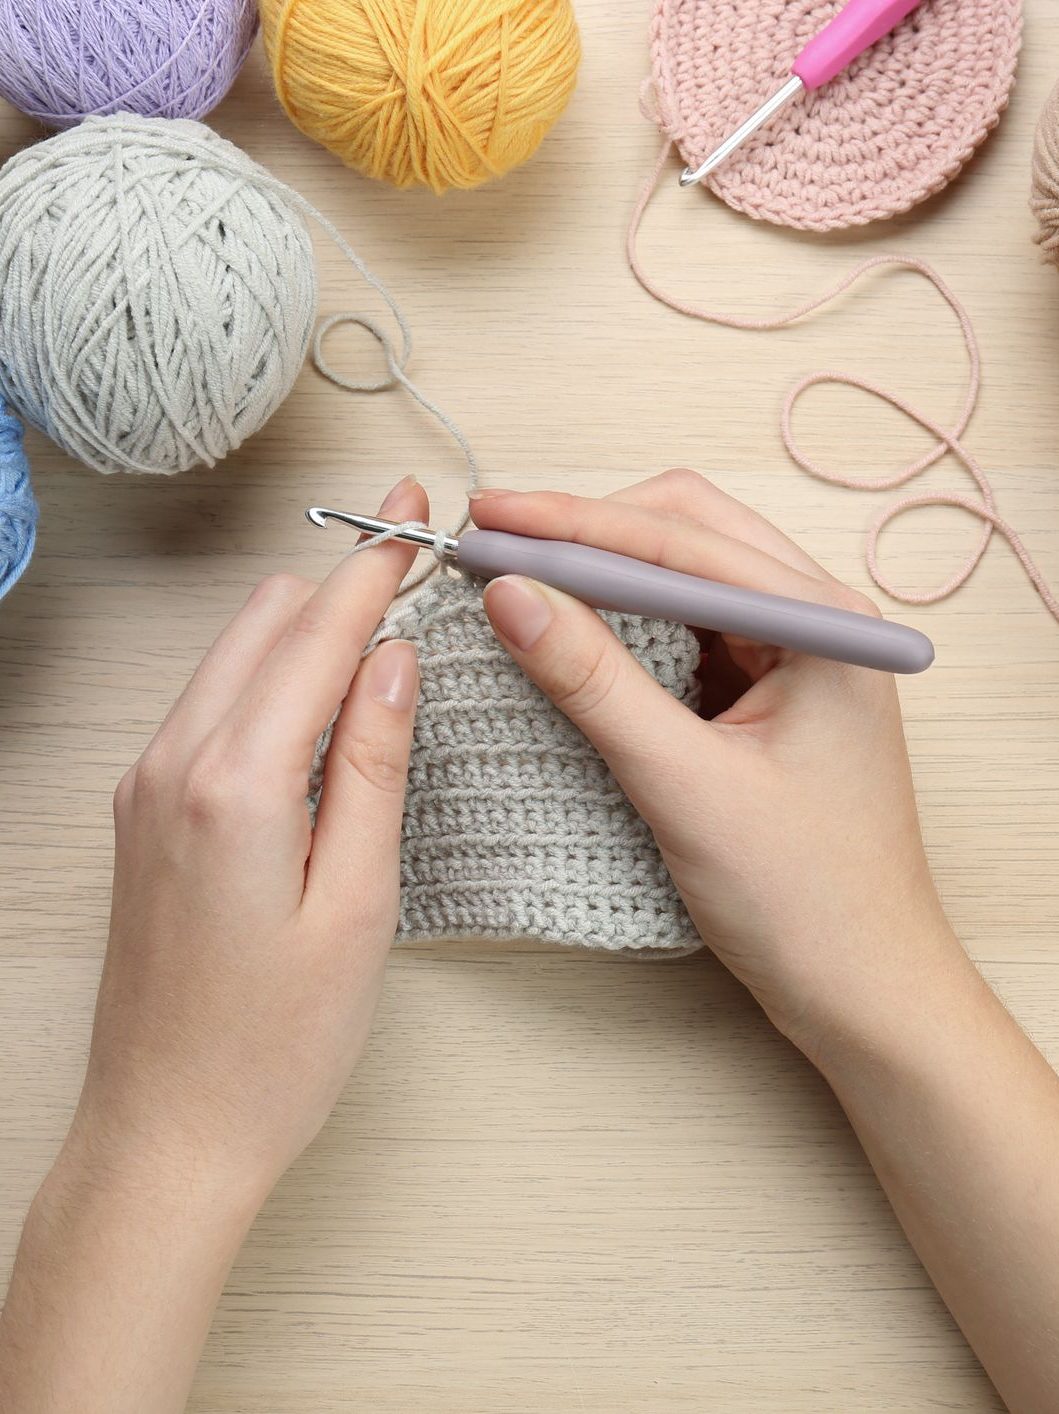
Crochet Prompt 1 – Group A:
Work on any ONE of the following stitches as per your choice of project.
1. Moss Stitch: Ch an even number of sts. Row 1: Sc in 4th ch from the hook, *ch 1, sk 1 ch, sc in next ch, repeat from * across. Row 2: Ch 2, turn. Sc in the next ch-1 sp, *ch 1, sk 1 sc, sc in next ch-1 sp, repeat from * across. Repeat row 2.
2. Extended Single crochet: Insert your hook, YO and pull up a loop, YO and pull through one loop, YO and pull through remaining two loops
3. Herringbone hdc: To make the HHDC stitch:
Yarn over, insert hook into next stitch and pull up a loop (3 loops on hook)
Pull first loop straight through the second (similar to a slip stitch)
Yarn over, pull through two remaining loops on hook.
In our first prompt, we have given multiple options for you to choose from. You can use any one stitch to work your first part. Now, work according to this prompt until we reveal our second prompt.
Reminder: be consistent with 4-5cm of knitting/crochet daily. By the end of week, you would have easily completed 20 -25 cm of your project!!
So you will enjoy the fun of revealing the second prompt.
Hello Everyone!!! We are back after a hiatus and we have a super fun activity for all of you to get on board with us again!
This time we are bringing you a new, fun, yarn stash busting activity!
Also this Make along is for all!! Yes you heard that right!! Knitters and Crocheters both are welcome to join the MAL, as there will instructions for both crafters every week.
So lets go ahead with the details!!
Who can participate
Everyboby!! No matter If you are a beginner or advanced knitter/crocheter. You all are welcome to join this MAL with basic knowledge of knitting/crochet.
Timeline:
The MAL will start on the 1st of May and will go on for 6 weeks. Each week a new prompt will be announced, both for knitters and crocheters.
What yarn to use:
You can pick and choose any yarn for this Project, even better if its from your own stash!! You can choose as many colours you want or make it monochrome – Its all upto you!!
Any thickness of yarn will work for this project, just be mindful of the repeats. The width and length can be determined by you as per your requirement. Our Recomendations are fingering weight, Sport weight, Dk weight, and Aran weight yarns.
What to expect:
The motive of this MAL is to be consistent and creative. So you must be willing to knit/crochet few rows and repeats amounting to at least 4-5cm every day.
This will ensure that you will have covered approximately 20-25cm length every 5th day. By the end of the MAL, you will have an approximately 150cm long scarf/shawl.
What is the mystery:
Now, the mystery part!
There will be a total of 6 prompts, and we will disclose each prompt one by one after every fifth day. Which means you have to work according to the prompts.
Prompts are like a set of instructions, which will have options and you can choose what interests you. This part will be fun and creative.
We have designed the prompts carefully, but If at any point you find it challenging, Nikita of @knitting_library and the IYC team will be here to guide and help you choose what to do next.
Rewards
At the end of the MAL the top five best works will get featured on the IYC OFFICIAL WEBSITE AND INSTAGRAM PAGE. The voting will be conducted after the completion of MAL to choose the best five among all.
Remember, this is not a competition! It’s just a fun activity to bring the community a little closer.
Now that you have all the details, Here is how you can participate–
1. Register
You can register for the MAL by filling the details on the link below:
Hello Everyone!!! And Welcome Back to a super new, interesting and a quick CAL!!
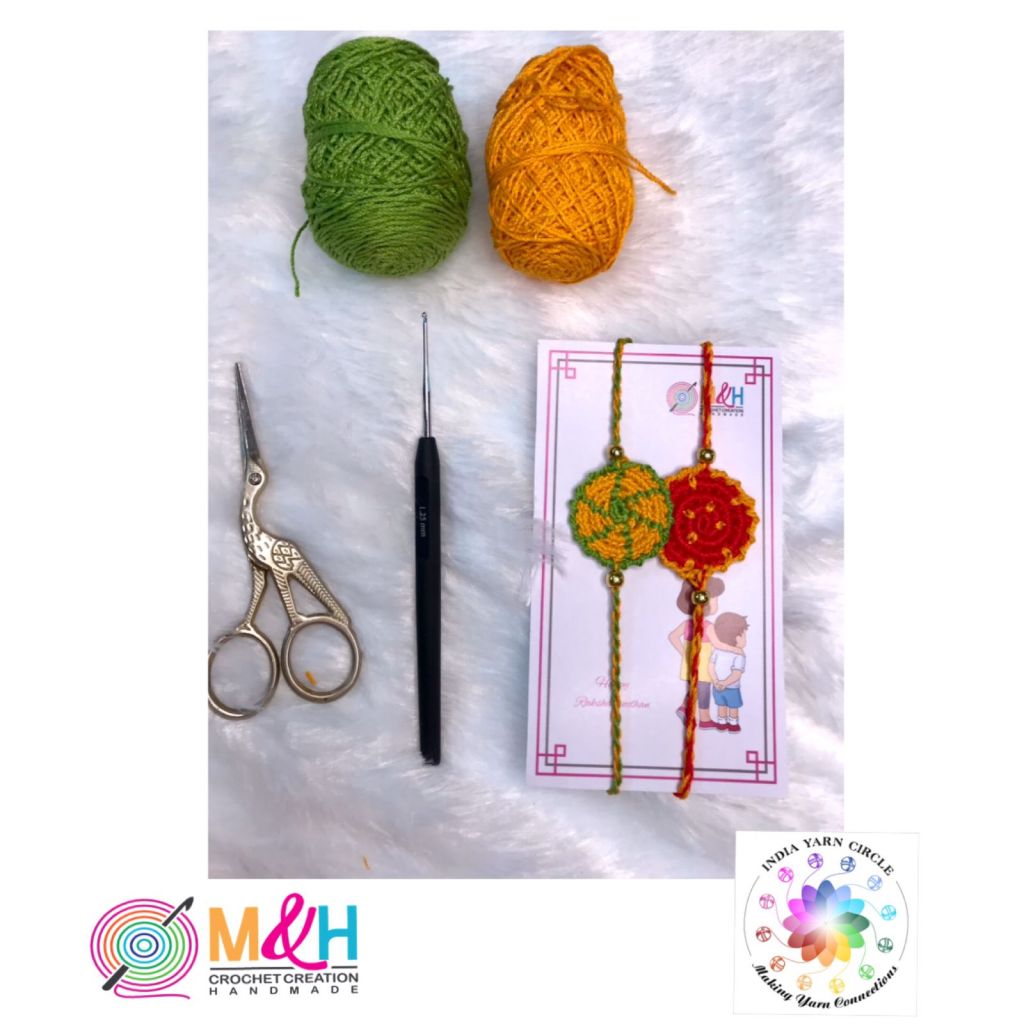
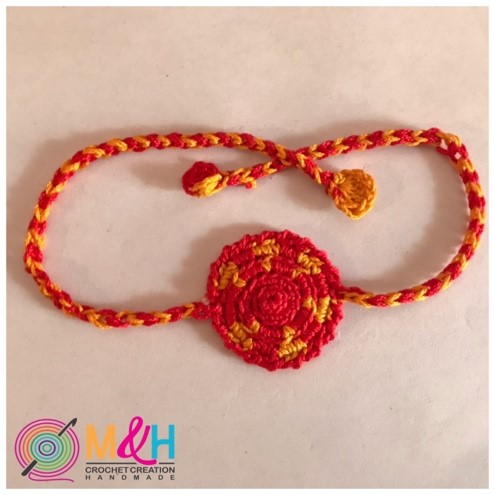
Since the festival season is upcoming, our very own member, Rosy of @mnhcrochetcreation has designed some beautiful Rakhis using the Mochila Techique in crochet!
These Rakhis are stunning and so unique, they would definitely steal the show and get you all the praises for making it yourself!
@mnhcrochetcreation
So why wait!! Lets Dive into it!!
Level
Easy/ Beginner
Supplies
Hook size 1mm Mercerized Cotton Yarn. (I am using Anchor 4054) You can also use Anchor pearl thread, Kotton 3ply or any doily thread. Scissor Beads optional
Colour Index
Colour A –
Colour B –
Note: The above colour index is just an example. Please use any colour combination of your choice.
Abbreviations
A = Red
B = Yellow
1A = crochet stitch with color A
A inc = increase (2 single crochet in the next single crochet)
AB inc = increase with 2 colors (one stitch in color A and one stitch in color B)
* * = repeat what is between
* * (2x) = repeat 2 times what is between
* * [12]= total number of stitches at the end of the round
Pick up different colour = before the next colour change, do a normal yarn over with current yarn and then second yarn over with new colour.
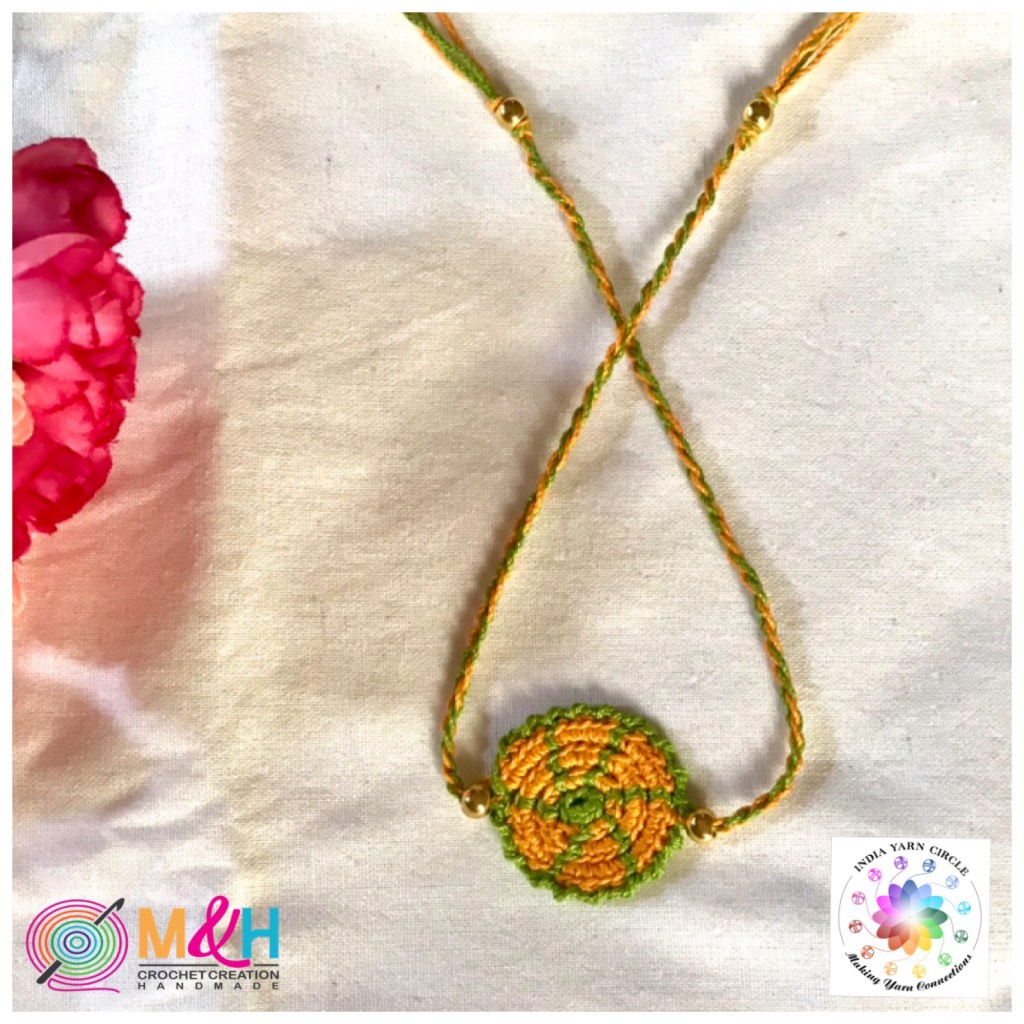
PATTERN TYPE 1
@mnhcrochetcreation
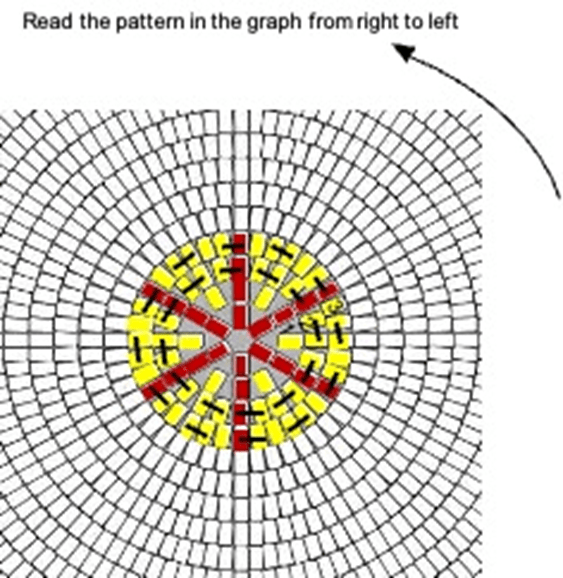
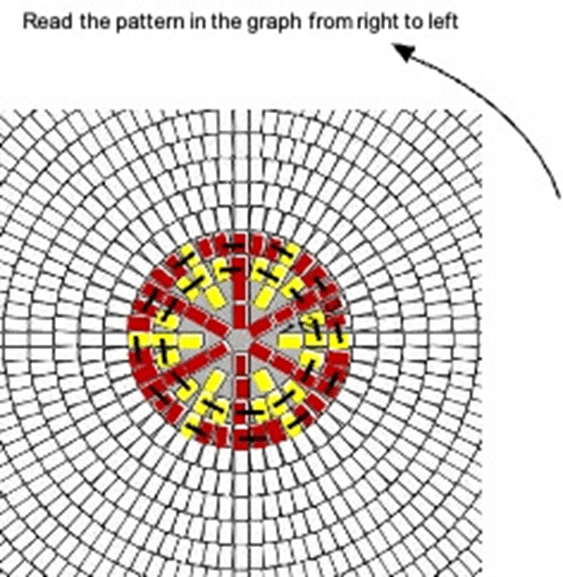
CHART 1:
In this chart, red blocks are yarn colour A and yellow ones colour B
Black colour dash across two blocks indicates increase in stitches. 6 stitches in the magic circle is not counted as a Row.
@mnhcrochetcreation
RAKHI PATTERN 1
•Please note that from Row 1 onwards, you will work each stitch in the back loop.
•Don’t forget to keep pulling the additional yarns that you carry to make your work look neat and round.
Make Magic Circle and make 6sc with colour A
Row 1: *AB inc* (Repeat * to * 6 times) (12) Add colour B ( Take 4 strands measuring 15 inches in colour A and 1 strand of colour B and add right after you finish row 1)
Row 2:*AB inc, B inc * (Repeat * to * 6 times) (24)
Row 3:* AB inc, 1B, B inc, 1B * (Repeat * to * 6 times) [36]
slip stitch and cut off the yarns which was added.
With Yarn A make crab stitch all around and cast off. You can add beads instead of doing crab stitch.
Take 4 strands measuring 15 inches. Take 2 strands and tie it at one end where you want to make the dhaga (thread). Now twist two strands from both sides and release till it looks like a rope. Tie at the end and add one inch tassel with same yarn. You can make this dhaga with two colours also.
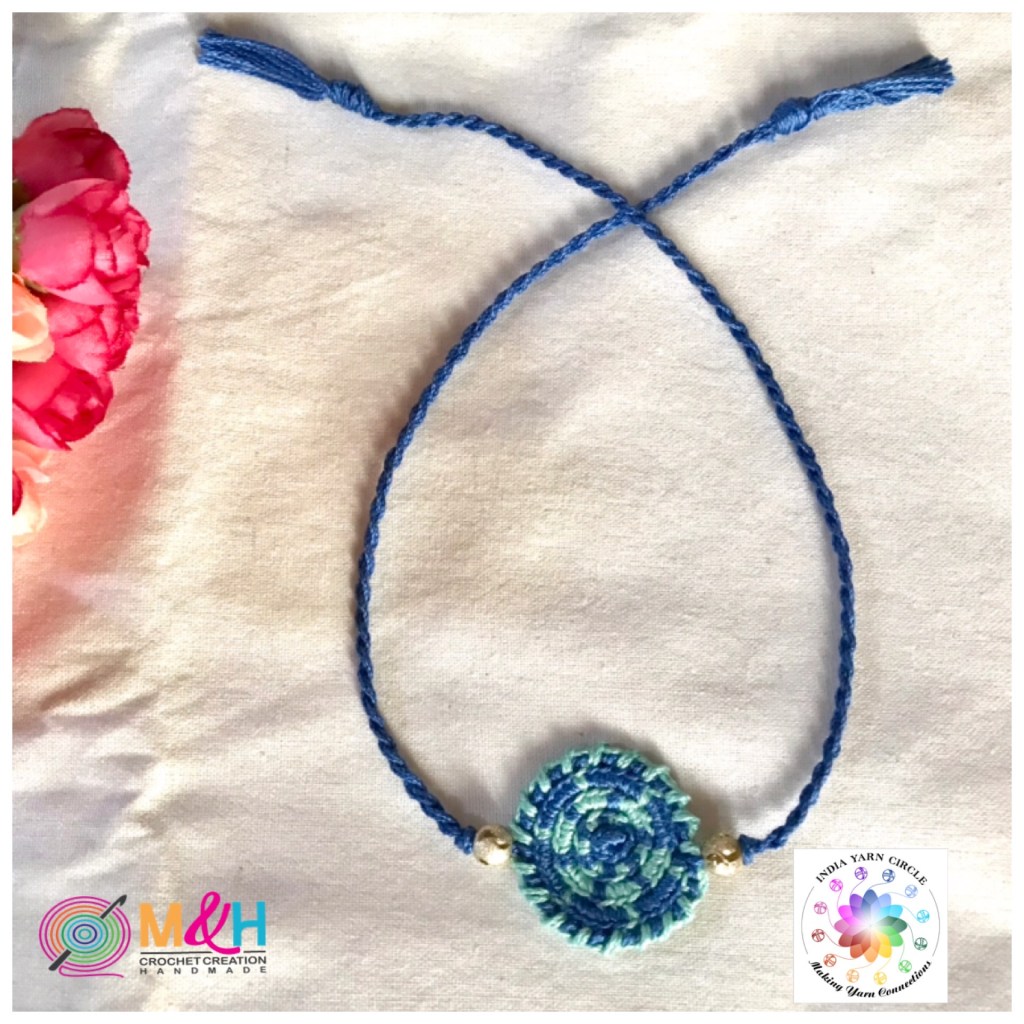
PATTERN TYPE 2
@mnhcrochetcreation
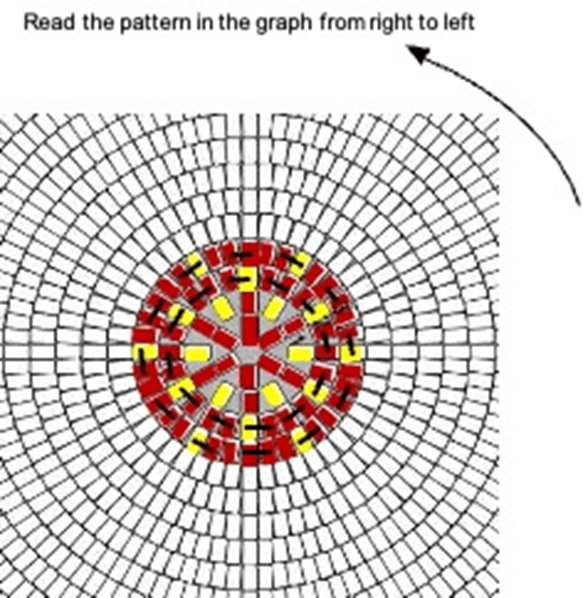
CHART 2
@mnhcrochetcreation
RAKHI PATTERN 2
•Please note that from Row 1 onwards, you will work each stitch in the back loop.
•Don’t forget to keep pulling the additional yarns that you carry to make your work look neat and round.
Make Magic Circle and make 6sc with colour A
Row 1:*AB inc* (6x ) [12]Add colour B ( Take 4 strands measuring 15 inches in colour A and 1 strand of colour B and them add right after you finish row 1)
Row 2:*AB inc, B inc * (6x) [24]
Row 3:* A inc, 1A, AB inc, 1A * (6x) [36]
slip stitch and cut off tall he yarns which was added.
With Yarn A make crab stitch all around and cast off. You can add beads instead of doing crab stitch.
Take 4 strands measuring 20 inches. Take 2 strands and tie it at one end where you want to make the dhaga (thread). Now twist two strands from both sides and release till it looks like a rope. Tie at the end and add one inch tassel with same yarn. You can make this dhaga with two colours also.
PATTERN TYPE 3
@mnhcrochetcreation
CHART 3
@mnhcrochetcreation
RAKHI PATTERN 3
•Please note that from Row 1 onwards, you will work each stitch in the back loop.
•Don’t forget to keep pulling the additional yarns that you carry to make your work look neat and round.
Make Magic Circle and make 6sc with colour A
Row 1:*AB inc* (6x) [12] Add colour B ( Take 4 strands measuring 15 inches in colour A and 1 strand of colour B and add right after you finish row 1)
Row 2:*BA inc, Ainc * (6x) [24]
Row 3:* A inc, 1A, AB inc, 1A * (6x) [36]
slip stitch and cut off the yarns which was added.
With Yarn A make crab stitch all around and cast off. You can add beads instead of doing crab stitch.
Take 4 strands measuring 20 inches. Take 2 strands and tie it at one end where you want to make the dhaga (thread). Now twist two strands from both sides and release till it looks like a rope. Tie at the end and add one inch tassel with same yarn. You can make this dhaga with two colours also.
To explain these instructions further in detail, Rosy has created a you tube tutorial for you:
For any queries and clarification, please feel free to leave a comment below or write to us at indiayarncircle@gmail.com
Hope you all enjoy making these Mochila Rakhis. If you do, please tag @mnhcrochetcreation Instagram/facebook page and @indiayarncircle Instagram/facebook page.
Hey everyone!! Oh my god!! We are into Week 4!! Time is surely flying by!!
We are in the last week for the CAL instructions, but dont worry, we will be giving more time for people to ctch up and complete the Nifty Thrifty Eco Bag CAL with GoKraftz Yarns!! Dont forget to share your progress and tag us!!
We are completing the bag this week and we excited to begin with week 4 instructions!! Our Designer Divya of @stringtierey has again put together a video tutorial for this week to help understand better.
But if you havent caught up on the previous weeks, you can check out the instructions below and get onbaord with everyone.
Come! lets complete the bag and get on with WEEK 4 of Instructions for the Nifty Thrifty Eco Bag!!
@stringtierey
Lets look at some of the details once again before we begin.
KEY
ch: chain sl st: slip stitch sk: skip sc: single crochet st(s): stitch(es) ch sp: chain space dc: double crochet yo: yarn over sc2tog: single crochet 2 together dc2tog: double crochet 2 together dc5tog: double crochet 5 stitches together. scdc2tog: single crochet double crochet 2 together (see special stitches) dcsc2tog: double crochet single crochet 2 together (see special stitches) MC: Main colour CC: Contrast colour MR: Magic Ring WS: Wrong side RS: Right side
SPECIAL STITCHES:
scdc2tog: single crochet double crochet 2 together
Insert hook into the next st (or ch sp), yo, pull up a loop, (2 loops on the hook), yo, insert hook into the next st, yo, pull up a loop, (4 loops on the hook) yo, pull through 2 loops, (3 loops on the hook) yo, pull through last 3 loops.
dcsc2tog: double crochet single crochet 2 together Yo, insert hook into the next st (or ch sp), yo, pull up a loop (3 loops on the hook), yo, pull through 2 loops, (2 loops on the hook), insert hook into the next st, yo, pull up a loop, (3 loops on the hook) yo, pull through last 3 loops.
NOTES:
ch2/ch1 at the start of the Row, doesn’t count as a St.
This bag is a constructed as a rectangular flat piece first and then the corners are worked to form the shape of the bag.
Pattern is worked in flat rows by turning at the end of each row for the body, and in the round for the edging and shaping.
The instructions are written in crochet shorthand, for eg. “sc 2” means single crochet in each of the next 2 stitches, “2sc” means make 2 single crochet in the same stitch.
Stitch count is mentioned in Brackets as [#] at end of row.
Blocking is a must for this project to achieve the desired look.
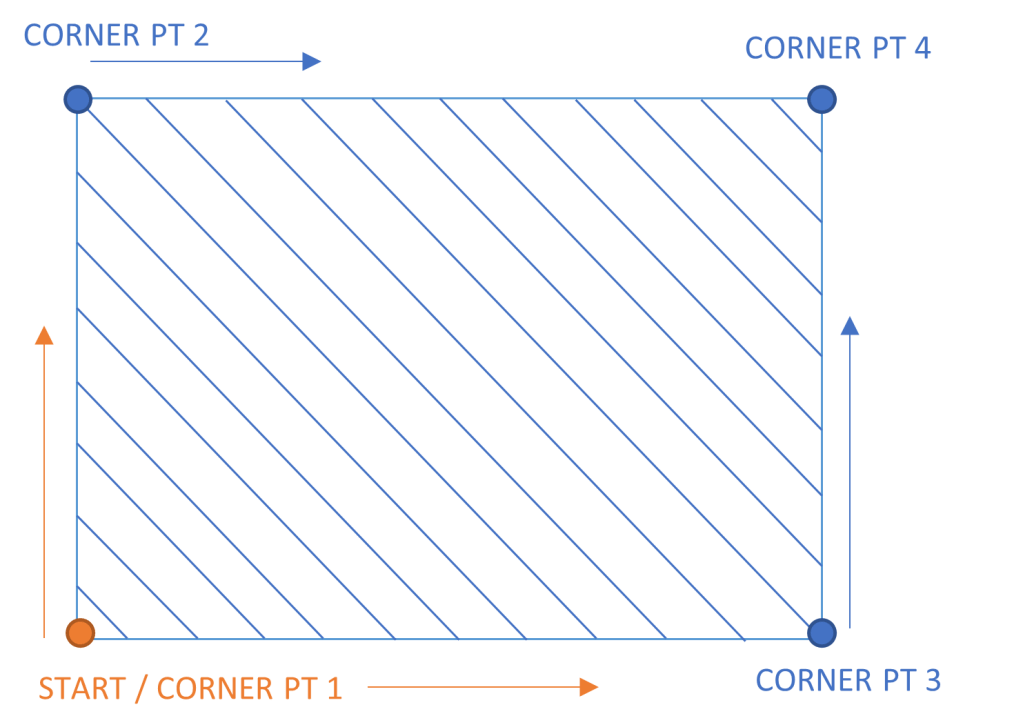
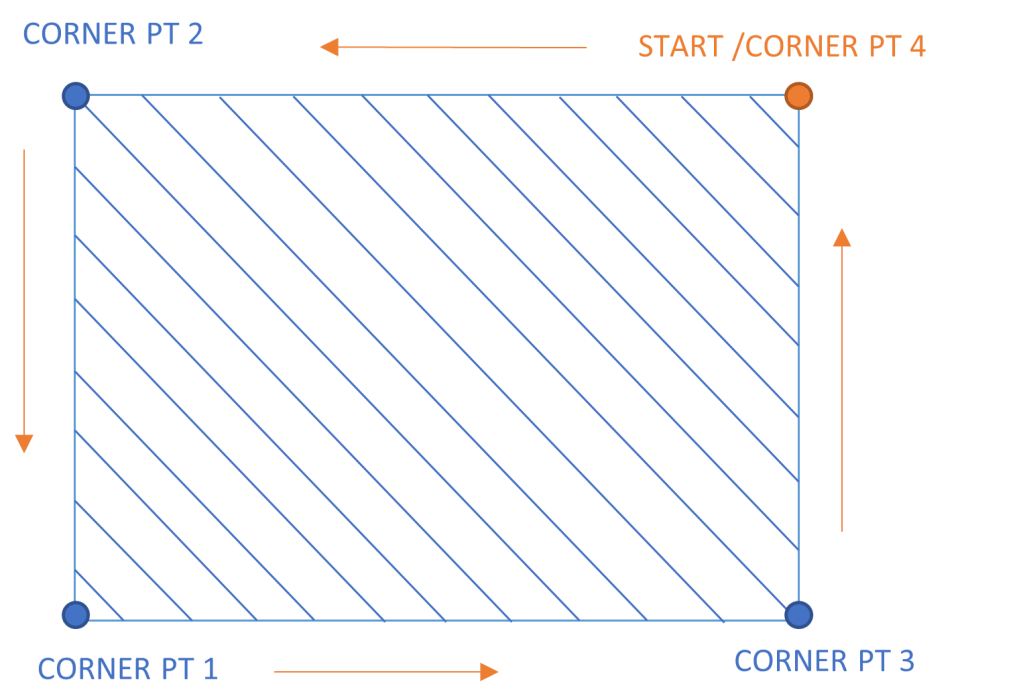
SCHEMATICS:
The bag is created by making a rectangle and then sinching the 4 corner points to create the shape. However instead or a normal rectangle we shall be starting from one corner and working our way u to create the remaining 3 corners of the rectangle.
@stringtierey
RECAP:
We ended week 1 at Row 48 for gohibulky yarn users and Row 60 for gobulky users, both in contrast colour. This end was the corner point 2 for both options.
We continued Week 2 to get to corner point 3, and started decreasing both sides.
Week 3 ended with us completing the entire rectangle and wet blocking it.
PATTERN INSTRUCTIONS – WEEK 4:
For this week, we will give shape to our bag and finish it with handles!
For this week we will be going down hook sizes and use 4mm hook size for gohibulky yarn and 3mm hook size for gobulky yarn. rest of the instructions remain same for both options.
The instructions remain the same for either yarn option you choose, unless specified.
We will now put stitch markers into each of the corner stitches (4 corners). Also we completed week 3 on the right side of the fabric.
So with the right side facing towards you and the top right point being corner point 4 (where we fastened off our rectangle), we will begin at this point with the larger quantity yarn colour.
With the larger quantity yarn colour.
ROUND 1 (RS): ch1, *sc2tog, in each and every stitch edge till the next stitch marker. 3sc in the same stitch at the stitch marker, replace the stitch marker into the 2nd stitch of the 3sc*. Repeat from * to * till you reach back to the first stitch marker. 3sc in the 1st stitch marker and replace stitch marker into the 2nd st. Sl st into the 1st sc2tog to close the round.
ROW 2 (RS): ch1, *sc2tog, in each and every stitch edge till the next stitch marker. 3sc in the same stitch at the stitch marker, replace the stitch marker into the 2nd stitch of the 3sc, {sc, sc2tog} into every stitch till the next stitch marker, 3sc in the same stitch at the stitch marker, replace the stitch marker into the 2nd stitch of the 3sc*. Repeat from * to * till you reach back to the first stitch marker. 3sc in the 1st stitch marker and replace stitch marker into the 2nd st, sc in the last st. Sl st into the 1st sc2tog to close the round.
Before we start the Handle, we shall now pinch and hold, corner point 4 and corner point 3together and corner point 2 and corner point 1 together. This allows us to see the shape of the bag and work on the handle accordingly.
To help you understand better, Divya has created a tutorial video that is perfect for beginners:
Now we will divide the leftover yarn of the same colour into 2 equal parts and wind into 2 seperate balls.
For the Handle, we shall start with corner point 4.
Mark 2 stitches to the right of the stitch marker at corner point 4 and attach the first ball of leftover yarn.
ROW 1: ch1, sc in the same st and the next 4 stitches. Turn. [5] remove stitch marker. ROW 2: ch1, sc in all st. Turn. [5].
Repeat Row 2 till around 6″-8″ of handle length or till yarn lasts. Count the number of rows and make sure you end on an odd numbered row.
So we will join the handle at corner point 2.. Now with the right side of the fabric and the right side of the handle facing each other. insert the hook into the first stitch of the handle and the 2nd stitch on the right of corner point 2 stitch marker and slip stitch both together for the next 5 stitches. Fasten off.
Repeat the same thing on the other side starting the handle at corner point 1 and joining it at corner point 3.
If you have CC yarn colour left, start at any point on the outside of the fabric and create an eding with either single or slip stitch into every stitch all around. You can repeat the same on the inner side of both the handles.
To help you understand better, Divya has created a tutorial video that is perfect for beginners:
And you are done!!! Your nifty thrifty eco bag is all finished!!
That is it for Week 4!! in case of any queries reach out to us via email or comment below this post or dm us on instagram. you can also address your queries directly with our designer Divya @stringtierey on instagram.
We would love to see your progress, so dont forget to tag us, gokratfz and stringtierey on instagram and use hashtags #goiyccal2022 #goiycecocal #niftythriftyecocal #iyccal2022 #goiyccal #niftythriftyecobag