Community Activity, IYC

Sunburst Diamond Mochila CAL – Week 3

Hello Everyone!!! Can you believe it?? It’s Week 3 already!!

Time surely is flying by and we are swiftly progressing ahead on our Bag CAL.

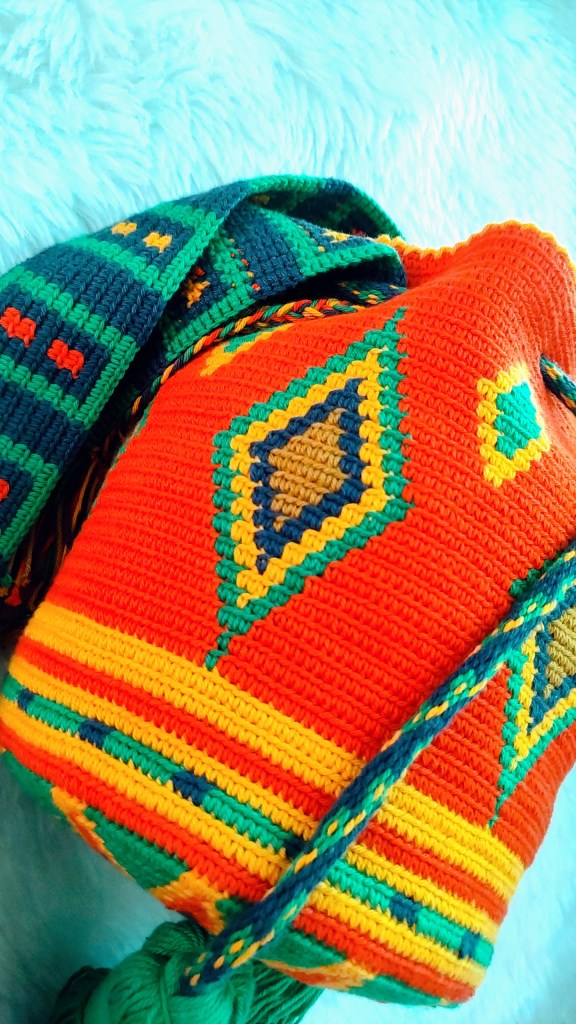
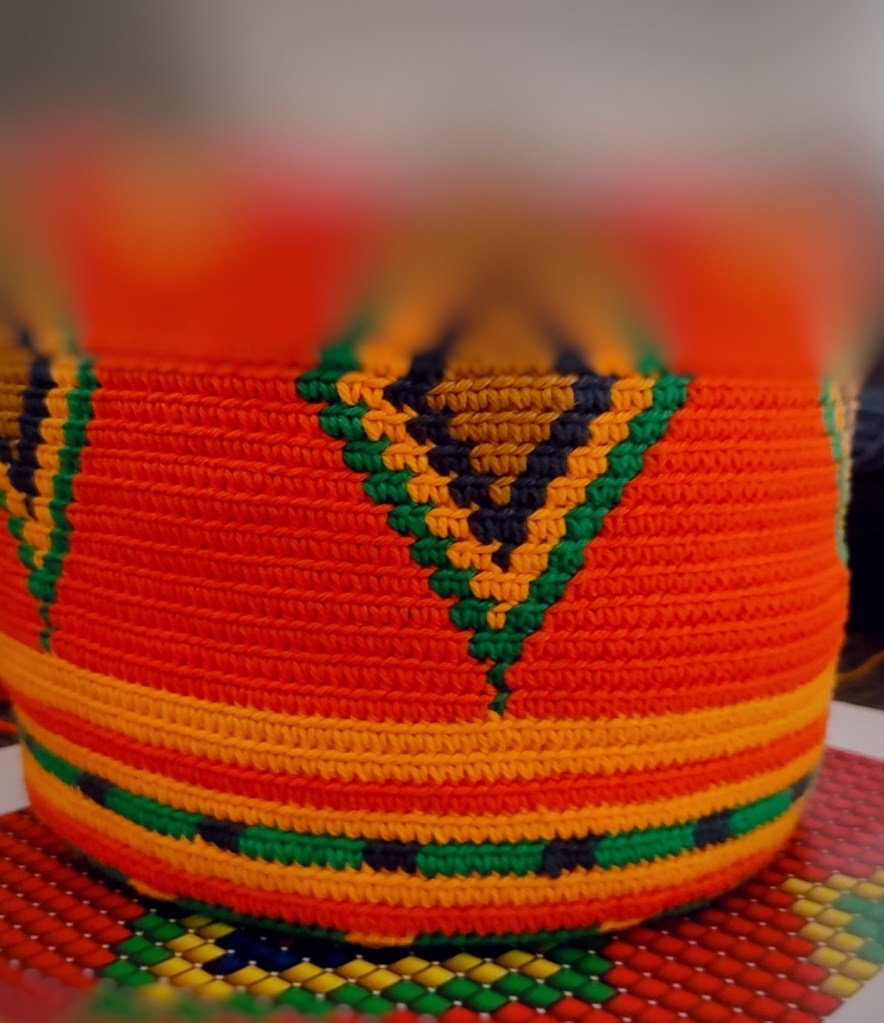
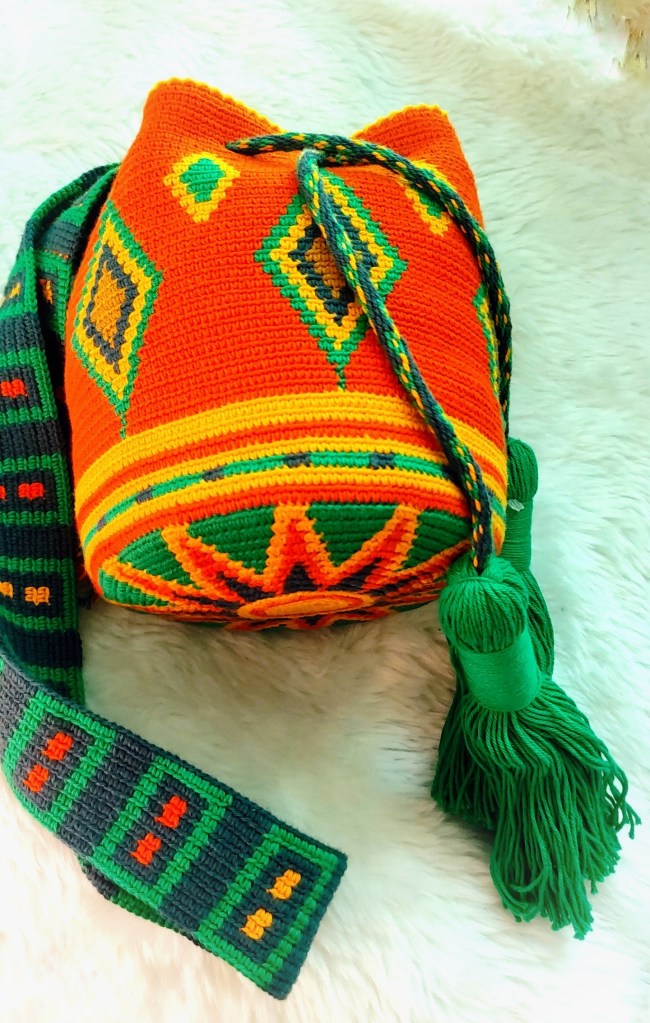
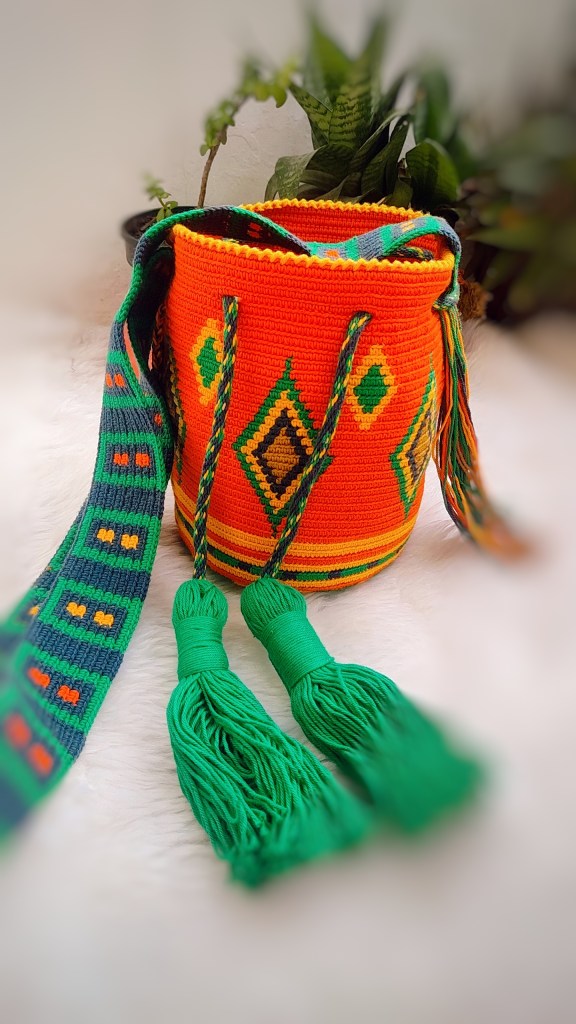
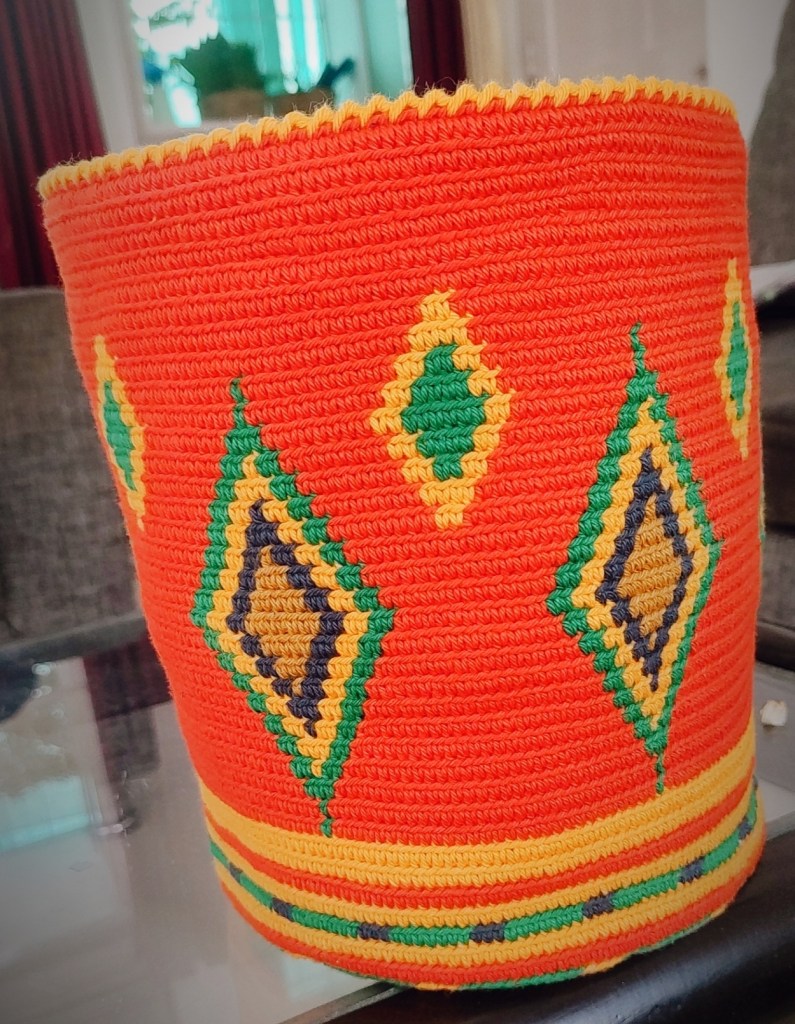
We are absolutely loving the pictures of all your Sunburst Diamond Mochilla bags and definitely keep tagging us in all your pictures!!

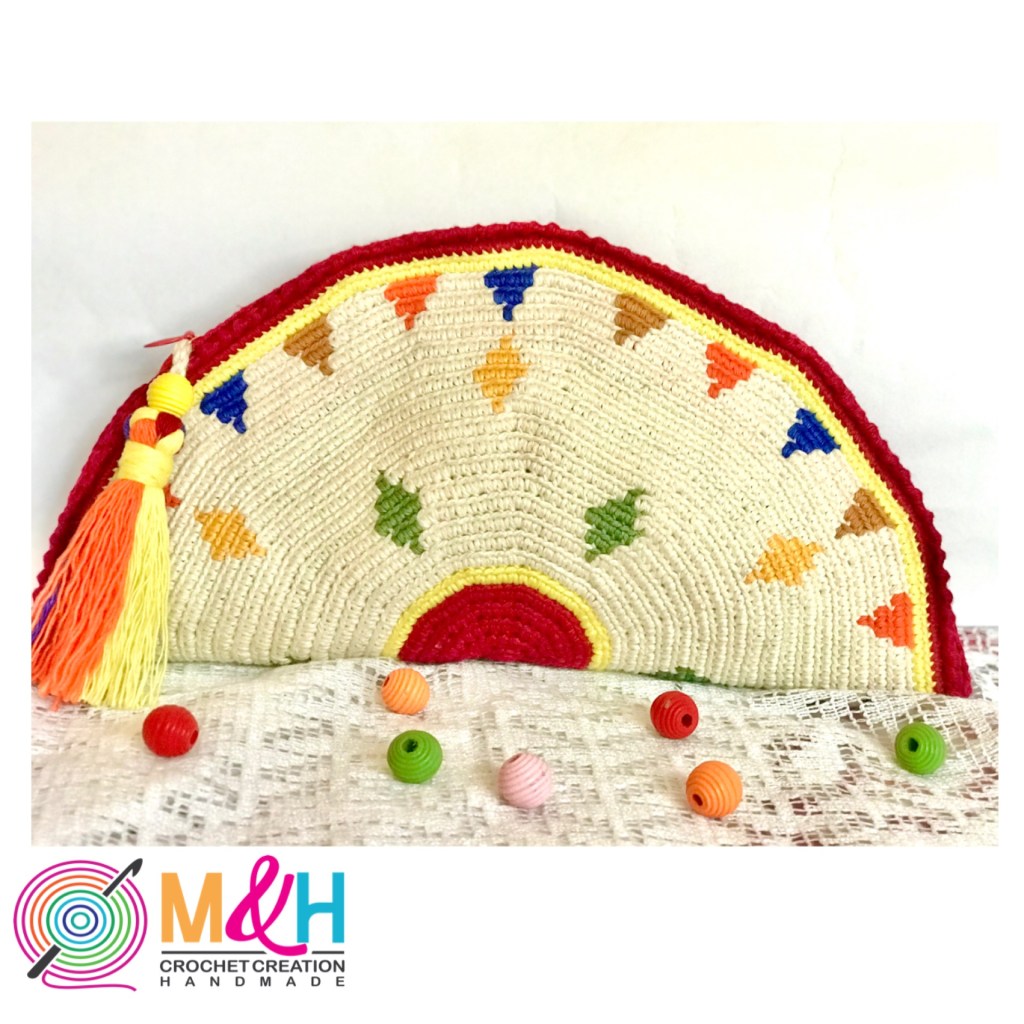
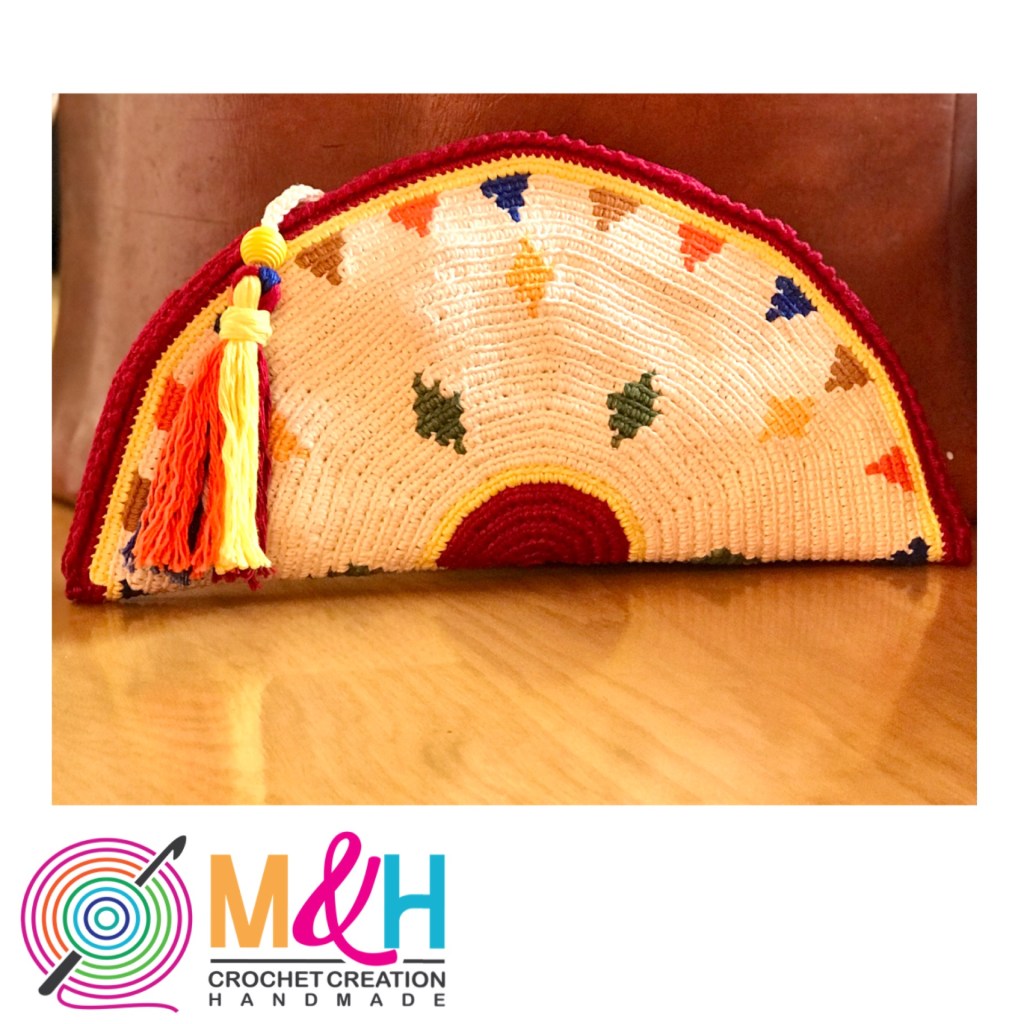
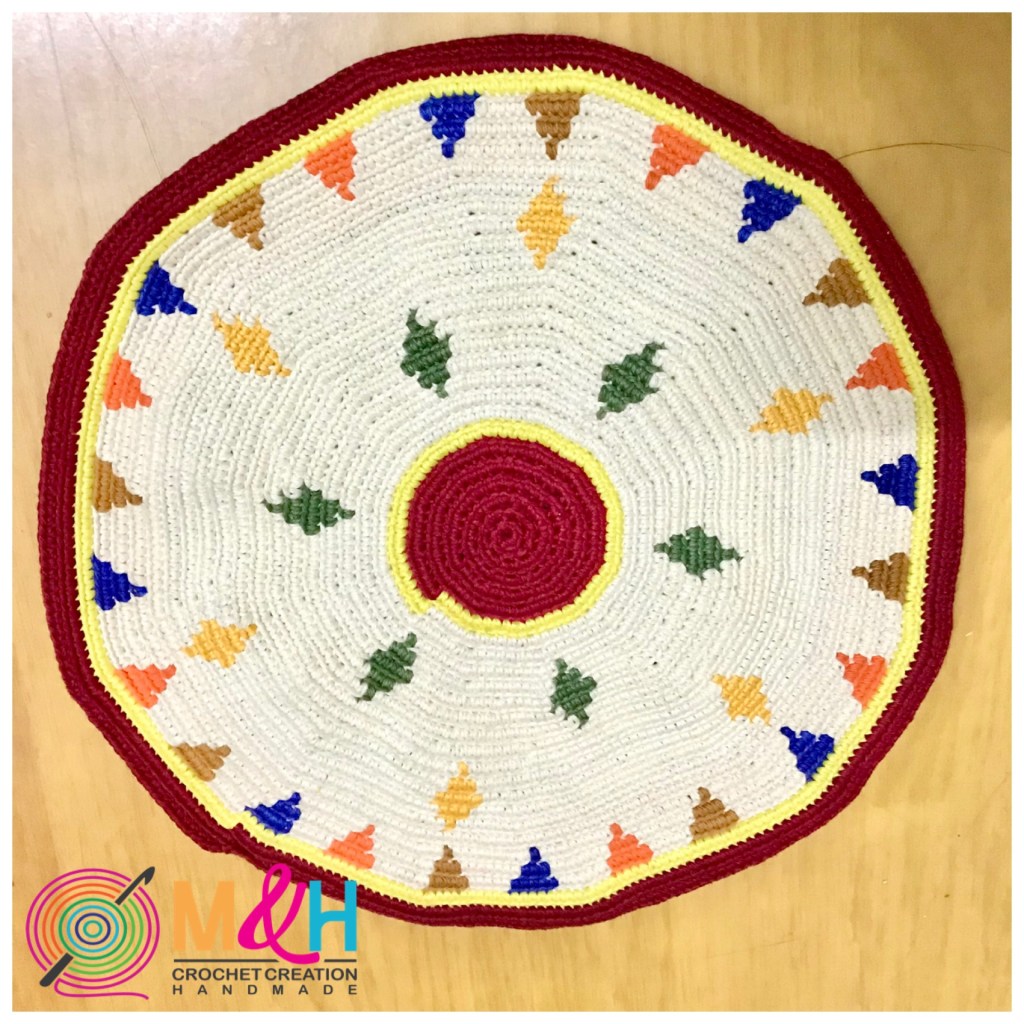
For Week 3, we will continue with the body or the side section of th bag.

Recap of previous weeks you can find below:

Materials and Registration Week – CLICK HERE.

Base of the Bag – Week 1 – CLICK HERE.

Side / body of the bag part 1 – Week 2 – CLICK HERE.


So lets begin with Week 3 Instructions.

Written instructions

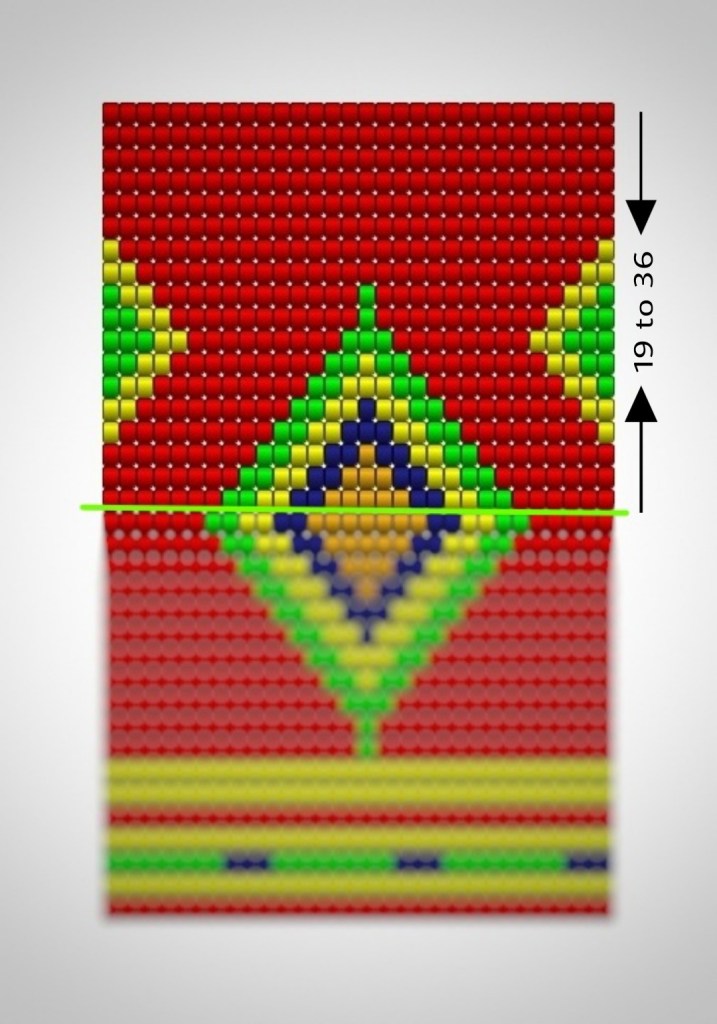
Round-19.   *6A, 2B, 2C, 2D, 5E, 2D, 2C, 2B, 7A*   {6x}
Round-20.   *7A, 2B, 2C, 2D, 3E, 2D, 2C, 2B, 8A*   {6x}
Round-21.   *8A, 2B, 2C, 2D, 1E, 2D, 2C, 2B, 9A*   {6x}
Round-22.   *1C, 8A, 2B, 2C, 3D, 2C, 2B, 9A, 1C*   {6x}
Round-23.   *2C, 8A, 2B, 2C, 1D, 2C, 2B, 9A, 2C*   {6x}
Round-24.   *1B, 2C, 8A, 2B, 3C, 2B, 9A, 2C, 1B*   {6x}
Round-25.   *2B, 2C, 8A, 2B, 1C, 2B, 9A, 2C, 2B*   {6x}
Round-26.   *3B, 2C, 8A, 3B, 9A, 2C, 3B*   {6x}
Round-27.   *2B, 2C, 10A, 1B, 11A, 2C, 2B*   {6x}
Round-28.   *1B, 2C, 11A, 1B, 12A, 2C, 1B*   {6x}
Round-29.   *2C, 26A, 2C*   {6x}
Round-30.   *1C, 28A, 1C*   {6x}
Round-31.   *30A*   {6x}
Round-32.   *30A*   {6x}
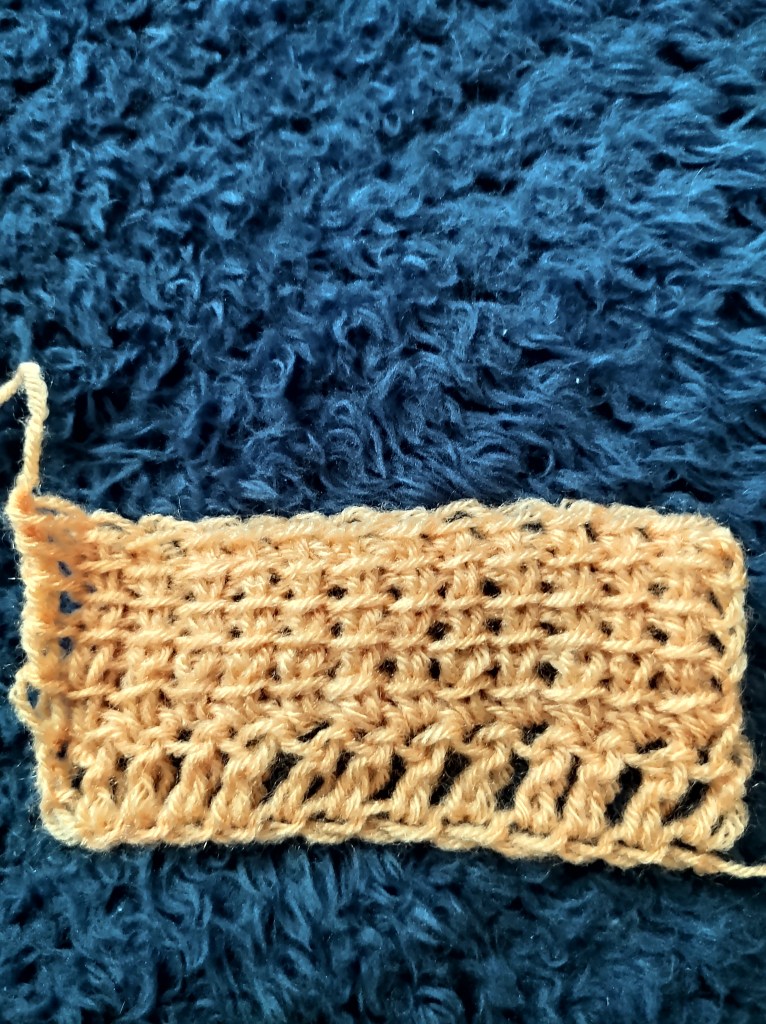
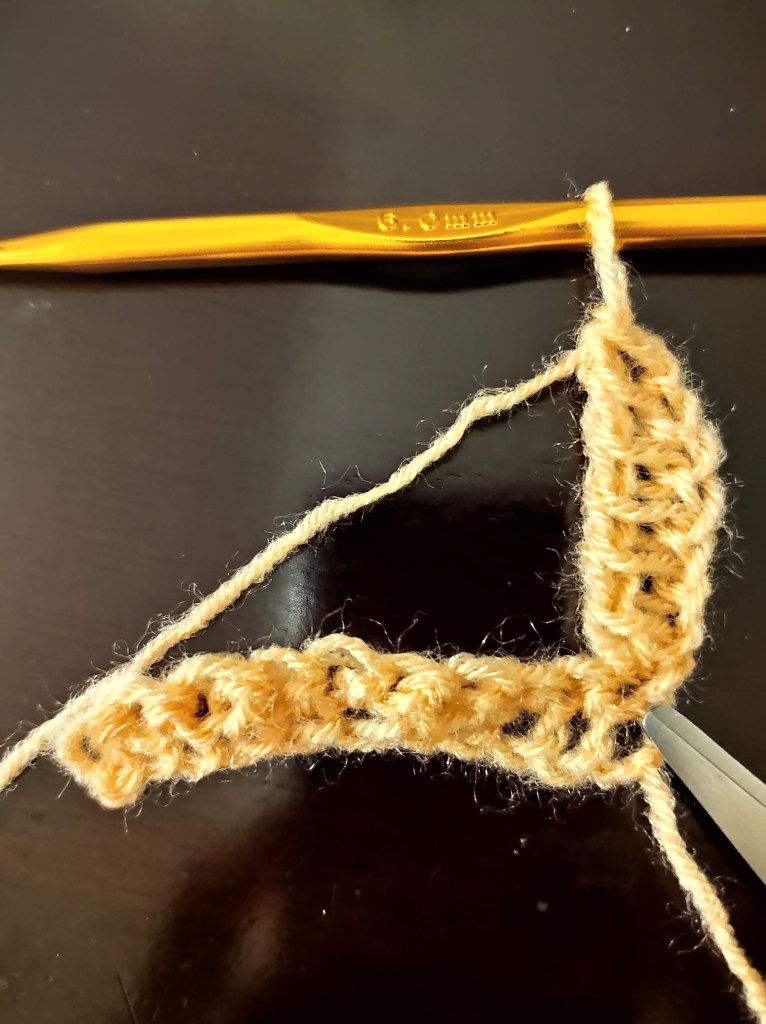
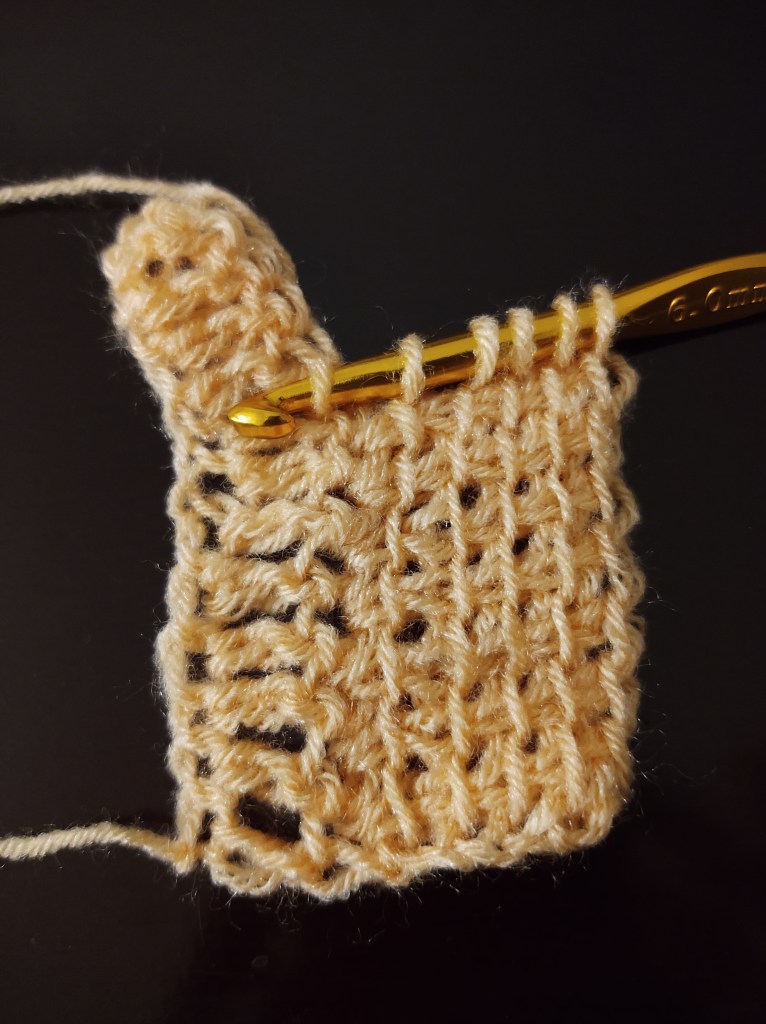
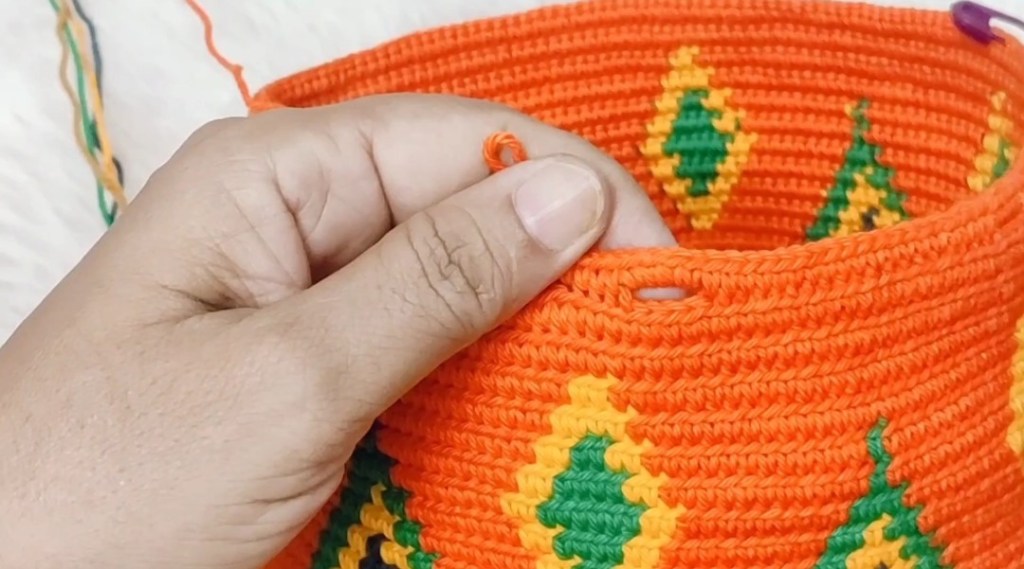
Button holes

We will make Button holes in Round 33โ€ฆCrochet 4 stitches around the yarns you carry.  Slide the stitches if needed, pull the yarns gently. Skip 4 stitches and insert the hook in next stitch.
In this video we will see how to make button holes:

See instructions below:

Round-33.   *9A, BUTTON HOLE, 18A, BUTTON HOLE, 19A, BUTTON HOLE, 18A, BUTTON HOLE,     19A, BUTTON HOLE, 18A, BUTTONHOLE, 19A, BUTTON HOLE, 18A, BUTTON HOLE, 10A*

Round-34.   *30A*   {6x}
Round-35.   *30A*   {6x}

As we work in spiral, there is a difference in height at the end of the round.
we can minimize the height by cutting the yarns one by one in Round-36.
20 stitches before the end, cut yarn color E. 15 stitches before the end, cut yarn color D. 10 stitches before the end, cut yarn color B. At the end of the Row, cut yarn colorA.

Round-36. *30A*   {6x}
Round-37.   Crab stitch with color C, (Do not make crab stitch in every stitch, skip every other stitch)
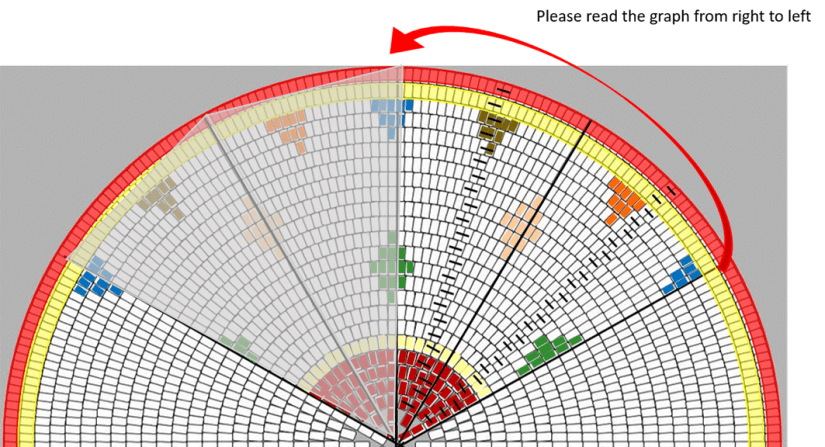
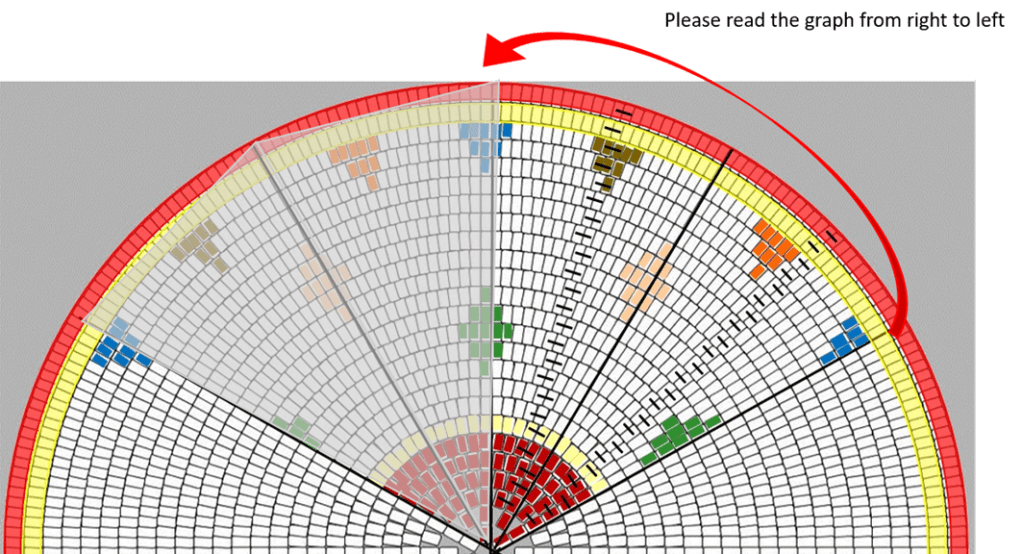
Graph

Thats it for Week 3! You can always get in touch with us by leaving a comment below or dm us on instagram @indiayarn.circle or join us on our facebook group where all the action happens!!

We would love to see your makes!! So dont forget to tag us @indiayarn.circle and our designer @handmadeby_ashita on instagram and facebook and use hashtags #sunburstdiamondcal #indiayarncircle #sunburstdiamondmochilacal #IYCcal

HAPPY CRAFTING!!!

Community Activity, IYC

Sunburst Diamond Mochila Bag CAL – Week 2

Happy Monday Everyone!!!

Its Monday and start to a brand new week, which means only one thing –

IT’S WEEK 2 of the Sunburst Diamond Mochila Bag CAL!!!!

We have been seeing your progress pictures of Week 1 and we are blown away!! You all are doing amazingly well!!

Incase you havent caught up yet, here is a little help for a quick recap.

Find all info about the cal and registration HERE

Find WEEK 1 instructions HERE

So lets get on with Week 2!!

This week we will be starting with the body of the bag and as usual our guest designer Ashita has included written instructions with a video tutorial and graph!

Side of the Bag

We donโ€™t have to make any more increases for the side of the bag. Our work will go up when we stop increasing. Every 10 or 15 stitches we push our work to 90 degree angle and pull the carrying yarns one by one and massage the stitches in the direction of the hook.

Transition from base to side

In this Video we will see how to start the side:

Graph

We will repeat this graph 6 times.
Button holes starts at round 33.

Written Instructions

Round โ€“ 1 to 18

Round-1.ย ย  ย *30A*ย ย  {6x}
Round-2.ย ย  ย *30C*ย ย  {6x}
Round-3.ย ย  ย *3D, 7B, 3D, 7B, 3D, 7B*ย ย  {6x}
Round-4.ย ย  ย *30C*ย ย  {6x}
Round-5.ย ย  ย *30A*ย ย  {6x}
Round-6.ย ย  ย *30C*ย ย  {6x}
Round-7.ย ย  ย *30C*ย ย  {6x}
Round-8.ย ย  ย *14A, 1B, 15A*ย ย  {6x}
Round-9.ย ย  ย *14A, 1B, 15A*ย ย  {6x}
Round-10. ย *13A, 3B, 14A*ย ย  {6x}
Round-11. ย *12A, 2B, 1C, 2B, 13A*ย ย  {6x}
Round-12. ย *11A, 2B, 3C, 2B, 12A*ย ย  {6x}
Round-13. ย *10A, 2B, 2C, 1D, 2C, 2B, 11A*ย ย  {6x}
Round-14.ย  *9A, 2B, 2C, 3D, 2C, 2B, 10A*ย ย  {6x}
Round-15.ย  *8A, 2B, 2C, 2D, 1E, 2D, 2C, 2B, 9A*ย ย  {6x}
Round-16.ย  *7A, 2B, 2C, 2D, 3E, 2D, 2C, 2B, 8A*ย ย  {6x}
Round-17.ย  *6A, 2B, 2C, 2D, 5E, 2D, 2C, 2B, 7A*ย ย  {6x}
Round-18.ย  *5A, 2B, 2C, 2D, 7E, 2D, 2C, 2B, 6A*ย ย  {6x}

Thats it for Week 2! You can always get in touch with us by leaving a comment below or dm us on instagram @indiayarn.circle or join us on our facebook group where all the action happens!!

We would love to see your makes!! So dont forget to tag us @indiayarn.circle and our designer @handmadeby_ashita on instagram and facebook and use hashtags #sunburstdiamondcal #indiayarncircle #sunburstdiamondmochilacal #IYCcal

HAPPY CRAFTING!!!

Community Activity, IYC

Solitaire Mochila Cal 2021 – Week 2

Hello everyone!

Can you believe week 1 of the Solitaire Mochila CAL is already over?

We hope you are progressing well in making your Solitaire Purse and we would love to see all your pics! Join our facebook group to share or follow us on instagram and tag us! Use hashtags #solitairemochilacal #mochilacal2021 #indiayarncircle

If you are new here, check out all the registration and material details HERE and Week 1 Instructions HERE

Now that you are all caught up, lets begin with week 2

WEEK TWO

Week Two is from Row 13 to Row 24

Note:

Please keep in mind all the techniques mentioned in the Week 1 CAL so that you can perfect your work.

Written instructions

Full pattern has been divided into 12 triangular parts. You will repeat 2 triangular pattern 6 times(unless specified otherwise) . (the unshaded parts are two triangles which you have to repeat 6 times)

Row 13 * 1D, 4C, inc C, 11C, inc C, 6C* (Repeat * to * 6 times) [156]

Row 14 * 5C, inc C, 7C, 1E, 4C, inc C, 7C* (Repeat * to * 6 times) [168] Add colour F and cut yarn D

Row 15 * 6C, inc C, 6C, 3E, 4C, inc C, 7C* (Repeat * to * 6 times) [180] Add colour G

Row 16 * 6C, inc C, 6C, 5E, 3C, inc C, 8C* (Repeat * to * 6 times) [192] Add colour H

Row 17 * 7C, inc C, 7C, 3E, 5C, inc C, 8C* (Repeat * to * 6 times) [204]

Row 18 * 7C, inc C, 9C, 1E, 6C, inc C, 9C* (Repeat * to * 6 times) [216]

Row 19 * 8C, inc C, 17C, inc C, 9C* (Repeat * to * 6 times) [228] Pick yarn F

Row 20 * 1F, 7C, inc C, 1C, 1G, 16C, HC (inc with yarn H and C ), 10C* (Repeat * to * 6 times) [240]

Row 21 * 2F, 7C, inc C, 3G, 15C, 1H, inc H, 9C, 1F * (Repeat * to * 6 times) [252]

Row 22 * 3F, 6C, inc C, 5G, 13C, 2H, inc H, 1H, 8C, 2F* (Repeat * to * 6 times) [276] pick up yarn B

Row 23 * 10B, inc B, 11B* (Repeat * to * 12 times) [288] pick up yarn A

Row 24 * 10A, inc A, 12A* (Repeat * to * 12 times) [300] cut the yarn.

Fold the round base into half exactly and put stitch markers on both ends. I made a fold along the line where you begin your rows and shifting of colours can be noticeable. If you do this, rest of your pattern will look neat.

Row 25 Leave two sc after the marker and make 1A into each. Skip 2sc before you reach the next marker. Cut the yarn. Continue on the other side the same thing and cut the yarn.

Stitching two pieces:

Have a look at Marion Verloopโ€™s tutorial on how to join the two pieces:

By using this method just make 25 slip stitches both corners and leave the middle for stitching the zip.

Add Zip:

Stitch your zip on the extra row which you made.

Add Crab Stitch

Marion has shown very clearly how to add the crab stitch. On the last row i.e Row 25 you made sc on the back loop, so you will make crab stitch on the front loop all around.

Add Tassel:

Its upto you how you want to make your tassel but if you want to make a tassel like Marionโ€™s then here is the link:

And thatโ€™s it!!!! Your bag is complete.

We would love to see all your pics! Join our facebook group to share or follow us on instagram and tag us! Use hashtags #solitairemochilacal #mochilacal2021 #indiayarncircle

Please feel free to leave your comments and suggestions below.

Community Activity, IYC

Solitaire Mochila CAL 2021 – Week 1

We are so excited to start the Mochila CAL 2021 with Rosy of @mnhcrochetcreation!! Hope you all have gathered all the materials and are ready to go at it with us!

If you are new here and still wondering what the CAL is about, you can read our introductory post HERE.

Also if you still havent registered for the CAL please register at the earliest!

So here is a recap for you!!

Level

Easy/ Beginner

Supplies

Mercerized Cotton Yarn. (I am using White Rose Cotton Yarn. You can use Laura Yarn, Gulera 4 Ply, Anchor 4060, Kotton 4 ply, Mercerized Cotton yarn from Yarnkart

Scissor

Zip for Bag โ€“ 18 / 20 cm

Lining Material (optional)

COLOUR INDEX

Note: The above colour index is just an example. Please use your imagination and use any colour combination of your choice.

Abbreviations

A = Red

B = Yellow

C = Cream

D = Green

E = Peach

F = Blue

G = Orange

H = Brown

2A = crochet 2 stitches with color

inc A = increase with color A inc

AB = increase with 2 colors (one stitch in color A and one stitch in color B)

* * = repeat what is between

* * [2x] = repeat 2 times what is in between

* * (12) = total number of stitches at the end of the round

Pick up different colour = before the next colour change, do a normal yarn over with current yarn and then second yarn over with new colour.


Before you start your mochila CAL, here are some of the links that you must see and learn. These are excellent step by step tutorials given by Marion Verloop:

Basic Mochila techniques


Yarn Over and Yarn Under


Adding a new Yarn


Note: Incase any of you donโ€™t understand or want a detailed video of my pattern, please write to us or comment on our Instagram or Facebook page.

Techniques

After you have checked out all the Youtube tutorials by Marion Verloop, please remember the following points before you start the CAL

  • Single Crochet is always worked on the back loop. If you accidentally work the full single crochet you will see the difference it looks very different
  • Always mark the first stitch of the new row with stitch marker
  • In mochila, you will never slip stitch before moving onto the next round. Just remove the stitch marker and carry on to the next row.
  • When you change your yarn colour, pull up the new colour yarn in the second pull through.
  • Stitches have to tight so that other colour yarns are not visible.
  • Please read the graph from right to left

Measurement

Size of the round base is 26cm

When you fold it, you will get a height of 12cm

Week 1

Written instructions

Full pattern has been divided into 12 triangular parts. You will repeat 2 triangular pattern 6 times. (the unshaded parts are two triangles which you have to repeat 6 times)

1. With colour A crochet 6 sc in the magic circle

Row 1  2A  in each stitch (12) Add colour B

Row 2  *2A inc*  (24)  Add color C  

Row 3  * inc A, 1A * (Repeat * to * 12 times) [36]  Add colour D

Row 4  * inc A, 2A  * (Repeat * to * 12 times) [48] Add colour E

Row 5  * 1A, inc A, 2A * (Repeat * to * 12 times) [60] pick up yarn B in the last stitch

Row 6  * 1B, inc B, 3B * (Repeat * to * 12 times) [72] pick up yarn C in the last stitch

Row 7  * 2C, inc C, 3C * (Repeat * to * 12 times) [84]

Row 8  * 2C, inc C, 4C * (Repeat * to * 12 times) [96] pick up yarn D in the last stitch

Row 9  * 1D, 2C, Inc C, 7C, Inc C, 4C * (Repeat * to * 6 times) [108]

Row 10 * 2D, 1C, inc C, 8C, inc C, 4C, 1D* (Repeat * to * 6 times) [120]

Row 11 * 3D, 1C, inc C, 9C, inc C, 3C, 2D* (Repeat * to * 6 times) [132]

Row 12 * 2D, 2C, inc C, 10C, inc C, 5C,1D* (Repeat * to * 6 times) [144]

We cannot wait to see your colour choices and your makes!! tag us @indiayarn.circle and @mnhcrochetcreation and use the hashtag #mochilacal2021 and #solitairemochilacal

Please feel free to comment and revert with your queries below or join our facebook group where the CAL is being hosted or DM us on instagram

Community Activity, IYC

Winter KAL – Week 4 – Brioche Headband

Week 4 of the Winter KAL 2020 involves brioche knitting.

Brioche knitting is a family of knitting patterns involving tucked stitches, i.e., yarn overs that are knitted together with a slipped stitch from the previous row. Such stitches may also be made by knitting into the row below and dropping the stitch above.

This type of knitting leads to a thick and ribbed pattern which is perfect for shawls and sweaters and anything warm.

The headband has a very elegant and chic twist in the middle (a clever way to hide the seam!).

You can easily match your headband to your outfit.

Knit headband

The pattern is worked back and forth and is very easy to memorize, which makes it a quick project. You can also find a video tutorial of this headband at the end of the written instructions.

I hope you will enjoy knitting this headband with a twist!

To knit the headband you will need:

DK or worsted weight yarn, 4 or 5 mm knitting needles, tapestry needle

Pattern:

Cast on about 20 stitches (customisable) using long tail cast on

Row 1 (foundation row): Yarn over, slip 1 stitch purlwise, knit 2 together, repeat from * to * until the end of the row.

Row 2: Yarn over, slip 1 stitch purlwise, knit yarn over and the slipped stitch together, repeat from * to * until the end of the row.

Work row 2 for 20 inches or desired length.

Bind off loosely.

See the video for the twist

Fold into half, sandwich together and sew in all the four edges. Invert it to reveal twist.

Happy knitting!!

Community Activity, IYC

Winter KAL – Week 3 – Cable headband

It’s week 3 of the Winter KAL 2020 and we have our next knitting technique which is Cable knitting.

Cable knitting is a style of knitting in which textures of crossing layers are achieved by permuting stitches.

This headband has a simple 8 row repeat which is perfect to understand how a cable pattern is developed.

For this particular project you need DK or worsted weight yarn, 4 or 5 mm knitting needles, a cable needle or any substitute (thin rod, pencil, toothpick or any needle sized object).

Key:

C6F – Knit 3 stitches on to a cable needle and hold at front of work, Knit 3 then Knit 3 from cable needle
C6B – Knit 3 stitches onto cable neddle and hold at back of work, knit 3 then knit 3 from cable needle

Pattern:

Cast on 15 stitches
Row 1 : Knit
Row 2,4,6,8 : K3, P9, K3
Row 3 : K3, C6F, K3, K3
Row 5 : Knit
Row 7 : K3, K3, C6B, K3

Continue this pattern till piece is about 18 inches long.

You can check out the YouTube tutorial to learn how the cable stitches are made.

Happy knitting!

Community Activity, Stitch it Up

Tunisian Linked Stitches – A quick Guide

Now that we have seen what tunisian crochet is and how to work it, lets go a step further!!

As you all know, we are running the PAX Shawl as TCAL over at the IndiaYarnCircle for this month, and we thought it would be a great help to break down certian stitches and techniques, and ease your understanding of Tunisian Crochet.

Still clueless about what we are talking??

Check out all about what is cal HERE.

Know all about the PAX Shawl cal and register for it HERE.

Pin it now! Read it Later!

The Pax Shawl

The Pax shawl is beautiful simple tunisian crochet pattern that uses a combination of regualr crochet and tunisian crochet techniques.

Source: @aiohobeni

One of the stitches used in the shawl is the Tunisian Linked stitch or the Uple stitch.

The linked stiches can be worked in any numbers as required. These are very simple stitches that are a perfect combination of regular crochet and tunisian crochet.

The linked stitch is basically a vertical stitch worked up to the length n number required and worked down again to link it to the foundation row.

You can build the linked sttiches to make them 1-uple, 2-uple, 3-uple, 4-uple, 5-uple and so on. These numbers are basically the no. of horizontal bars in the one stitch.

1-uple stitch with one horizontal bar
3-uple stitch with 3 horizontal bars
2-uple stitch with two horizontal bars
4-uple stitch with 4 horizontal bars

The working of the linked stitches is a little different, since we pull up loops in the horizontal bars and work verticaly to build the height of the stitches. Hence it better to turn work 90 degrees to make it easier.

Image showing the vertical length of the 5-uple stitch
Image with work turned 90 degree for working the horizontal bars

You can find a detailed video tutorial explaining the linked stitches below:

Hope this tutorial is helpful for understanding the tunisian linked stitches!!

Please feel free to leave your queries and comments below!

All images are copyright of IndiaYarnCircle and the respective makers, unless otherwise mentioned. You can read ourย disclaimer policy here.

Community Activity

Week 4 – Summer Fashion Cal with The Juju Scarf.

Week 4 is here and the final update of the scarf has been sent out on the email to all the participants.

We saw the progress of the scarf in decreasing every 2 clusters in week 2, then decreasing 1 cluster till the end on week 3 and now week 4 is all about finishing the scarf!

The most important part of week 4 is blocking the scarf and our designer Divya Bhat has included a video tutorial specially showing how to block The JuJu Scarf to make it the lacey light fabric that it is! Isnt that great?

The Crochet along has been extended till 15th August keeping in mind the current pandemic situation and the fact that a lot of you guys got your yarns quite late. More time to catch up and finish the cal!! Yayyyy!!!

So now its all about completing the last leg of the cal and flaunting your beautiful makes!! Do post your pictures on all social media, use the hashtag #thejujuscarf and tag us @indiayarn.circle, @anchor.crafts and @stringtierey . We would love to see all your makes and show it off to everyone!!

Leave us your questions and queries in comments below and join the facebook group to get in on all the details for this week!!!

Yarnoholic Series

All About Anchor Yarn โ€“ IYC gets Anchored

Anyone who wants to indulge in yarncrafts would go to a kangan store or shop ย next door and pick up Anchor yarns and this is the impression Anchor has left in our minds. While Anchor leaves us with these distinct memories, they have been a go to brand for many of our yarn crafts ranging from embroidery, crochet, knitting , tatting, string art and many more forms of yarn crafts.

In this blog post we are going into a little detail about the yarns from Anchor.

Pin It Now! Read It Later!

Click on Image to Pin it!

YOU CAN ALSO WATCH OUR VIDEO EXPLAINING THE DIFFERENT ANCHOR YARNS

1. Anchor Stranded Cotton Skeins โ€“ Art4625

A spectrum that would compare a rainbow, Anchor stranded cotton skein is the most well-known premium hand embroidery thread all over the world. A superior 6-strand thread, made from the best Egyptian cotton is ideal for all forms of embroidery. Available in single and multicolor.

Ideal for โ€“ all types of hand embroidery – Free style & Counted thread embroidery

Key features โ€“

  • Imported Egyptian cotton fiber
  • Long staple cotton โ€“ superior strength
  • Double Mercerized โ€“ Superior luster & strength
  • Extensive shade range

Packaging โ€“ 25, 8meter skeins to a box

2. Anchor Mercer Crochet Cotton โ€“ Art4054

Anchor Mercer Crochet cotton is available in two thicknesses โ€“ Ticket 20 & Ticket 40 (ticket 20 is thicker than ticket 40). Being mercerized, these threads are a little stiff and can be used very strikingly to give a lacy feel.

Ideal for โ€“ all types of Lace crafts like Crochet, Tatting, Knitting and Hairpin lace.

Key features โ€“

  • Imported Egyptian cotton fiber
  • Long staple cotton โ€“ superior strength
  • Double Mercerized โ€“ Superior luster & strength

Packaging โ€“ 10, 20gram balls to a box

3. Anchor Mercer Pearl Cotton โ€“ Art4591

Anchor Mercer Pearl cotton, is a versatile soft thread with a pearly sheen on it. This gives your work an extra glossy effect.ย 

Ideal for โ€“ all types of hand embroidery – Free style & Counted thread, and Lace crafts like Crochet & Knitting.

Key features โ€“

  • Imported Egyptian cotton fiber
  • Long staple cotton โ€“ superior strength
  • Double Mercerized โ€“ Superior luster & strength

Packaging โ€“ 10, 10gram balls to a box

4. Anchor Mercer Knitting Cotton โ€“ Art4057

Anchor Mercer Knitting cotton, as the name implies is used for knitting, as well as Crochet and chunky Tatting. It is also used embroidery and soft toy making.ย  Available in single and multicolor.

Ideal for โ€“ all types of Lace crafts like Knitting & Crochet. Also used for different kinds of hand embroidery โ€“ Free style & Counted thread

Key features โ€“

  • Imported Egyptian cotton fiber
  • Long staple cotton โ€“ superior strength
  • Double Mercerized โ€“ Superior luster & strength

Packaging โ€“ 10, 50gram balls to a box

5. Anchor Mercer Knitting Cotton โ€“ Art4060

This is a versatile thread that is soft and lustrous. It is strong and flexible and used for Home furnishings apart from embroidery and lace crafts.ย 

Ideal for โ€“ all types of Lace crafts like Knitting, Crochet & Macramรฉ. Also used for different kinds of hand embroidery โ€“ Free style & Counted thread

Key features โ€“

  • Imported Egyptian cotton fiber
  • Long staple cotton โ€“ superior strength
  • Double Mercerized โ€“ Superior luster & strength

Packaging โ€“ 4, 50gram balls to a box

WHERE TO BUY –

Instore โ€“

Options are umpteen , look around any craft supply stores and you are most definite to be offered anchor yarns

Online โ€“

Coats India : http://shop.coatscrafts.in/

Pradhan Embroidery Store

Pony Craft Store

Donโ€™t forget to ask for shade cards  to pick the right colors for your project !

We hope that we were able to help you with deciding the right Anchor Yarn for your projects. Leave us a comment or note if you like to know more about Anchor Yarns.

All images are copyright of IndiaYarnCircle, unless otherwise mentioned. You can read ourย disclaimer policy here.

Community Activity, IYC

Summer Fashion 2020 CAL.

Anchor in collaboration with IndiaYarnCircle launches it’s 1st Crochet Along to make The JuJu Scarf designed by Divya Bhat of @Stringtierey.

Woohoooo!!!! Did you see our Summer Fashion show with Anchor in our Previous Post?? We were super glad to collaborate with Anchor to show off our Summer cotton makes and we are here to take it a step further!!!

We are super excited to finally annouce our 1st Crochet Along with Anchor – The Summer Fashion 2020 CAL!! Its our first Group activity in the IYC community and we cannot wait for all the interactions and exchanges of projects!

If you are still clueless on what a Crochet along is then do read our detailed post about it HERE.

Pin It Now! Read It Later!

The crochet along is hosted in the IndiaYarnCircle Facebook group and is a 4 week schedule starting from 13th July 2020 to 7th August 2020. The Instructions for the pattern will be updated every week of the CAL and notified by email to everyone who Registers for the CAL.

REGISTRATIONS FOR THE CAL HAVE BEEN CLOSED. THANK YOU FOR JOINING THE SUMMER FASHION CAL!! SEE YOU IN THE FACEBOOK GROUP!!

(Keep scrolling to the end to join the group!)

WEEK 1 – 13TH JULY 2020 TO 19TH JULY 2020

Week 1 is all about Registering for the cal and getting your materials! So dig into your Anchor stash, order your Anchor yarn, select your colours and beads (Yes the pattern has an option for adding beads too!!) and swatch your gauge! Show off your Choices in our IYC FB group and be ready to get go!!

WEEK 2 – 20TH JULY 2020 TO 26TH JULY 2020

Week 2 kicks off with the pattern instructions with a video tutorial for easy understanding. you can work all week and get back to us with your queries and doubts. We will be having a live Q&A session at the end of the week on our FB group to resolve all your issues and check out your progress!.

WEEK 3 – 27TH JULY 2020 TO 02nd AUGUST 2020

Week 3!! We have a GIVEAWAY scheduled for this week for the best picture! And its gonna be Epic!! We also go live at the end of the week to chit chat, show off and announce the winners of the giveaway!!

WEEK 4 – 02nd AUGUST 2020 TO 09TH AUGUST 2020

Week 4 is all about finishing!! We will give you tips and tricks for finishing you make and you can submit your final pictures to be a part of the CAL Video of participants!! The end of CAL marks your achievement and you will be rewarded with a digital Certificate from Anchor!!!

As Part of the Crochet Along you will be Required to follow the below rules:

  1. Follow @Indiayarn.circle @anchor.crafts and @stringtierey on Instagram.
  2. Join the IndiayarnCircle Facebook group.
  3. Make The JuJu Scarf Pattern with Anchor Yarns only.
  4. Share progress Pictures on the FB group to be eligible for giveaways.
  5. Complete your make by 07th of August 2020, to be eligible to get a digital certificate for the CAL by Anchor Crafts India.

The Juju Scarf!

The JuJu scarf is a Lacey, Light weight, summery crochet triangular scarf which will be the perfect accessory to any outfit and style.The scarf pattern is availble in instructions for Fingering weight yarn as well as DK weight yarn. 
Its a free size super light scarf which requires only 575 yards / 150 gms of fingering weight AKC Art 4057 yarn with 3.5mm hook and 575 yards / 200 gms of DK weight Anchor 4ply Art.4060 yarn with 4.5mm hook size.

You can join our facebook group here.


REGISTRATIONS FOR THE CAL HAVE BEEN CLOSED. THANK YOU FOR JOINING THE SUMMER FASHION CAL!! SEE YOU IN THE FACEBOOK GROUP!!

So start Digging into your Anchor Stash and get going!! We cant wait to see your colour choices and Gauge Swatches!

For any queries you can always leave a comment below or get in touch with us at indiayarncircle@gmail.com

All images are copyright of IndiaYarnCircle and Divya Bhat @Stringtierey, unless otherwise mentioned. You can read our disclaimer policy here.