Community Activity, IYC

Dream CAL 2021 – Week 3

Time is surely flying by!! February is done and we are already into week 3 of the Dream CAL now!

Are you as excited as we are? Have you started you cal yet?

If not you can check out the week 2 instructions HERE to get you started. You can also share your Progress pictures on our facebook group or post it on instagram, tag us @indiayarn.circle , the designer @naore_the_blot and use the hastag #dreamcal2021

We have seen quite a few gorgeous versions being posted and we cannot wait to see them finished.

Wondering where all this is happeneing? Join our facebook group and follow us on instagram to see all crafty things.

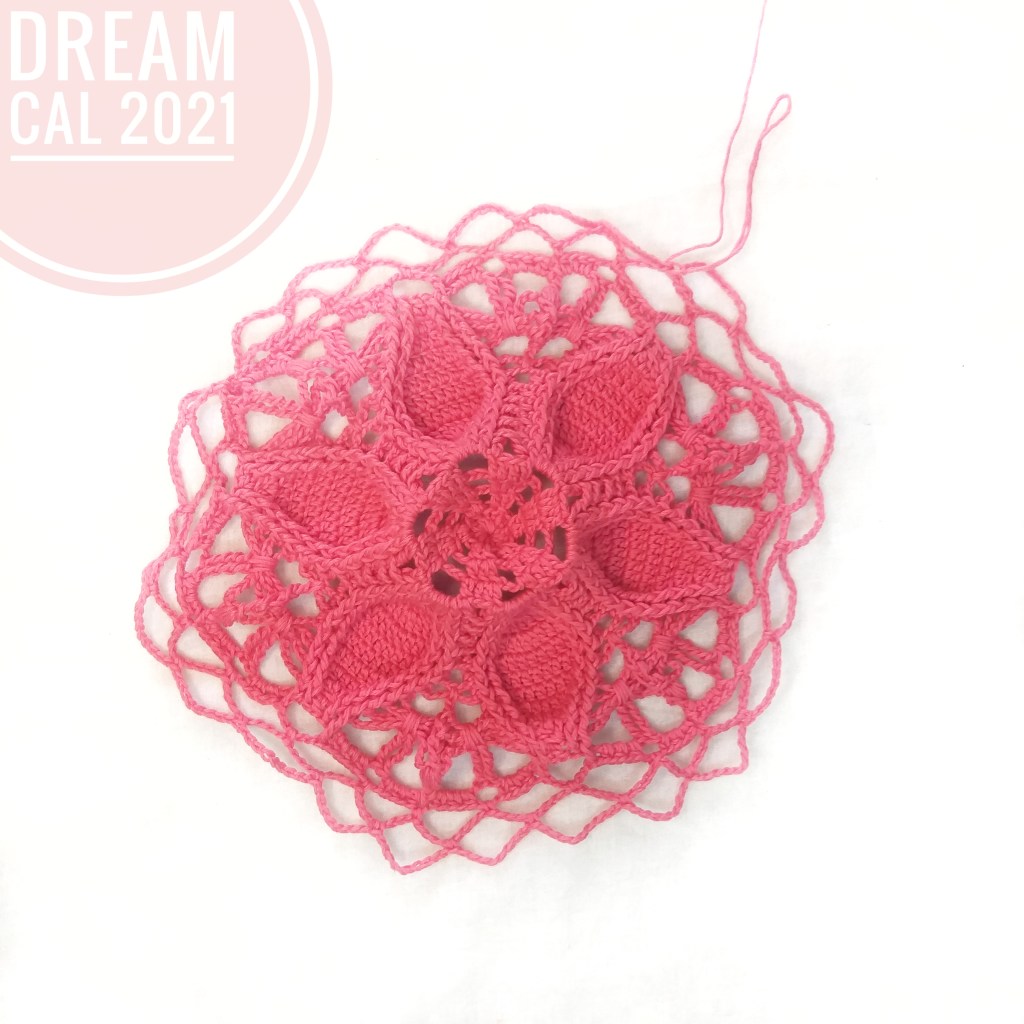
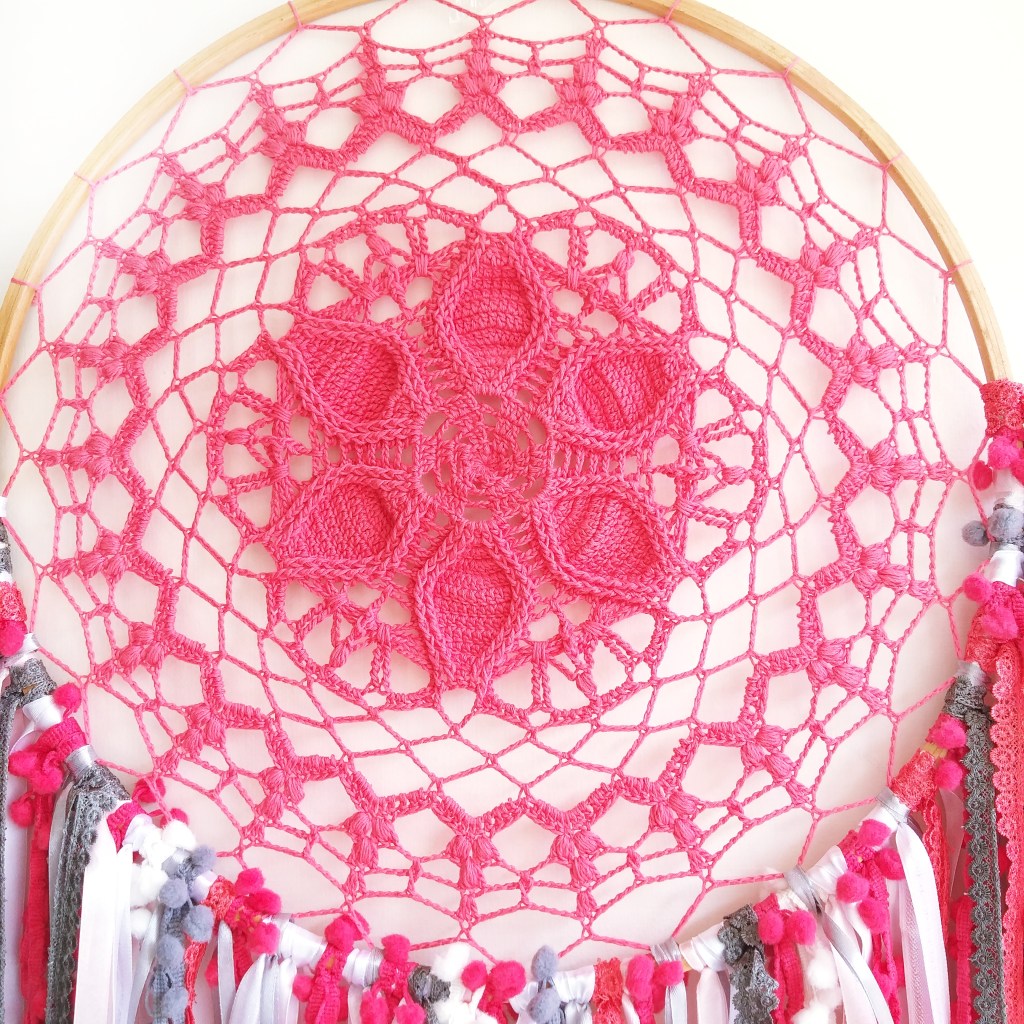
Week 3 is going to be fun, as we complete our doily, block it and learn how to attach it to the ring and see our dreamcatcher finally taking shape.

We have a few additions to the notes for the pattern, hence we are listing it down again.

For all the instructions and video tutorial from the start till Row 19 check out our previous blog post HERE.

PATTERN:

NOTES :

  1. Ch3 is considered as 1Dc in all rows.
  2. Slst at the end of each round is to close the round. So slip stitch into the third chain of the first Ch3 of the respective rounds or slip stitch to the starting Bpdc stitch of each round.
  3. Ch1 before the Bpdc is not considered as a stitch.
  4. The number (a) written at the end of each round, indicates the number of stitches in the round.
  5. Number mentioned before a stitch is the number of stitches in the same stitch, and number mentioned after with the “x” is the number of repeats in the consecutive stitches. Eg : 3Dc x2 means, do 3 Double crochet into the same stitch and again 3 Double crochet into the next stitch as well.
  6. (Sl+ch1) y times is used to reach to the centre of chain space and is not considered as a stitch in the total no of stitches.
  7. Chains in between stitches is considered as a stitch in the total count.

INSTRUCTIONS:

R20 :   (slst into the Ch sp, Ch1) x2, 1Sc into the same sp, (Ch9, 1Sc into the next Ch sp) x23, Ch9, slst into the first Sc     (240)

R21 :   Ch1, 1Sc into the same sp, (10Dc into the Ch sp, 1Sc into the previous SC st) x23, 10Dc into the Ch sp, slst into the first Sc         (264)

R22 :   slst  x5 into the next 5 sts, Ch3, 1PS & 1Dc into the same st,1Dc, 1PS & 1Dc into the next st, {Ch5, sk  9 sts and (1Dc, 1PS & 1DC) x2 } x23, Ch5, slst into the first Sc    (264)

R23 :    slst x3 into the next 3 sts, Ch3, 1PS & 1Dc into the same st, (Ch4, 1Sc into the Ch sp, Ch4, sk 3 sts and 1Dc, 1PS, 1Dc into into the sp between the 2 Dc ) x23, Ch4, 1Sc into the Ch sp, Ch4, slst into the third Ch of the first Ch3   (288)

R24 :    slst x1 into the next st, Ch3 & 2Dc into the same st, (Ch4, 1Fpdc through the previous Sc, Ch4, 3Dc into previous PS) x23, Ch4, 1Fpdc through the previous Sc, Ch4, sl into the third Ch of the first Ch3            (288)

R25 :    slst, Ch1, 1Sc into the same st, (Ch12, 1Sc into the 2nd Dc of the 3Dc of previous round) x 23, Ch12, Slst into the first Sc, Ch1 and cut the yarn. Weave in the end  (312)

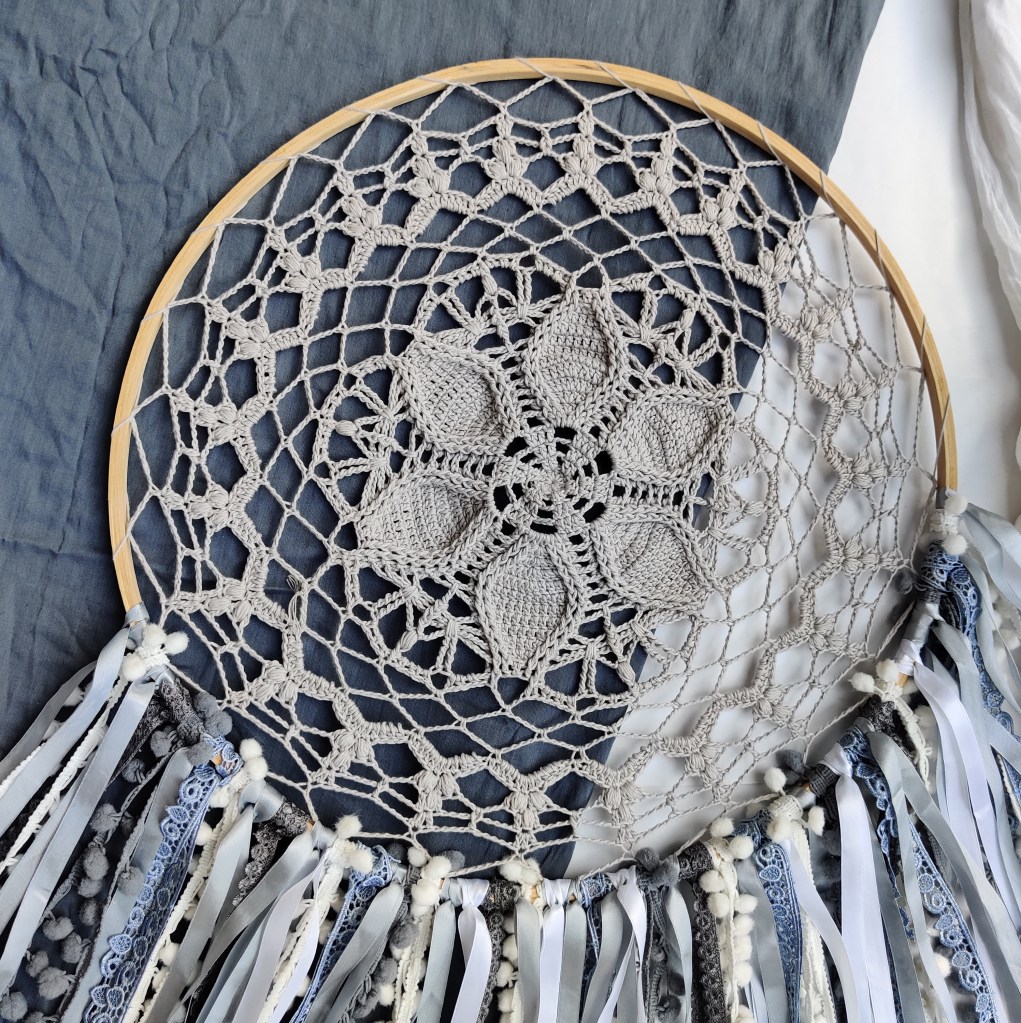
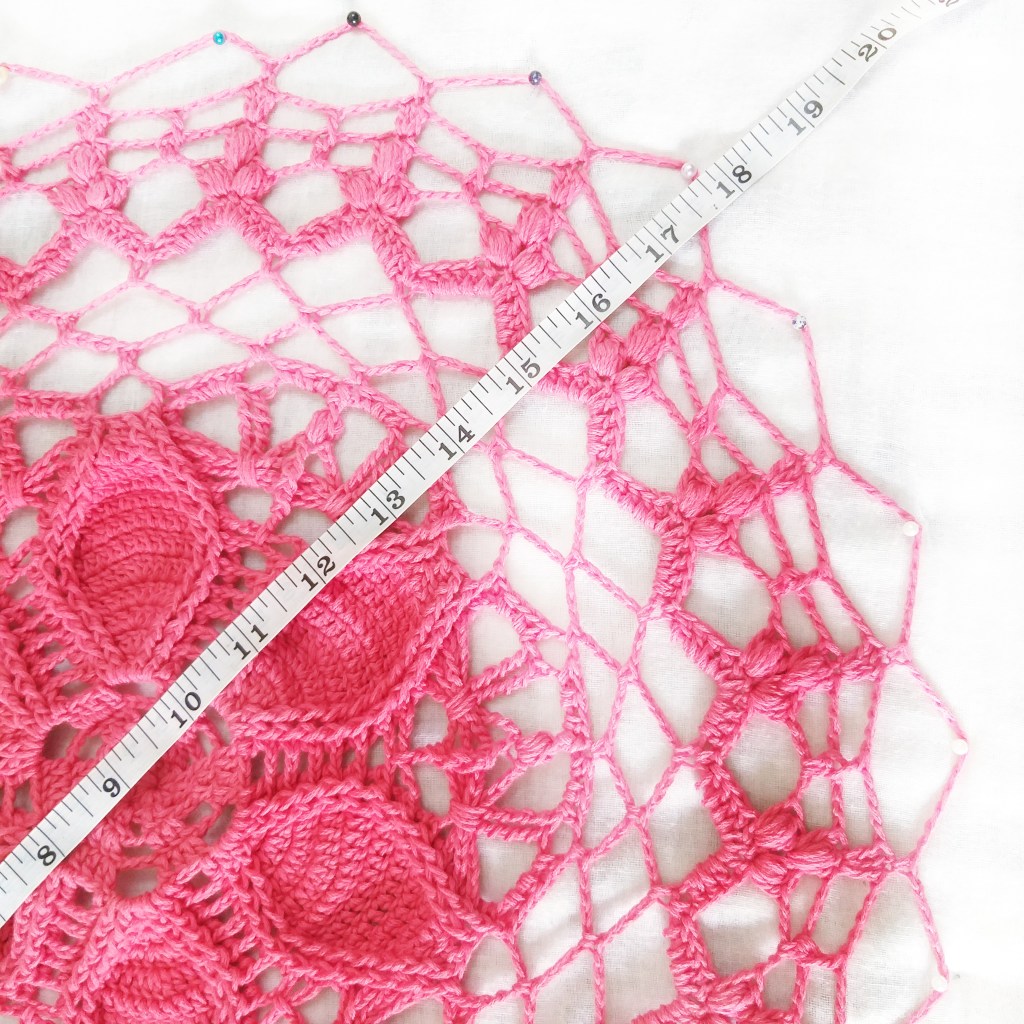
This completes the Doily for Dream Cal 2021. When you pin it down the way you do for blocking, it will measure up to 18”. If you are using a smaller hoop for the dream catcher, stop the Doily accordingly a few rounds before Round 25.

How to attach  the Doily to the Hoop

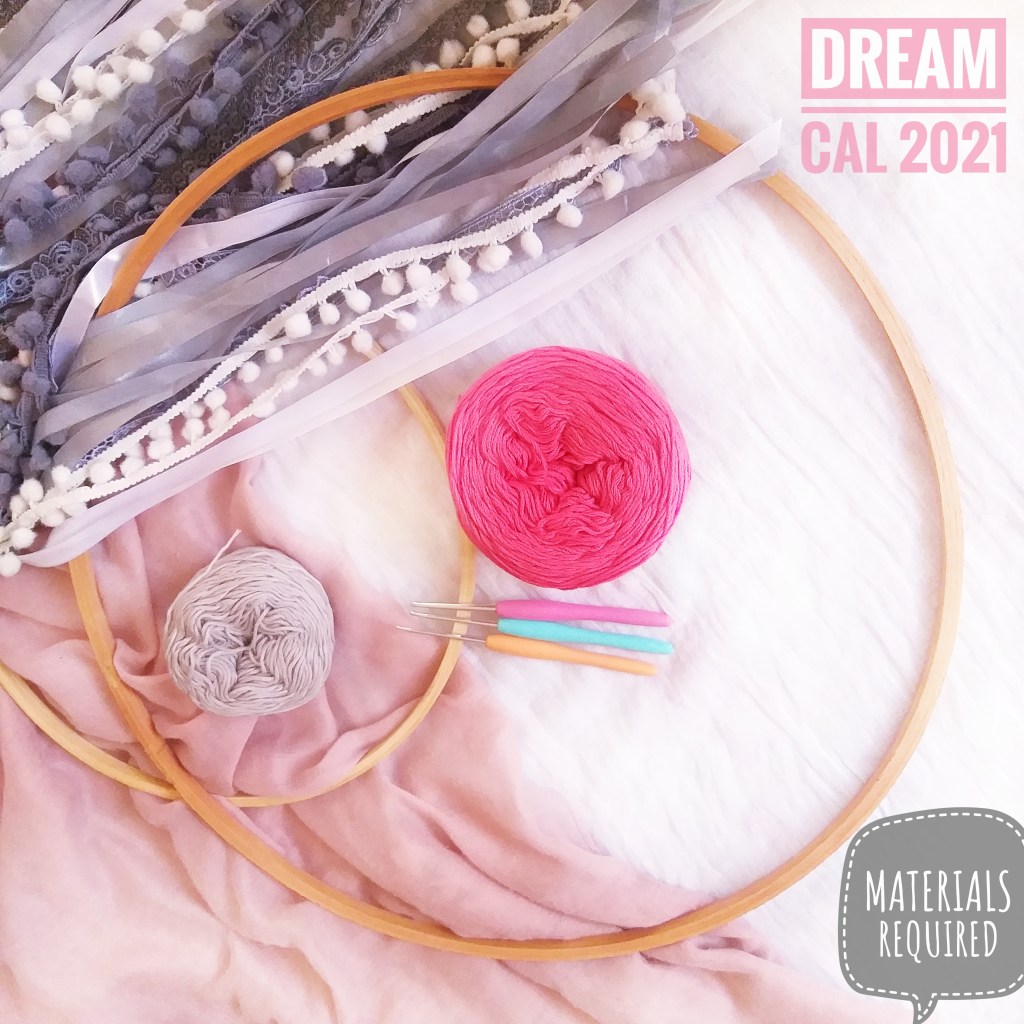
Cut 24 small pieces of the same yarn measuring around 6inches (Choose a length convenient for you to hold and tie) . Tie the 12Ch sp to the Hoop using these small yarn pieces. Make 3 to 4 knots to secure. Cut the excess and make the knotted portion behind the hoop and further secure with an adhesive. (adhesive is optional). This method and a totally different method is explained in detail in the part 03 video attached.

How to attach the Hangings

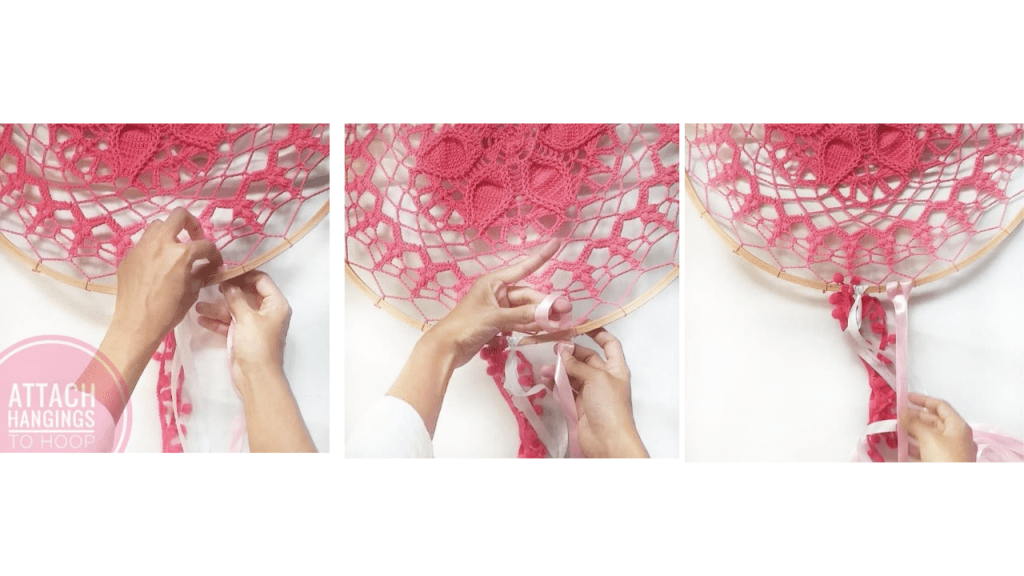
The length of the hangings can be your personal choice. The length used for the sample  is same as that of the diameter of the Hoop used, ie, 18 inches. The hangings are folded into two and then we make a knot through the hoop. Hence the length of each hanging to be approx 38 inches. (18 inches +18 inches + 2 inches extra for tying the knot) Fold the lace into two and place it beneath the hoop and take it over the hoop. Take the tail portion through the inside of the fold and tighten it by pulling the tail portion.

After hanging all the Laces, trim the bottom portion into a “V” shape. 

You can check out the video tutorial for the same below:

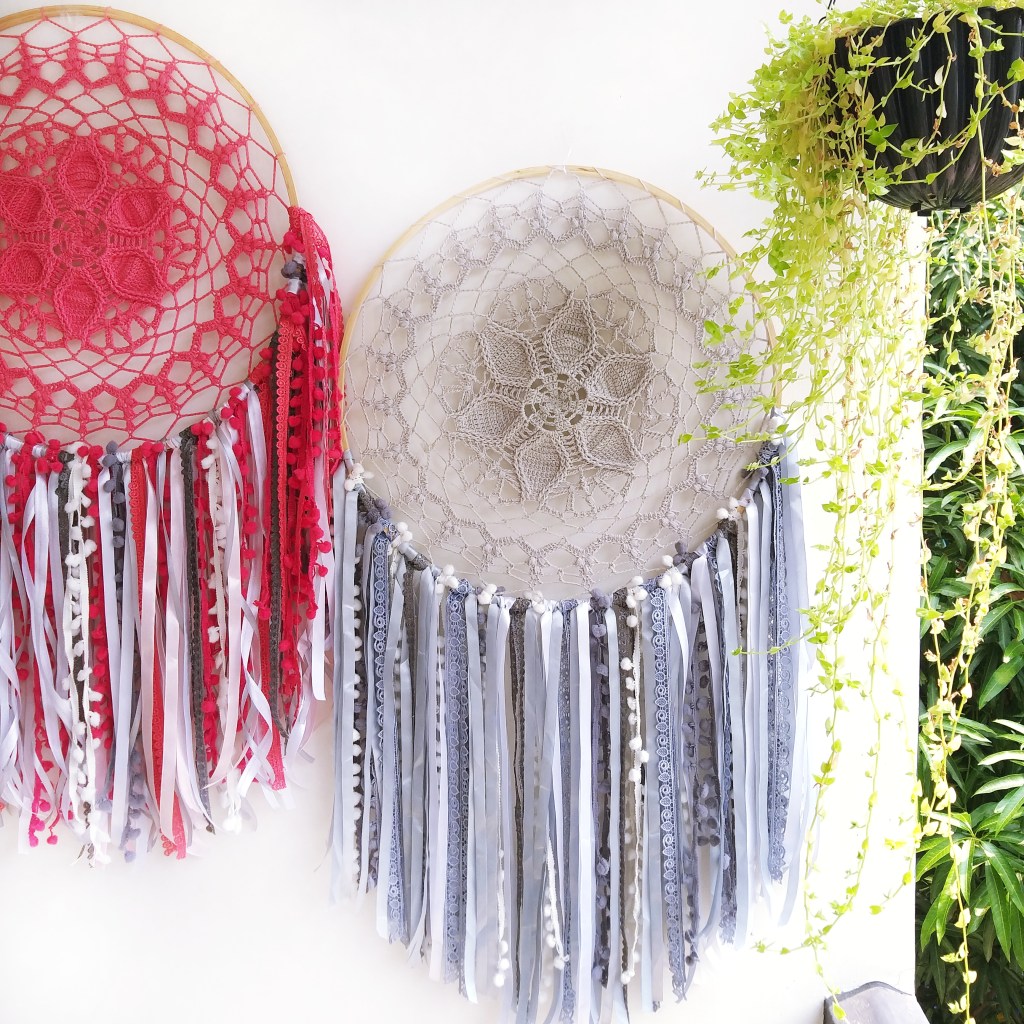
We have come to the end of the Dream Cal 2021 and now you all have a beautiful Dream Catcher to enhance the aesthetics of your favourite space.

Hope you all enjoyed making this with us. Please share your Photos and videos with Dream catcher and tag @indiayarn.circle and @naore_the_blot on Instagram and Facebook. Also use #dreamcal2021.

Please feel free to comment below with your queries and suggestions.

Community Activity, IYC

Dream CAL – WEEK 2 – Part 1, 2

And it’s kick off!!! We are so excited to start the Dream CAL and hope you have collected all the materials required for the same!

We will be listing down the material list again for you to get started in case you havent got it yet!

We shall be providing the Written instructions as well as video tutorial for the CAL and our entire team is available to answer your queries over here or over the IYC FACEBOOK group!

So Week 2 is split into 2 parts for the convinience of the video tutorial and working. Each part has a seperate video tutorial, and we hope it will definitely be helpful. Kindly go through the written pattern in detail, especially the key, special stitches and the notes!!!

Lets Get Started!!!

MATERIALS :

  1. 3ply Cotton Yarn , 170 metres yardage.
  2. Hook : 2.5 mm
  3. Hoop : 18” metal / wooden hoop
  4. Hangings can be anything of your choice, like Satin Ribbons, Pompom Laces, Cotton Laces, feathers, macramé cords, etc
  5. Scissors
  6. Measuring Tape

The sample is made with the following materials :

  1. Yarn : Gulera 3ply soft cotton (60gms approx) from Pradhan Embroidery Stores
  2. Hook : 2.5 mm
  3. Hoop : 18” wooden embroidery Hoop
  4. Hangings :
  5. White satin ribbon : 1 roll
  6. Grey satin ribbon : 3 roll
  7. White pompom lace : 12m
  8. Grey pompom lace : 6m
  9. Dark grey cotton lace : 6m
  10. Light grey cotton lace : 6m

KEY :

R : round

MC : magic circle

Ch : chain

Sk : skip

Sts : stitches

Sp : space

Yo : Yarn over

Slst : Slip stitch

Hdc : Half double crochet

Dc : Double crochet

Tc : Treble crochet

QrTr : Quadruple treble

PS : Puff stitch

Fpdc : Front post double crochet

FpHdc : Front post half double crochet

Bpdc : Back post double crochet

Dc2tog : Double crochet two together

DC3tog : Double crochet three together

SKILL  LEVEL

Intermediate

GAUGE :

3” X 3” Square is 18 Dc x 9 rows.

TERMINOLOGY :

The pattern is written in US terminology.

SIZING MEASUREMENTS :

The completed doily when pinned in shape to block will measure upto 18 incjes diameter.

SPECIAL STITCHES :

QRTR : Quadruple Treble : Yarn over 4 times, insert the hook into R12 chain space and pull through, (YO and pull though 2 loops) 5 times.

PS : Puff Stitch : (YO  insert the hook into the stitch, yarn over and pull up a loop through that stitch ) 5 times, YO pull through the first 10 loops on the hook and YO pull through last 2 loops and close the puff.

NOTES :

  1. Ch3 is considered as 1Dc in all rows.
  2. Slst at the end of each round is to close the round. So slip stitch into the third chain of the first Ch3 of the respective rounds or slip stitch to the starting Bpdc stitche of each round.
  3. Ch1 before the Bpdc is not considered as a stitch.
  4. The number (a) written at the end of each round, indicates the number of stitches in the round.
  5. Number mentioned before a stitch is the number of stitches in the same stitch, and number mentioned after with the “x” is the number of repeats in the consecutive stitches. Eg : 3Dc x2 means, do 3 Double crochet into the same stitch and again 3 Double crochet into the next stitch as well.

PATTERN :

PART 1:

R1 :    MC, Ch3, 11Dc, slst    (12)

R2 :    Ch3+1Dc, (Ch2, sk 1 st & 2Dc into the next) X5, Ch2, slst    (24)

R3 :    Ch3, 2Dc, (Ch3, sk Ch sp, 1Dc, 2Dc) X5, Ch3, slst    (36)

R4 :    Ch3, 1Dc, 2Dc, (Ch4, sk Ch sp, 1Dc, 1Dc, 2Dc) X5, Ch4, slst    (48)

R5 :    Ch6, (skip 2 sts, 1Dc, 5Dc in the Ch4 sp, 1Dc, Ch3) x5, 1Dc, 5Dc in Ch4 sp, slst     (60)

R6 :    Ch1, 1Bpdc, Ch3, (1Bpdc, 1Fpdc x2, 3Dc, 1Fpdc x2, 1Bpdc, Ch3) x5, 1Bpdc, 1Fpdc x 2, 3Dc,    1Fpdc x2, slst    (72)

R7 :    Ch1, 1Bpdc, Ch3, (1Bpdc, 1Fpdc x2, 1Dc, 3Dc, 1Dc, 1Fpdc x2, 1Bpdc, Ch3) x5, 1Bpdc, 1Fpdc x2, 1Dc, 3Dc, 1Dc, 1Fpdc x2, slst    (84)

R8 :    Ch1, 1Bpdc, Ch1, (1Bpdc, 1Fpdc x2, 1Dc, 2Dc, 3Dc, 2Dc, 1Dc, 1Fpdc x2, 1Bpdc, Ch1) x5, 1Bpdc, 1Fpdc x2, 1Dc, 2Dc, 3Dc, 2Dc, 1Dc, 1Fpdc x2, slst    (96)

R9 :    Ch1, 1Bpdc, Ch1, (1Bpdc, 1Fpdc x2, 1Dc x4, 3Dc, 1Dc x4, 1Fpdc x2, 1Bpdc, Ch1) x5, 1Bpdc, 1Fpdc x2, 1Dc x4, 3Dc, 1Dc x4, 1Fpdc x2, slst      (108)

R10 :   Ch1, 1Bpdc, Ch3, (1Bpdc, 1Fpdc x2, 1Dc x11, 1Fpdc x2, 1Bpdc, Ch3) x5, 1Bpdc, 1Fpdc x2, 1Dc x11, 1Fpdc x2, slst     (120)

R11 :   Ch1, 1Bpdc, Ch7, (1Bpdc, 1Fpdc x2, 1Dc2tog, 1Dc x7, 1Dc2tog, 1Fpdc x2, 1Bpdc, Ch7) x5, 1Bpdc, 1Fpdc x2, 1Dc2tog, 1Dc x7, 1Dc2tog, 1Fpdc x2, slst      (132)

CHECK OUT THE VIDEO TUTORIAL FOR THE PATTERN TILL HERE!

PART 2:

R12 :   Ch1, 1Bpdc, Ch5, 1Tc (into 2nd Ch of Ch3 of R10), Ch5, (1Bpdc, 1Fpdc x2, 1Dc2tog, 1Dc x5, 1Dc2tog, 1Fpdc x2, 1Bpdc, Ch5,  1TC (into R10 centre of CH3), Ch5) x5, 1Bpdc, 1Fpdc x2, 1Dc2tog, 1Dc x5, 1Dc2tog, 1Fpdc x2, slst    (144)

R13 :   Ch1, 1Bpdc, Ch7, 1Fpdc into the Tc, Ch7, (1Bpdc, 1Fpdc x2, 1Dc2tog, 1Dc x3, 1Dc2tog, 1Fpdc x2, 1Bpdc, Ch7,  1Fpdc into the Tc, ch7) x5, 1Bpdc, 1Fpdc x2, 1Dc2tog, 1Dc x3, 1Dc2tog, 1Fpdc x2, slst    (156)  

R14 :    Ch1, 1Bpdc, Ch9, 1Fpdc into the Fpdc, Ch9, (1Bpdc, 1Fpdc x2, 1Dc2tog, 1Dc, 1Dc2tog, 1Fpdc x2, 1Bpdc, Ch9,  1Fpdc (into the Fpdc), ch9) x5, 1Bpdc, 1Fpdc x2, 1Dc2tog, 1Dc, 1Dc2tog, 1Fpdc x2, slst    (168)

R15 :    Ch1, 1Bpdc, Ch11, 1Fpdc (into the Fpdc), Ch11, (1Bpdc, 1Fpdc x2, 1Dc3tog, 1Fpdc x2, 1Bpdc, Ch11,  1Fpdc (into the Fpdc), ch11) x5, 1Bpdc, 1Fpdc x2, 1Dc3tog, 1Fpdc x2, slst (180) 

R16 :    Ch1, 1Bpdc, Ch5, 1QrTr x2 into the Ch5 sp of R12, Ch5, 1PS into the Fpdc, Ch5, 1QrTr x2 into the Ch5 sp of R12, Ch5, (1Bpdc, 1Fpdc x2, 1Dc, 1Fpdc x2, 1Bpdc, Ch5, 1QrTr x2 into the Ch5 sp of R12, Ch5, 1PS into the Fpdc, Ch5, 1QrTr x2 into the Ch5 sp of R12, Ch5) x5, 1Bpdc, 1Fpdc, x2, 1Dc, 1Fpdc x2,  slst       (192)  

R17 :     Ch1, 1Bpdc, (1Hdc, Ch1) x2 & 1Hdc into the Ch5 sp, Ch2, sk the 2QrTr and (1Hdc, Ch1) x2 & 1Hdc into the Ch5 sp, 1FpHdc into the PS, , (1Hdc, Ch1) x2 & 1Hdc into the Ch5 sp, Ch2, sk the 2QrTr and (1Hdc, Ch1) x2 & 1Hdc into the Ch5 sp, (1Bpdc, 1Fpdc, Ch5, sk 3 sts, 1Fpdc, 1Bpdc, (1Hdc, Ch1) x2 & 1Hdc into the Ch5 sp, Ch2, sk the 2QrTr and (1Hdc, Ch1) x2 & 1Hdc into the Ch5 sp, 1FpHdc into the PS, , (1Hdc, Ch1) x2 & 1Hdc into the Ch5 sp, Ch2, sk the 2QrTr and (1Hdc, Ch1) x2 & 1Hdc into the Ch5 sp) x5, 1Bpdc, 1Fpdc, Ch5, sk 3 sts, 1Fpdc, Ch2, 1Tc into the first Bpdc to close the round.    (204)

R18 :    Ch1, 1Sc into the same sp, (Ch8, 1Sc into the Ch2 sp, Ch8, 1Sc into the FpHdc, Ch8, 1Sc into the Ch2 sp, Ch8, 1Sc into the Ch5 sp) x5, Ch8, 1Sc into the Ch2 sp, Ch8, 1Sc into the FpHdc, Ch8, 1Sc into the Ch2 sp, Ch8, slst into the first Sc.      (216)

R19 :   (slst into the Ch8 sp, Ch1) x3, 1Sc into the same sp, (Ch8, 1Sc into the Ch8 sp, Ch9, 1 Sc into the Ch8 sp) x11, Ch8, 1Sc into the Ch8 sp, Ch9, slst into the first Sc     (228)

Once you complete Round 19, it should measure 12 inches diameter when pinned like the way you do for blocking.

Check out the video tutorial for Part 2 – Round 12 to 19

We cannot wait to see your progress, so dont forget to tag us @indiayarn.circle , the designer noumin @naore_the_blot and use the hashtag #dreamcal2021

Please feel free to comment below with your queries and suggestions.

Community Activity, IYC

Dream CAL 2021!!

Hi everyone!!! 

Are you ready to register for our next CAL? We have completed our Summer Cal and Winter Cal, and now we are here with our DREAM CAL 2021, we will be making a dreamy dreamcatcher with Crochet doily as focus.

This crochet along will be hosted by Noumin aka naore_the_blot 

Interested???  Just scroll to the end of this post and Click the register button. This is to help us keep the logistics straight so that we can award the certificates to all of you who complete the CAL.

If you wish to keep the design as a doily, you may do so. If you can’t find a big hoop to attach the crochet piece, you can alter it to fit the hoop you can get. 

We will have weekly release of various parts and there will be written and video instructions for the same.

It’s totally doable!!! Come on , join in, what are you waiting for???

Materials required : 

1. Hoop – 18″ diameter is preferred. (12″ and above will be considered fit for the certificate) .

2. Yarn – 3 ply cotton yarn (3ply acrylic also works fine, but cotton is considered suitable for dreamcatchers) .

3. Hook – 2.5mm.

4. Hangings – Satin ribbon, pompom lace, cotton lace, feathers, macrame cords (anything of your choice)

 170 meters  yardage .. (The sample is made using 3ply soft cotton from pradhan 60gms approx. )

or you can use any yarn and hook which meets the gauge below:

Gauge :

18 DC X 9 Rows = 3″ X 3″ square

Yarn Options:

Please check gauge before deciding with any of the yarn below

  1. Gulera 3ply soft cotton
  2. Anchor 4057
  3. 3ply yarnkart cotton
  4. 3ply kotton
  5. Hobby India
  6. Bliss cotton
  7. White Rose cotton

Now that you are all set with all the information, click below to register!!!

Also do not forget to join our facebook group and follow us in instagram to be updated every step of the way!