Community Activity, IYC

Solitaire Mochila CAL 2021

Hello everyone!!

We are back with a new crochet along!! This one is going to be super fun and exciting!! We have an out of the normal, new technique and style of crochet this time and it is hosted by Rosy of MNHcrochetcreation!!

So what are we exploring this CAL?? Why ofcourse its Mochila crochet!!

Want to know how to participate and register Scroll to the end of the post!

Dont know what Mochila Crochet is or what to do in it?? Fear not, We are here along with Rosy to help, guide and explain everything about it!!

Before we dive into the details of the CAL lets first hear a little from our host – Rosiland Bakshi.

Hello,

My name is Rosy Bakshi short for Rosalind. Just a very small introduction about myself.

I am a mother of two. My son Mayank is 26 years old and daughter Hina is 18 years old. I work for an airline for the past 25 years.

I have always been very interested in handwork. It can be anything, whether it is any paper artwork like quilling, making envelops or gift bags or thread work like embroidery and cross stitch. I had no knowledge about knitting or crochet. I learnt crochet and knitting from YouTube in order to teach my daughter for her school project. That was 3 years back. My family members and close friends saw my work and encouraged me to start this work professionally. Without thinking too much about the success of my work, I created a Facebook page on 8th March (Women’s Day) and named it after my children M & H Crochet Creation.

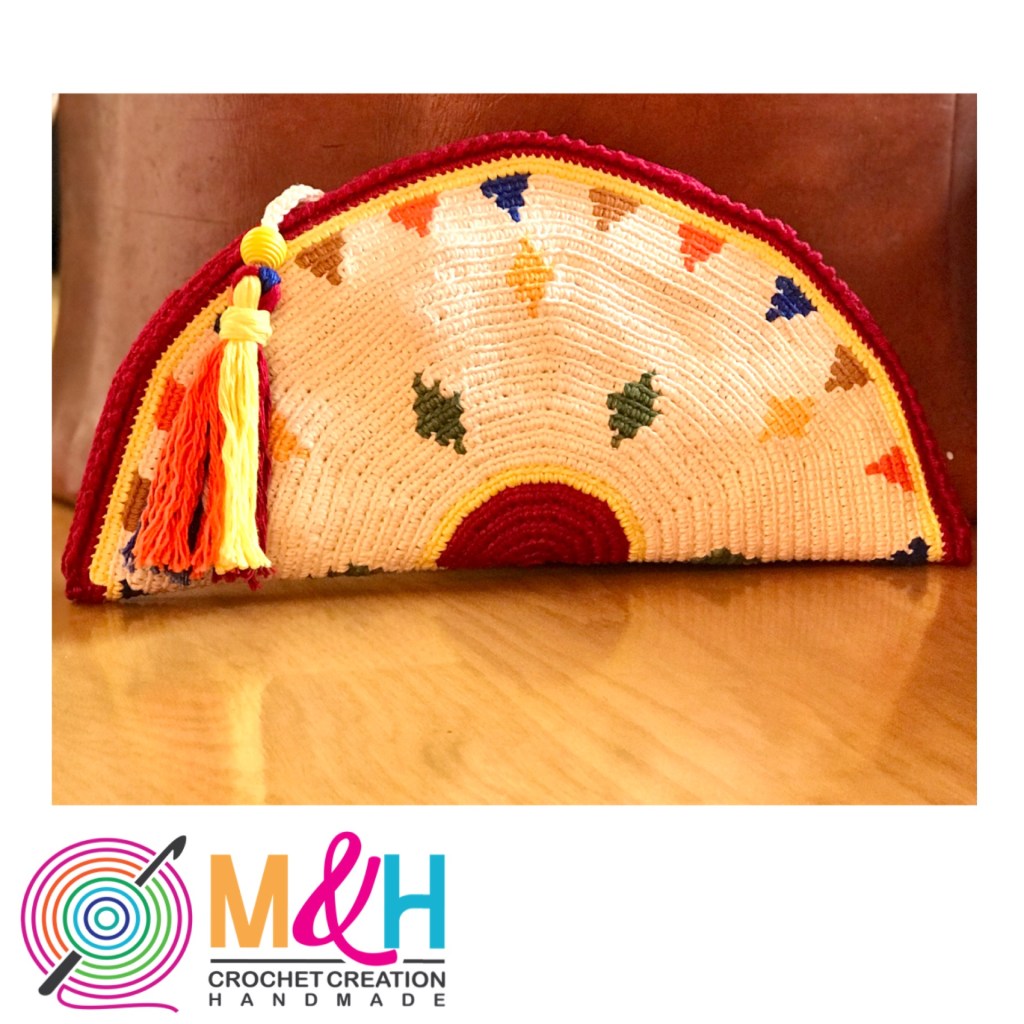
I love colours so whenever I see any Crochet work with lots of colours, I immediately get very fascinated by it. I came across Mochila work 3 years back and wanted to try it but was very intimidated by the complicated designs and beautiful work created by so many artists as I was a beginner then. It took me 2 years to finally try it and all thanks to Marion Verloop and her weekly CAL (Crochet along) that I was able to learn (very slowly). I am yet to master this art completely, hence, I should be the last person to take up a CAL for Indiayarncirle group, but having said that, I also believe that its better to share whatever I know about this beautiful art with everyone rather than do nothing at all. Besides, Indiayarncircle’s main objective is to help others learn all kinds of yarn related art. I managed to create a simple Mochila Clutch pattern so that everyone can start with a simple and small pattern before venturing out to try bigger projects. My Solitaire Mochila Clutch pattern is coming your way soon.

History of Wayuu Mochila Crochet:

Mochila is a Spanish word which meant “backpack” 

WayĂşu are best known for the beautiful and colourful crochet textiles created by women. They even have a popular saying: “To be a woman is to know how to weave.” 

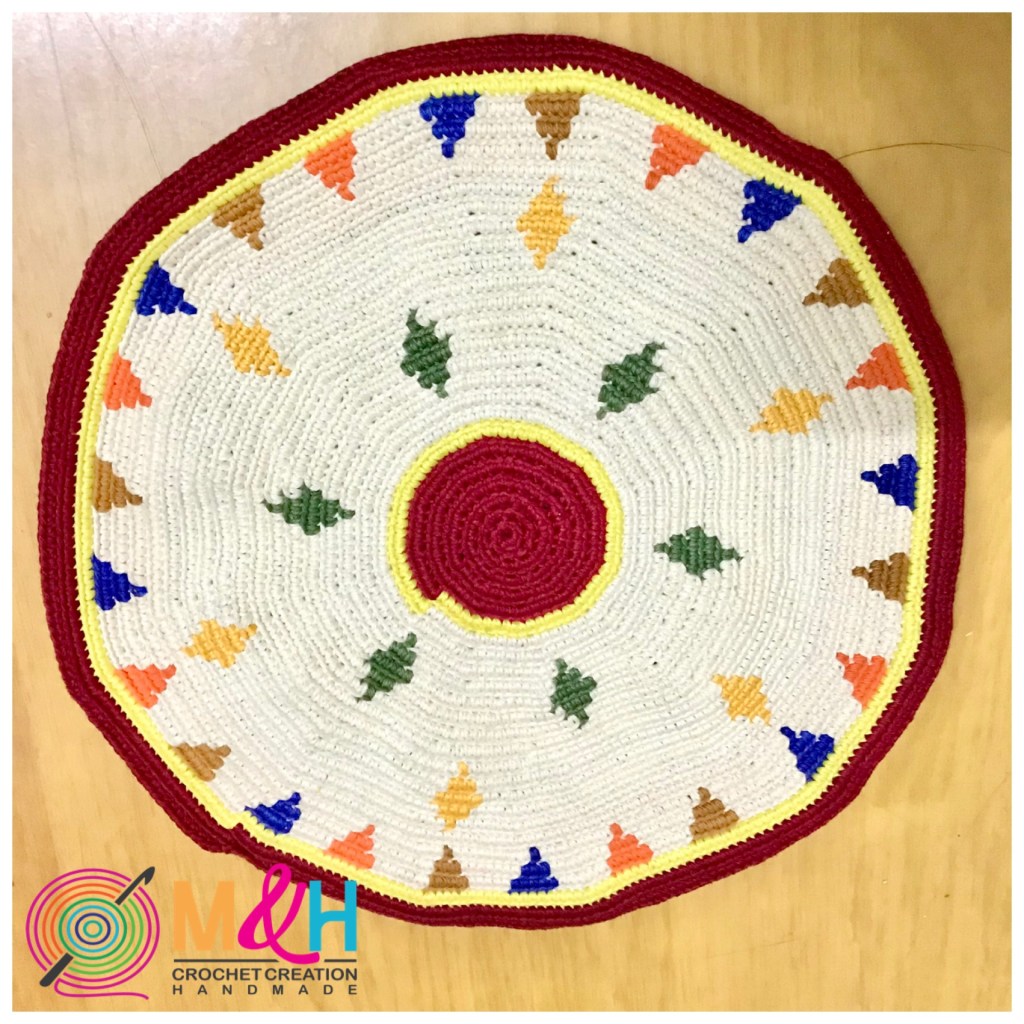
The most common woven creations are the mochilas, small bags, made of colourful yarn with intricate patterns and motifs. Through the motifs, the weaver shares their cosmological view of the universe, and their traditions. The techniques are passed from generation to generation of women, making it one of the primary traditional aspects of the tribe, included as a rite of passage. Mochilas, chinchorros (hammocks), and other woven creations, have become a means of economical income for Wayuu women who sell them to tourists or people outside their tribe. The mochilas have raised awareness of the tribe, as well as the critical conditions they face.

If you have ever travelled to the Caribbean, you may see Mochilas on exhibit in vendors and most of you will recognize they are not like a cheap purse. 

What Is Wayuu Crochet?

If you have ever done tapestry crochet, you have partially trained already. Primarily single crochet, but you can use other stitches too, you carry the unused yarn strands under the working stitches. So, there are no bobbins associated with colour switching. As you need to change colour, you need to pull up the colour you need and place the existing colour under the next stitch.

Wayuu Crochet is not a quick going process. It is slow going and intricate. The end results are second to none. It can take 2 weeks up to one full month for a person to weave a single bag depending on the complexity of the design and skill of the weaver. Weaving these bags takes great dedication from these Wayuu women and really shows how devoted they are to their craft! Today, the Wayuu bags are a crucial part of the Wayuu economy and means for financial support, which enables them to preserve their culture, traditions, and way of life.

Mochila art is similar to tapestry. Difference between them is:

  • In Mochila single crochet is done only at the back loop whereas in tapestry you do a full single crochet.
  • Also, if you have ever submitted your work at Marion’s Facebook group, you will promptly be corrected by her saying “keep your stitches small and tight” the reason for this is that all the yarns you carry is well hidden. In tapestry you can keep your stitches close but it’s not something that you have to be particular about.

How to understand Mochila techniques?

Please do watch all the Tutorials hosted by Marion Verloop. English is not Marion’s first language but she does an excellent job for us to understand her. We will be putting up all the links along with our weekly pattern so that it’s easy for all of you to understand. 

Now lets check out the material list. Since the quantities are lesser you could dive into your own stash and scraps to work on this project!

Level

Easy/ Beginner

Material List

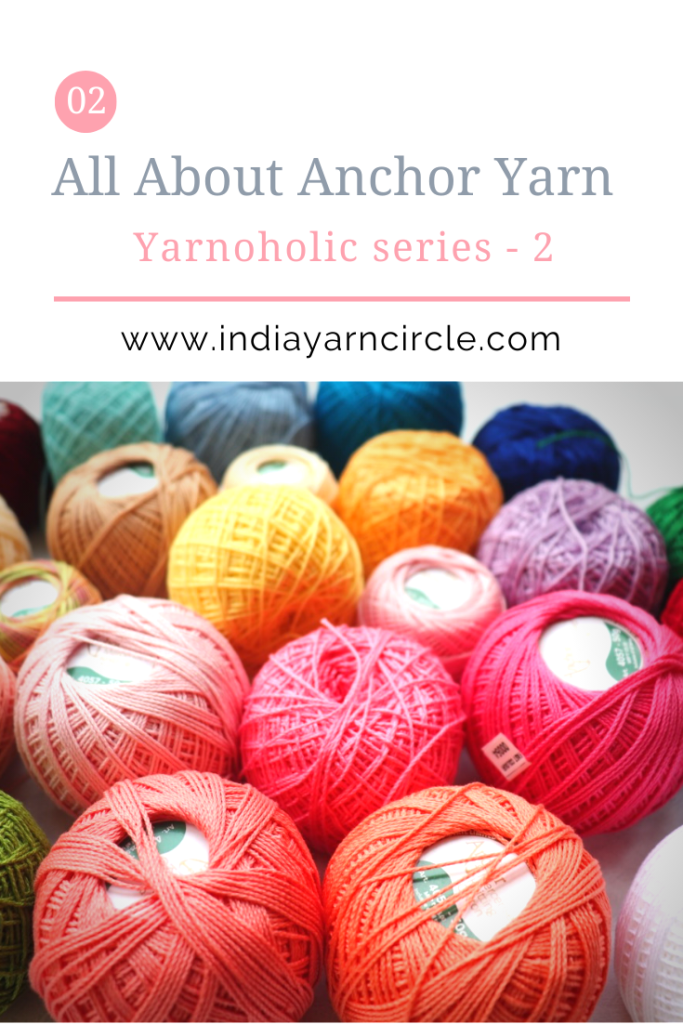
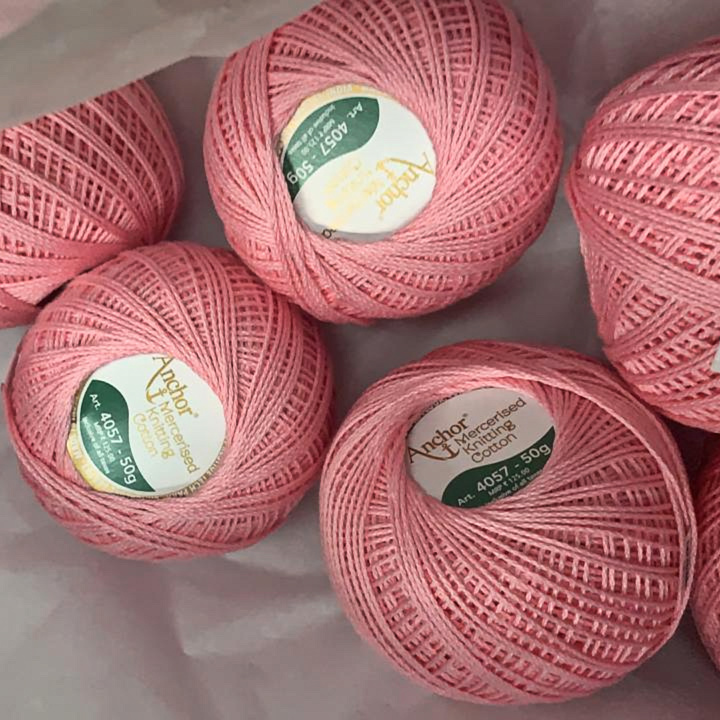
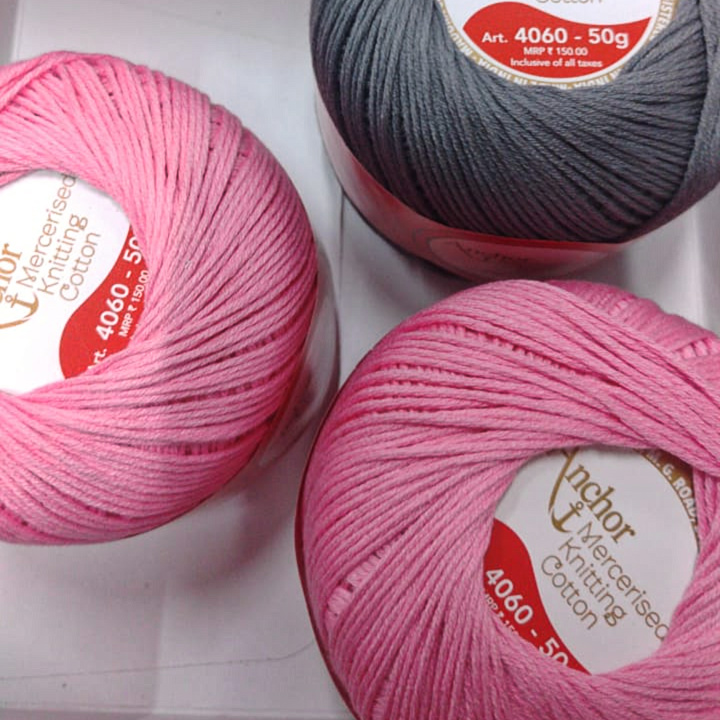
Mercerized Cotton Yarn. (I am using White Rose Cotton Yarn from Crochet Bella. You can use Laura Yarn, Gulera 4 Ply, Anchor 4060, Kotton 4 ply from Magic Needles, Mercerized Cotton yarn from Yarnkart.

Scissor

Zip for Bag – 18/20 cm

Lining Material (optional)

Hook Size

2mm

It is extremely important that you do not use hook size bigger than 2.5mm because you will want to keep your stitches close and tight.

Colours and Yardage

COLOUR A      –            30 gm

COLOUR B      –            30 gm

COLOUR C      –            75 gm

COLOUR D      –            15 gm

COLOUR E       –            15 gm

COLOUR F       –            20 gm

COLOUR G      –            20 gm

COLOUR H      –            20 gm

Note: The above colour index is just an example. The project uses 8 colours but you can use 4 to 5 colours too. Please use your imagination and use any colour combination of your choice.

Schedule of the CAL

We will start the Solitaire Mochila Clutch CAL on the 10th of May, 2021. The first week is for Registration and material gathering.

Week 1              –            17th May,2021

Week 2               –            31st May,2021

Week 3               –            7th June Submission of Complete Bag pictures to indiayarncircle@gmail.com

How to Participate:

Register yourself on the page below

Join our facebook group!

Follow us on instagram for all the updates!

Use the hashtag #mochilacal2021 #solitairemochilacal and tag us @indiayarn.circle and @mnhcrochetcreation.

Community Activity, IYC

Dream CAL 2021 – Week 3

Time is surely flying by!! February is done and we are already into week 3 of the Dream CAL now!

Are you as excited as we are? Have you started you cal yet?

If not you can check out the week 2 instructions HERE to get you started. You can also share your Progress pictures on our facebook group or post it on instagram, tag us @indiayarn.circle , the designer @naore_the_blot and use the hastag #dreamcal2021

We have seen quite a few gorgeous versions being posted and we cannot wait to see them finished.

Wondering where all this is happeneing? Join our facebook group and follow us on instagram to see all crafty things.

Week 3 is going to be fun, as we complete our doily, block it and learn how to attach it to the ring and see our dreamcatcher finally taking shape.

We have a few additions to the notes for the pattern, hence we are listing it down again.

For all the instructions and video tutorial from the start till Row 19 check out our previous blog post HERE.

PATTERN:

NOTES :

  1. Ch3 is considered as 1Dc in all rows.
  2. Slst at the end of each round is to close the round. So slip stitch into the third chain of the first Ch3 of the respective rounds or slip stitch to the starting Bpdc stitch of each round.
  3. Ch1 before the Bpdc is not considered as a stitch.
  4. The number (a) written at the end of each round, indicates the number of stitches in the round.
  5. Number mentioned before a stitch is the number of stitches in the same stitch, and number mentioned after with the “x” is the number of repeats in the consecutive stitches. Eg : 3Dc x2 means, do 3 Double crochet into the same stitch and again 3 Double crochet into the next stitch as well.
  6. (Sl+ch1) y times is used to reach to the centre of chain space and is not considered as a stitch in the total no of stitches.
  7. Chains in between stitches is considered as a stitch in the total count.

INSTRUCTIONS:

R20 :   (slst into the Ch sp, Ch1) x2, 1Sc into the same sp, (Ch9, 1Sc into the next Ch sp) x23, Ch9, slst into the first Sc     (240)

R21 :   Ch1, 1Sc into the same sp, (10Dc into the Ch sp, 1Sc into the previous SC st) x23, 10Dc into the Ch sp, slst into the first Sc         (264)

R22 :   slst  x5 into the next 5 sts, Ch3, 1PS & 1Dc into the same st,1Dc, 1PS & 1Dc into the next st, {Ch5, sk  9 sts and (1Dc, 1PS & 1DC) x2 } x23, Ch5, slst into the first Sc    (264)

R23 :    slst x3 into the next 3 sts, Ch3, 1PS & 1Dc into the same st, (Ch4, 1Sc into the Ch sp, Ch4, sk 3 sts and 1Dc, 1PS, 1Dc into into the sp between the 2 Dc ) x23, Ch4, 1Sc into the Ch sp, Ch4, slst into the third Ch of the first Ch3   (288)

R24 :    slst x1 into the next st, Ch3 & 2Dc into the same st, (Ch4, 1Fpdc through the previous Sc, Ch4, 3Dc into previous PS) x23, Ch4, 1Fpdc through the previous Sc, Ch4, sl into the third Ch of the first Ch3            (288)

R25 :    slst, Ch1, 1Sc into the same st, (Ch12, 1Sc into the 2nd Dc of the 3Dc of previous round) x 23, Ch12, Slst into the first Sc, Ch1 and cut the yarn. Weave in the end  (312)

This completes the Doily for Dream Cal 2021. When you pin it down the way you do for blocking, it will measure up to 18”. If you are using a smaller hoop for the dream catcher, stop the Doily accordingly a few rounds before Round 25.

How to attach  the Doily to the Hoop

Cut 24 small pieces of the same yarn measuring around 6inches (Choose a length convenient for you to hold and tie) . Tie the 12Ch sp to the Hoop using these small yarn pieces. Make 3 to 4 knots to secure. Cut the excess and make the knotted portion behind the hoop and further secure with an adhesive. (adhesive is optional). This method and a totally different method is explained in detail in the part 03 video attached.

How to attach the Hangings

The length of the hangings can be your personal choice. The length used for the sample  is same as that of the diameter of the Hoop used, ie, 18 inches. The hangings are folded into two and then we make a knot through the hoop. Hence the length of each hanging to be approx 38 inches. (18 inches +18 inches + 2 inches extra for tying the knot) Fold the lace into two and place it beneath the hoop and take it over the hoop. Take the tail portion through the inside of the fold and tighten it by pulling the tail portion.

After hanging all the Laces, trim the bottom portion into a “V” shape. 

You can check out the video tutorial for the same below:

We have come to the end of the Dream Cal 2021 and now you all have a beautiful Dream Catcher to enhance the aesthetics of your favourite space.

Hope you all enjoyed making this with us. Please share your Photos and videos with Dream catcher and tag @indiayarn.circle and @naore_the_blot on Instagram and Facebook. Also use #dreamcal2021.

Please feel free to comment below with your queries and suggestions.

Community Activity, IYC

Dream CAL – WEEK 2 – Part 1, 2

And it’s kick off!!! We are so excited to start the Dream CAL and hope you have collected all the materials required for the same!

We will be listing down the material list again for you to get started in case you havent got it yet!

We shall be providing the Written instructions as well as video tutorial for the CAL and our entire team is available to answer your queries over here or over the IYC FACEBOOK group!

So Week 2 is split into 2 parts for the convinience of the video tutorial and working. Each part has a seperate video tutorial, and we hope it will definitely be helpful. Kindly go through the written pattern in detail, especially the key, special stitches and the notes!!!

Lets Get Started!!!

MATERIALS :

  1. 3ply Cotton Yarn , 170 metres yardage.
  2. Hook : 2.5 mm
  3. Hoop : 18” metal / wooden hoop
  4. Hangings can be anything of your choice, like Satin Ribbons, Pompom Laces, Cotton Laces, feathers, macramé cords, etc
  5. Scissors
  6. Measuring Tape

The sample is made with the following materials :

  1. Yarn : Gulera 3ply soft cotton (60gms approx) from Pradhan Embroidery Stores
  2. Hook : 2.5 mm
  3. Hoop : 18” wooden embroidery Hoop
  4. Hangings :
  5. White satin ribbon : 1 roll
  6. Grey satin ribbon : 3 roll
  7. White pompom lace : 12m
  8. Grey pompom lace : 6m
  9. Dark grey cotton lace : 6m
  10. Light grey cotton lace : 6m

KEY :

R : round

MC : magic circle

Ch : chain

Sk : skip

Sts : stitches

Sp : space

Yo : Yarn over

Slst : Slip stitch

Hdc : Half double crochet

Dc : Double crochet

Tc : Treble crochet

QrTr : Quadruple treble

PS : Puff stitch

Fpdc : Front post double crochet

FpHdc : Front post half double crochet

Bpdc : Back post double crochet

Dc2tog : Double crochet two together

DC3tog : Double crochet three together

SKILL  LEVEL

Intermediate

GAUGE :

3” X 3” Square is 18 Dc x 9 rows.

TERMINOLOGY :

The pattern is written in US terminology.

SIZING MEASUREMENTS :

The completed doily when pinned in shape to block will measure upto 18 incjes diameter.

SPECIAL STITCHES :

QRTR : Quadruple Treble : Yarn over 4 times, insert the hook into R12 chain space and pull through, (YO and pull though 2 loops) 5 times.

PS : Puff Stitch : (YO  insert the hook into the stitch, yarn over and pull up a loop through that stitch ) 5 times, YO pull through the first 10 loops on the hook and YO pull through last 2 loops and close the puff.

NOTES :

  1. Ch3 is considered as 1Dc in all rows.
  2. Slst at the end of each round is to close the round. So slip stitch into the third chain of the first Ch3 of the respective rounds or slip stitch to the starting Bpdc stitche of each round.
  3. Ch1 before the Bpdc is not considered as a stitch.
  4. The number (a) written at the end of each round, indicates the number of stitches in the round.
  5. Number mentioned before a stitch is the number of stitches in the same stitch, and number mentioned after with the “x” is the number of repeats in the consecutive stitches. Eg : 3Dc x2 means, do 3 Double crochet into the same stitch and again 3 Double crochet into the next stitch as well.

PATTERN :

PART 1:

R1 :    MC, Ch3, 11Dc, slst    (12)

R2 :    Ch3+1Dc, (Ch2, sk 1 st & 2Dc into the next) X5, Ch2, slst    (24)

R3 :    Ch3, 2Dc, (Ch3, sk Ch sp, 1Dc, 2Dc) X5, Ch3, slst    (36)

R4 :    Ch3, 1Dc, 2Dc, (Ch4, sk Ch sp, 1Dc, 1Dc, 2Dc) X5, Ch4, slst    (48)

R5 :    Ch6, (skip 2 sts, 1Dc, 5Dc in the Ch4 sp, 1Dc, Ch3) x5, 1Dc, 5Dc in Ch4 sp, slst     (60)

R6 :    Ch1, 1Bpdc, Ch3, (1Bpdc, 1Fpdc x2, 3Dc, 1Fpdc x2, 1Bpdc, Ch3) x5, 1Bpdc, 1Fpdc x 2, 3Dc,    1Fpdc x2, slst    (72)

R7 :    Ch1, 1Bpdc, Ch3, (1Bpdc, 1Fpdc x2, 1Dc, 3Dc, 1Dc, 1Fpdc x2, 1Bpdc, Ch3) x5, 1Bpdc, 1Fpdc x2, 1Dc, 3Dc, 1Dc, 1Fpdc x2, slst    (84)

R8 :    Ch1, 1Bpdc, Ch1, (1Bpdc, 1Fpdc x2, 1Dc, 2Dc, 3Dc, 2Dc, 1Dc, 1Fpdc x2, 1Bpdc, Ch1) x5, 1Bpdc, 1Fpdc x2, 1Dc, 2Dc, 3Dc, 2Dc, 1Dc, 1Fpdc x2, slst    (96)

R9 :    Ch1, 1Bpdc, Ch1, (1Bpdc, 1Fpdc x2, 1Dc x4, 3Dc, 1Dc x4, 1Fpdc x2, 1Bpdc, Ch1) x5, 1Bpdc, 1Fpdc x2, 1Dc x4, 3Dc, 1Dc x4, 1Fpdc x2, slst      (108)

R10 :   Ch1, 1Bpdc, Ch3, (1Bpdc, 1Fpdc x2, 1Dc x11, 1Fpdc x2, 1Bpdc, Ch3) x5, 1Bpdc, 1Fpdc x2, 1Dc x11, 1Fpdc x2, slst     (120)

R11 :   Ch1, 1Bpdc, Ch7, (1Bpdc, 1Fpdc x2, 1Dc2tog, 1Dc x7, 1Dc2tog, 1Fpdc x2, 1Bpdc, Ch7) x5, 1Bpdc, 1Fpdc x2, 1Dc2tog, 1Dc x7, 1Dc2tog, 1Fpdc x2, slst      (132)

CHECK OUT THE VIDEO TUTORIAL FOR THE PATTERN TILL HERE!

PART 2:

R12 :   Ch1, 1Bpdc, Ch5, 1Tc (into 2nd Ch of Ch3 of R10), Ch5, (1Bpdc, 1Fpdc x2, 1Dc2tog, 1Dc x5, 1Dc2tog, 1Fpdc x2, 1Bpdc, Ch5,  1TC (into R10 centre of CH3), Ch5) x5, 1Bpdc, 1Fpdc x2, 1Dc2tog, 1Dc x5, 1Dc2tog, 1Fpdc x2, slst    (144)

R13 :   Ch1, 1Bpdc, Ch7, 1Fpdc into the Tc, Ch7, (1Bpdc, 1Fpdc x2, 1Dc2tog, 1Dc x3, 1Dc2tog, 1Fpdc x2, 1Bpdc, Ch7,  1Fpdc into the Tc, ch7) x5, 1Bpdc, 1Fpdc x2, 1Dc2tog, 1Dc x3, 1Dc2tog, 1Fpdc x2, slst    (156)  

R14 :    Ch1, 1Bpdc, Ch9, 1Fpdc into the Fpdc, Ch9, (1Bpdc, 1Fpdc x2, 1Dc2tog, 1Dc, 1Dc2tog, 1Fpdc x2, 1Bpdc, Ch9,  1Fpdc (into the Fpdc), ch9) x5, 1Bpdc, 1Fpdc x2, 1Dc2tog, 1Dc, 1Dc2tog, 1Fpdc x2, slst    (168)

R15 :    Ch1, 1Bpdc, Ch11, 1Fpdc (into the Fpdc), Ch11, (1Bpdc, 1Fpdc x2, 1Dc3tog, 1Fpdc x2, 1Bpdc, Ch11,  1Fpdc (into the Fpdc), ch11) x5, 1Bpdc, 1Fpdc x2, 1Dc3tog, 1Fpdc x2, slst (180) 

R16 :    Ch1, 1Bpdc, Ch5, 1QrTr x2 into the Ch5 sp of R12, Ch5, 1PS into the Fpdc, Ch5, 1QrTr x2 into the Ch5 sp of R12, Ch5, (1Bpdc, 1Fpdc x2, 1Dc, 1Fpdc x2, 1Bpdc, Ch5, 1QrTr x2 into the Ch5 sp of R12, Ch5, 1PS into the Fpdc, Ch5, 1QrTr x2 into the Ch5 sp of R12, Ch5) x5, 1Bpdc, 1Fpdc, x2, 1Dc, 1Fpdc x2,  slst       (192)  

R17 :     Ch1, 1Bpdc, (1Hdc, Ch1) x2 & 1Hdc into the Ch5 sp, Ch2, sk the 2QrTr and (1Hdc, Ch1) x2 & 1Hdc into the Ch5 sp, 1FpHdc into the PS, , (1Hdc, Ch1) x2 & 1Hdc into the Ch5 sp, Ch2, sk the 2QrTr and (1Hdc, Ch1) x2 & 1Hdc into the Ch5 sp, (1Bpdc, 1Fpdc, Ch5, sk 3 sts, 1Fpdc, 1Bpdc, (1Hdc, Ch1) x2 & 1Hdc into the Ch5 sp, Ch2, sk the 2QrTr and (1Hdc, Ch1) x2 & 1Hdc into the Ch5 sp, 1FpHdc into the PS, , (1Hdc, Ch1) x2 & 1Hdc into the Ch5 sp, Ch2, sk the 2QrTr and (1Hdc, Ch1) x2 & 1Hdc into the Ch5 sp) x5, 1Bpdc, 1Fpdc, Ch5, sk 3 sts, 1Fpdc, Ch2, 1Tc into the first Bpdc to close the round.    (204)

R18 :    Ch1, 1Sc into the same sp, (Ch8, 1Sc into the Ch2 sp, Ch8, 1Sc into the FpHdc, Ch8, 1Sc into the Ch2 sp, Ch8, 1Sc into the Ch5 sp) x5, Ch8, 1Sc into the Ch2 sp, Ch8, 1Sc into the FpHdc, Ch8, 1Sc into the Ch2 sp, Ch8, slst into the first Sc.      (216)

R19 :   (slst into the Ch8 sp, Ch1) x3, 1Sc into the same sp, (Ch8, 1Sc into the Ch8 sp, Ch9, 1 Sc into the Ch8 sp) x11, Ch8, 1Sc into the Ch8 sp, Ch9, slst into the first Sc     (228)

Once you complete Round 19, it should measure 12 inches diameter when pinned like the way you do for blocking.

Check out the video tutorial for Part 2 – Round 12 to 19

We cannot wait to see your progress, so dont forget to tag us @indiayarn.circle , the designer noumin @naore_the_blot and use the hashtag #dreamcal2021

Please feel free to comment below with your queries and suggestions.

Community Activity

Final Rows of Pax Shawl and Blocking tips

We have successfully completed the two charts of pax shawlette and are at the very end of the pattern. Many have already  completed the whole shawlette and we are very happy to see their finished objects.

The following is the explanation of the last two rows in simple English.

After completing chart B, you should have finished with one row of single crochet. You should have 451 sc.

Picot edging

Here the designer has designed the picot as (sc, ch2, sc) to be worked  in the specified stitch.

Ch1, picot in the first stitch ( that is you make sc, ch2, sc in the same stitch), 1 single crochet in each of the next 4 stitches,  picot, 1 sc in one each of next 2 sts, picot, 1 sc in one each of next 2 sts, picot, [1 sc in each of the next 8 stitches,  picot, 1 sc in one each of next 2 sts, picot, 1 sc in one each of next 2 sts, picot]

Repeat the instructions in the square bracket till you reach the last 4 stitches. 1 sc on each of the next 3 stitches, picot in the last stitch. Fasten off. Weave in the ends.

You can watch the video here for better understanding:

 Ta da ! You are done! Give yourself a pat of the back for a job well done!

The next step is blocking.

For this step you will need , a sink or tub to hold, cold water, mild soap, towels, t pins, foam boards, steam iron or hair dryer

Blocking refers to the process of washing and pinning the finished product to the desired dimensions. The blocking technique varies for the type of material used.

For acrylic you will gently wash the handcrafted piece in cold water and mild detergent. A few drops of the handwash soap or mild shampoo will do the trick. Rinse in water till the soap suds are removed. Do not wring( twist) the project to remove excess water. Squeeze out as much water as you can.

The project will become heavy with all the water it has absorbed.

Now roll the piece in a thick towel. Use two towels if there is a lot of water to be removed.

Arrange foam sheets ( or if you have a spare bed you can use that) and cover it with two to three layers of towel. Spread your finished project out and carefully shape  the project with your hands to the desired shape.

You will now take your t-pins and pin the points you want to be stretched. Usually one places the t-pins on the picots .

After you have adjusted the project to the shape you desire, you can leave it to air dry.

Once again if the material is acrylic, you can use steam to kill the fibres. This means that once the lace stitches open up you do not have to keep blocking everytime you wash.

Plug in the steam iron and use the steam to block acrylic. You should not place the iron box on the crochet piece. You should hover the iron box over the project a few inches at a time. Slowly move the iron box so that the entire shawl is blocked.

Leave it to air dry and once it’s done, remove the pins and take pictures, model it if it’s a wearable and show it off. Sit back and wait for compliments to flow your way!!

If you have used cotton , same principle but you can use starch to make your fo to have a crisp look.

For silk do not wash in water. Instead use a spray bottle and spray water to moisten the crochet / knit piece.

Then pin and let dry.

For wool if it says superwash then you can wash it and follow the same principle as acrylic. For non superwash wool , care must be taken to not agitate the fo as it will cause the wool fibres to fuse and felt.

Then pin and let dry.

You can check out the video below to understand blocking better:

Waiting eagerly to see all the FOs.

Good luck!

Community Activity

Week 3 – Summer Fashion CAL with The JuJu Scarf.

Week 3 is here!! And time is surely flying fast!! We are sure all of you are on your start to making beautiful versions of The JuJu Scarf!!

If you have made it this far then pat yourself on the back and a big congratualtions!!! you have made it through the quirks of the pattern and completed 60% of the scarf!!!

Way to go!!!!

so, Last week we saw the start of the scarf pattern, We started with our gauge swatch and foundation Single Crochet. We learnt how to decrease the pattern to create the triangular shape and also learnt how to add beads to the corners of the clusters. So many new fun things to learn!!!

Our Designer Divya Bhat of Stringtierey went live on our facebook group explaining how to reada pattern and also adressing your questions and queries!! You can join our Facebook group and watch these very informative lives and be part of the cal!!

For week 3, we are going to continue on the pattern and start the last part of the decrease. in this week we will learn how to decrease by single clusters on each side and how to finish the last row!! Yes your heard that right, the last row!!

But the work doesnt end here and we learn all about finishing, tassle making and blocking in the last and final week of the CAL!!

Leave us your questions and queries in comments below and join the facebook group to get in on all the details and the giveaway for this week!!!

Community Activity

Week 2 – Summer Fashion cal 2020 with The JuJu Scarf

Welcome to Week 2 of the cal!!!

We are sure you guys have all got your materials by now and are all super excited to begin!!

Week 2 is the actual start of the CAL and the pattern will be shared to everyone who has registered for the cal, via email. Once you get the email, download your pattern and you are all good to go!!

Week 2 is all about taking it slow, reading all the instructions, and going step by step as per the pattern. Our Designer Divya Bhat will be availble on our facebook group to answer all the questions and queries’ . She will also be going Live on the IndiaYarnCircle Facebook group to answer all your queries and address your issues. So do look out for that!!!!

The cal is happening on the IndiaYarnCircle Facebook group. So do Join the group below.

You can also leave your queries and questions here if you need.

Yarnoholic Series

All About Anchor Yarn – IYC gets Anchored

Anyone who wants to indulge in yarncrafts would go to a kangan store or shop  next door and pick up Anchor yarns and this is the impression Anchor has left in our minds. While Anchor leaves us with these distinct memories, they have been a go to brand for many of our yarn crafts ranging from embroidery, crochet, knitting , tatting, string art and many more forms of yarn crafts.

In this blog post we are going into a little detail about the yarns from Anchor.

Pin It Now! Read It Later!

Click on Image to Pin it!

YOU CAN ALSO WATCH OUR VIDEO EXPLAINING THE DIFFERENT ANCHOR YARNS

1. Anchor Stranded Cotton Skeins – Art4625

A spectrum that would compare a rainbow, Anchor stranded cotton skein is the most well-known premium hand embroidery thread all over the world. A superior 6-strand thread, made from the best Egyptian cotton is ideal for all forms of embroidery. Available in single and multicolor.

Ideal for – all types of hand embroidery – Free style & Counted thread embroidery

Key features –

  • Imported Egyptian cotton fiber
  • Long staple cotton – superior strength
  • Double Mercerized – Superior luster & strength
  • Extensive shade range

Packaging – 25, 8meter skeins to a box

2. Anchor Mercer Crochet Cotton – Art4054

Anchor Mercer Crochet cotton is available in two thicknesses – Ticket 20 & Ticket 40 (ticket 20 is thicker than ticket 40). Being mercerized, these threads are a little stiff and can be used very strikingly to give a lacy feel.

Ideal for – all types of Lace crafts like Crochet, Tatting, Knitting and Hairpin lace.

Key features –

  • Imported Egyptian cotton fiber
  • Long staple cotton – superior strength
  • Double Mercerized – Superior luster & strength

Packaging – 10, 20gram balls to a box

3. Anchor Mercer Pearl Cotton – Art4591

Anchor Mercer Pearl cotton, is a versatile soft thread with a pearly sheen on it. This gives your work an extra glossy effect. 

Ideal for – all types of hand embroidery – Free style & Counted thread, and Lace crafts like Crochet & Knitting.

Key features –

  • Imported Egyptian cotton fiber
  • Long staple cotton – superior strength
  • Double Mercerized – Superior luster & strength

Packaging – 10, 10gram balls to a box

4. Anchor Mercer Knitting Cotton – Art4057

Anchor Mercer Knitting cotton, as the name implies is used for knitting, as well as Crochet and chunky Tatting. It is also used embroidery and soft toy making.  Available in single and multicolor.

Ideal for – all types of Lace crafts like Knitting & Crochet. Also used for different kinds of hand embroidery – Free style & Counted thread

Key features –

  • Imported Egyptian cotton fiber
  • Long staple cotton – superior strength
  • Double Mercerized – Superior luster & strength

Packaging – 10, 50gram balls to a box

5. Anchor Mercer Knitting Cotton – Art4060

This is a versatile thread that is soft and lustrous. It is strong and flexible and used for Home furnishings apart from embroidery and lace crafts. 

Ideal for – all types of Lace crafts like Knitting, Crochet & Macramé. Also used for different kinds of hand embroidery – Free style & Counted thread

Key features –

  • Imported Egyptian cotton fiber
  • Long staple cotton – superior strength
  • Double Mercerized – Superior luster & strength

Packaging – 4, 50gram balls to a box

WHERE TO BUY –

Instore –

Options are umpteen , look around any craft supply stores and you are most definite to be offered anchor yarns

Online –

Coats India : http://shop.coatscrafts.in/

Pradhan Embroidery Store

Pony Craft Store

Don’t forget to ask for shade cards  to pick the right colors for your project !

We hope that we were able to help you with deciding the right Anchor Yarn for your projects. Leave us a comment or note if you like to know more about Anchor Yarns.

All images are copyright of IndiaYarnCircle, unless otherwise mentioned. You can read our disclaimer policy here.