Hello Everyone!! How are you guys doing?
We hope you all enjoyed making the Solitaire Mochila CAL by Rosy of @mnhcrochetcreation and we loved seeing all your entries for that CAL! Check out the final makes of all the participants HERE!
We are back with a brand new CAL and this one is going to blow your minds!
Designed by the very talented Ashita Javeri of @handmadeby_ashita especially only for this CAL, the Sunburst Diamond Mochila bag will make you fall in love with mochila crochet and up your crochet game!
Before we dive into the specifics of the CAL, let’s hear from the Designer herself and know a little more about her journey into crochet and designing.
Ashita Jhaveri
My name is Ashita, a happily married mum to a daughter, a self-taught crocheter and the maker behind handmadeby_ashita on Instagram.
My passion for crochet started about 6 years ago. Spent my whole childhood and youth watching my grandma and my mama creating beautiful things with yarns. But it wasn’t until I saw a crochet page on Facebook that I felt the need to learn to crochet. This was how my journey started. I started my Facebook page with the purpose to inspire anyone with a do-it-yourself attitude.
I am a home-maker, my days are often busy but I always find time to pick up my crochet hook to create beautiful things.
I learned crochet entirely by watching tutorials on YouTube and I am happy to pass it on to the people who want to learn this art. I came across Mochila work last year but never initiated anything until one of my friends asked me to make her a Mochila Bag. I then, visited Marion’s Facebook group, watched her YouTube tutorials to get started and tried my first Mochila Bag (it would never have been possible without her tutorials). I am still a beginner to mochila techniques, but managed to create my second design to inspire everyone and grab their hooks and say, “this is my crochet!”
Yes, I say we can. And I look forward to seeing YOUR OWN Mochila.
Special mention to my friend Rosy for encouraging and supporting me to do this CAL without which I would have never thought of taking this up. It’s been an absolute pleasure to collaborate with India Yarn Circle and working as a team with all of you.
PRESENTING….
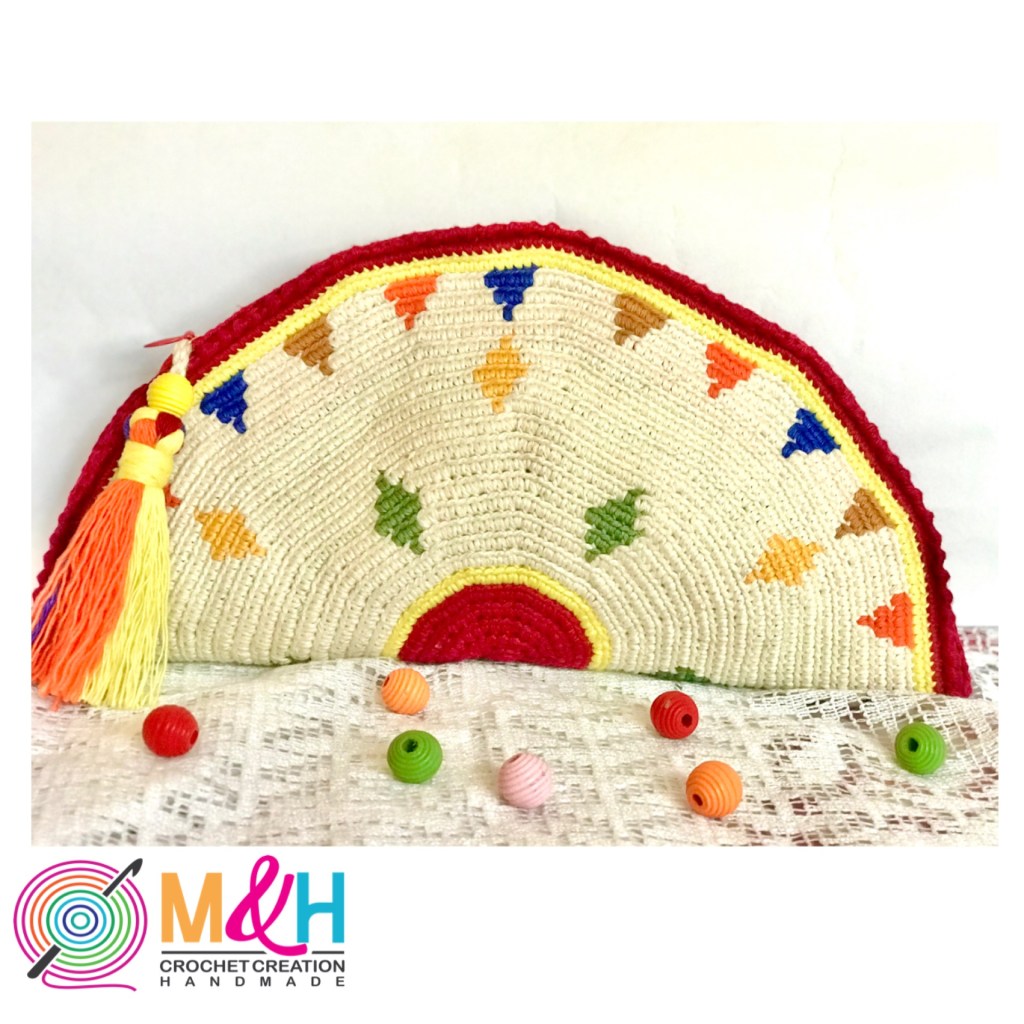
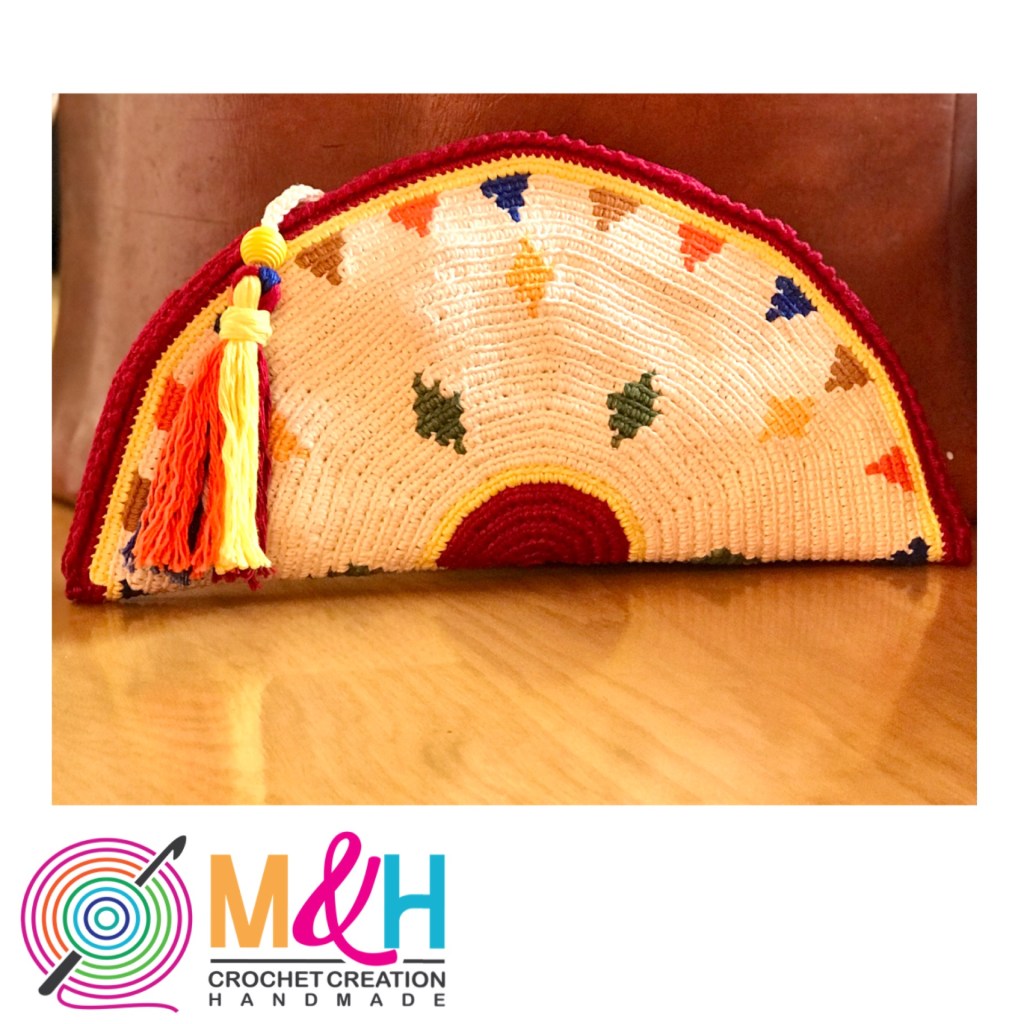
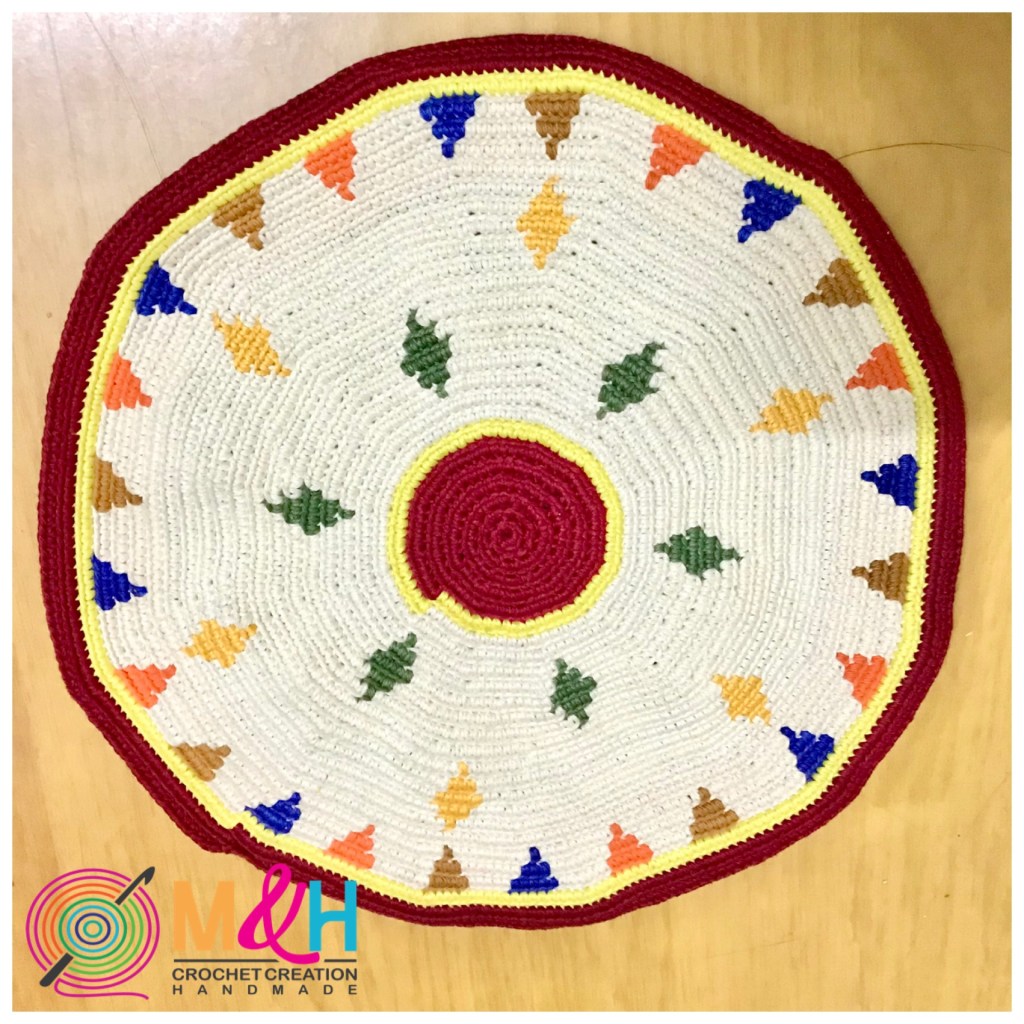
The Sunburst Diamond Mochila Bag
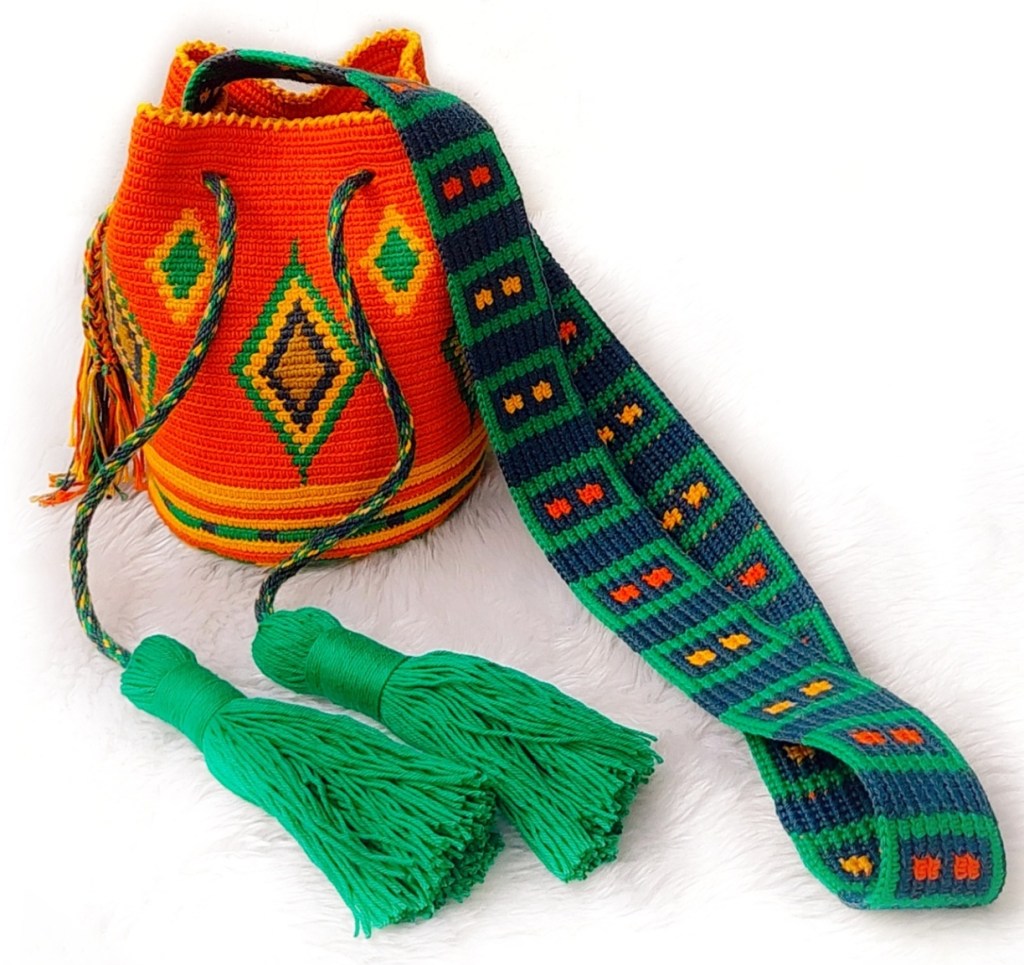
This Bag is designed with the purpose to learn Mochila techniqes.
The IndiaYarnCircle team and Ashita will guide and help you every step of the way to make this gorgeous design.
So dont worry! We got you!
Let’s Dive in and see how you can participate in this CAL:
The CAL will be running for 4 – 5 weeks and each week part of the pattern will be published on our blog here. The first week is for registration and gathering of the materials and next week onwards we will begin making the bag.
You only need to register for the CAL (scroll all the way below to the register here button).
Join our facebook group for all the CAL discussions and queries. (Scroll down to find the link)
Follow us on instagram and blog for regular updates and future events.
MATERIALS
* Recommended Yarn for Mochila bag is Mercerized cotton yarn, 125 meter/ 50 grams.
The sample bag is made with 100% cotton, 4ply, DK weight yarn.
Different brands we can use:
1) Mercerised cotton 3ply 2 strands hold together. Can be bought @magic needles, @Anish Sharma, @miss_crochet.
2) 100% cotton 4ply @magicneedles @Anish sharma @yarnkart
3) GulEra 4ply @magic needles @pradhanembroiderystores
4) Anchor 4060 @magic needles @pradhanembroiderystores
* Color A, Orange – 81 grams
* Color B, Green – 93 grams
* Color C, Yellow – 40 grams
* Color D, Dark Blue – 57 grams
* Color E, Light Brown – 14 grams
* Stitch marker
* A pair of scissors
* darning needle
Hook
2 or 2.5mm crochet hook (I have used 1.9mm hook with 100% 4ply yarn)
You can choose any colour combinations you like and build you own colour pallete for the bag.
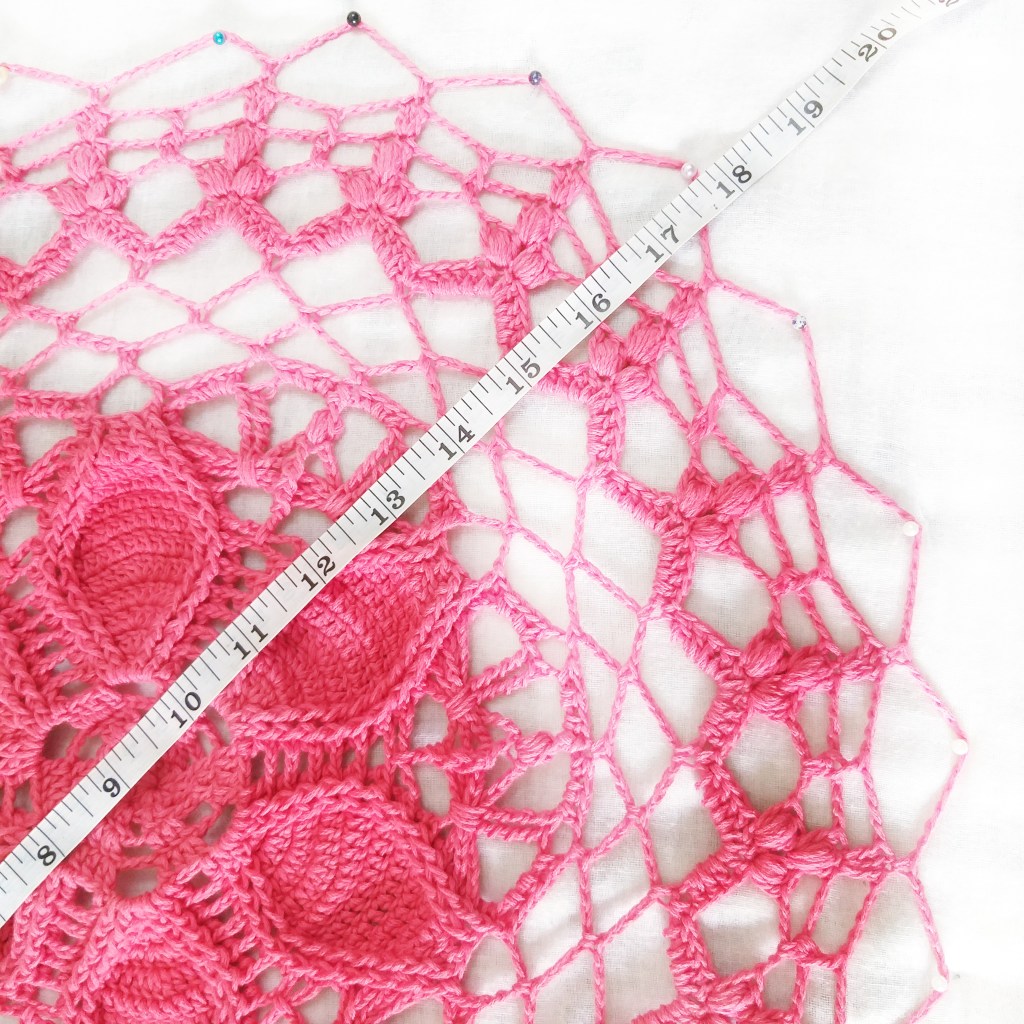
Measurements
Bottom: 10.7cm / 6.3 inch
Height: 20 cm / 8 inch
Level
Easy/ Beginner
Some tips and Notes before we begin
Important
The whole bag will be worked in BACK LOOP ONLY.
Tension:
It is important to have an even tension throughout the bag. We will need to give each stitch attention and SLOW DOWN. when there are so many color changes it will not be difficult but when there is no color changes or a very few color changes, we can easily pull the yarns that we carry, too much or not enough.
When we will pull the yarns too much, the work will get smaller and wider/wavy when we will pull the yarns not enough.
The only reason we pull the carrying yarn is to get the yarns straight within the stitches and never to get the stitches closer together.
Color Change and massaging the Stitches
In this video you can see how to change color and massage the stitches every few stitches.
How to Prevent Yarns from Tangling
Use the yarn from the inside of the Skein.
Place the yarns in front of you. Make sure the distance between your work and the skeins is not too long. When you change the color, pick up the yarn from the skein and follow to your work.
Two color increase:
Round 9 and 10 of our base have two color increase.
Round 9: 1C, 2A, 2D, inc DA, 1A….
* 1C = one stitch with color C
2A = two stitches with color A
2D = two stitches with color D
inc DA = insert the hook in the next stitch, 2 loops on the hook of color D, take the color
A yarn, pull through 2 loops, insert the hook in the same stitch again, and make second stitch.
This Mochila will have 5 colors and to make our bag firm, we carry all the yarns throughout the whole bag.
For the base:
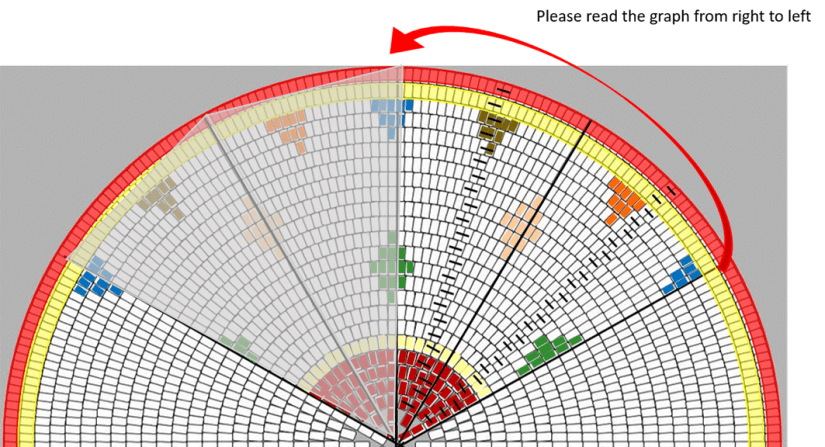
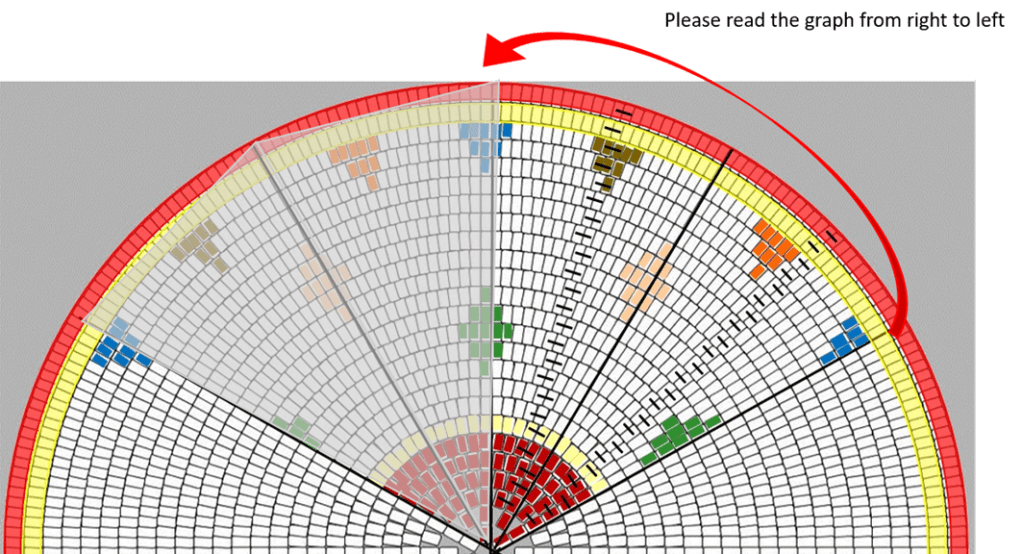
Graph:
There are 3 ways we can make our Mochila base.
With 8 increases, with 10 increases and with 12 increases.
To make our base flat and firm, 8 increases is just not enough so we will be making our base with 12 increases.
The program i have used here is originally for bead designs which always have 8 increases. I have divided the base in 8 equal parts and seperated 1/8th part to repeat 12 times. i.e. we will repeat only 1/8th part 12 times not follow the full graph.

Now that all the basics are covered lets set you up for the CAL.
We hope you join us in making this CAL a huge sucess and make this beautiful bag that Ashita has created just for you!!
Use hashtags #sunburstdiamondcal #indiayarncircle #sunburstdiamondmochilacal #IYCcal
Please feel free to comment below your queries or post a question on our facebook group or DM us on instagram.