Week 4 of the Winter KAL 2020 involves brioche knitting.
Brioche knitting is a family of knitting patterns involving tucked stitches, i.e., yarn overs that are knitted together with a slipped stitch from the previous row. Such stitches may also be made by knitting into the row below and dropping the stitch above.
This type of knitting leads to a thick and ribbed pattern which is perfect for shawls and sweaters and anything warm.
The headband has a very elegant and chic twist in the middle (a clever way to hide the seam!).
You can easily match your headband to your outfit.
Knit headband
The pattern is worked back and forth and is very easy to memorize, which makes it a quick project. You can also find a video tutorial of this headband at the end of the written instructions.
I hope you will enjoy knitting this headband with a twist!
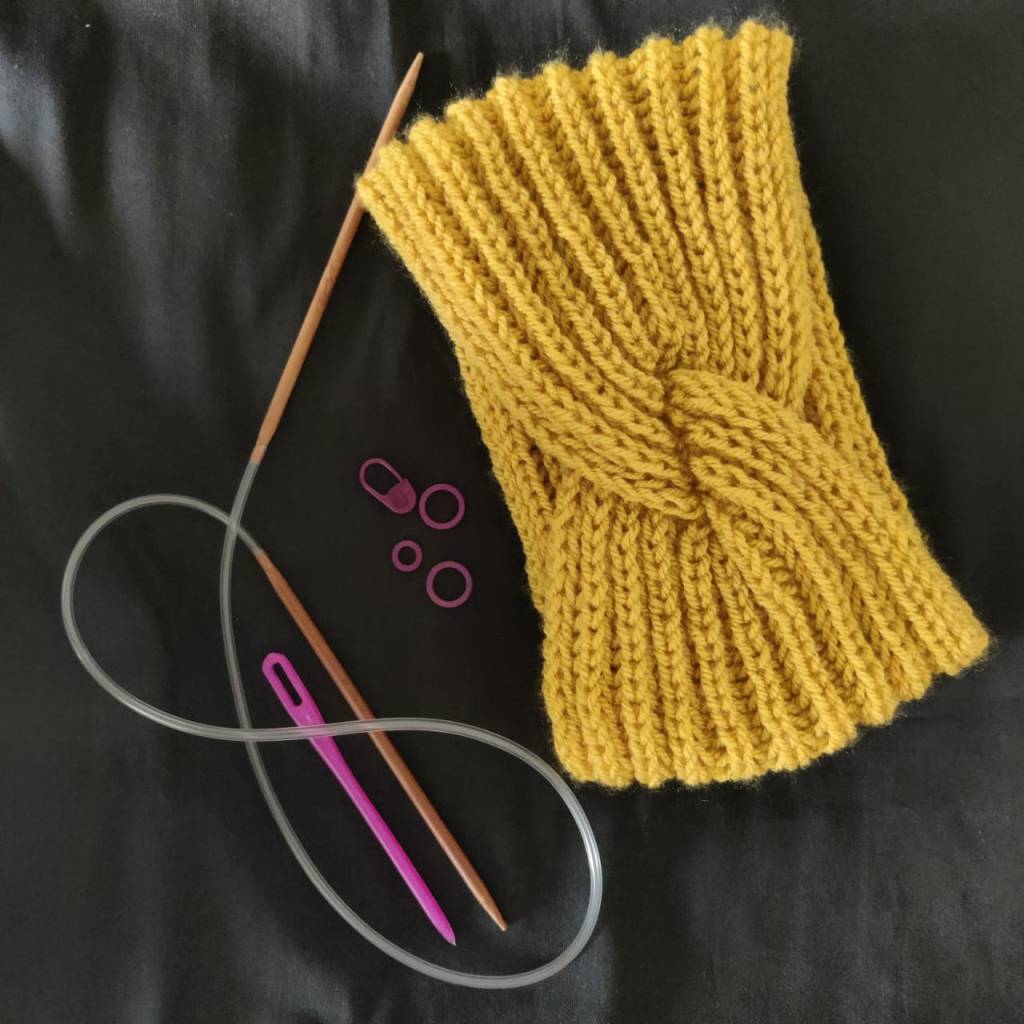
To knit the headband you will need:
DK or worsted weight yarn, 4 or 5 mm knitting needles, tapestry needle
Pattern:
Cast on about 20 stitches (customisable) using long tail cast on
Row 1 (foundation row): Yarn over, slip 1 stitch purlwise, knit 2 together, repeat from * to * until the end of the row.
Row 2: Yarn over, slip 1 stitch purlwise, knit yarn over and the slipped stitch together, repeat from * to * until the end of the row.
Work row 2 for 20 inches or desired length.
Bind off loosely.
See the video for the twist
Fold into half, sandwich together and sew in all the four edges. Invert it to reveal twist.
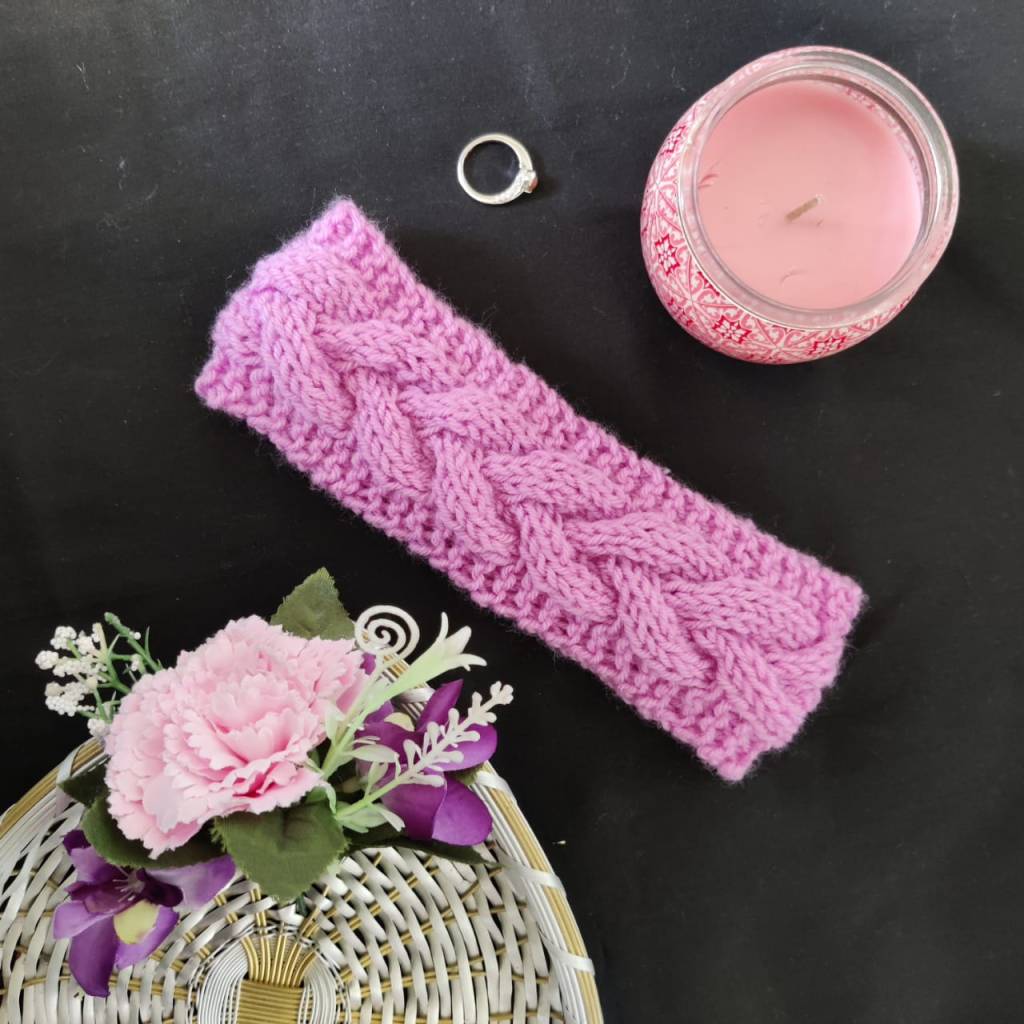
It’s week 3 of the Winter KAL 2020 and we have our next knitting technique which is Cable knitting.
Cable knitting is a style of knitting in which textures of crossing layers are achieved by permuting stitches.
This headband has a simple 8 row repeat which is perfect to understand how a cable pattern is developed.
For this particular project you need DK or worsted weight yarn, 4 or 5 mm knitting needles, a cable needle or any substitute (thin rod, pencil, toothpick or any needle sized object).
Key:
C6F – Knit 3 stitches on to a cable needle and hold at front of work, Knit 3 then Knit 3 from cable needle C6B – Knit 3 stitches onto cable neddle and hold at back of work, knit 3 then knit 3 from cable needle
Hello knitters, We hope you enjoyed week 1 of the India Yarn Circle knit along with @poojascrochet.
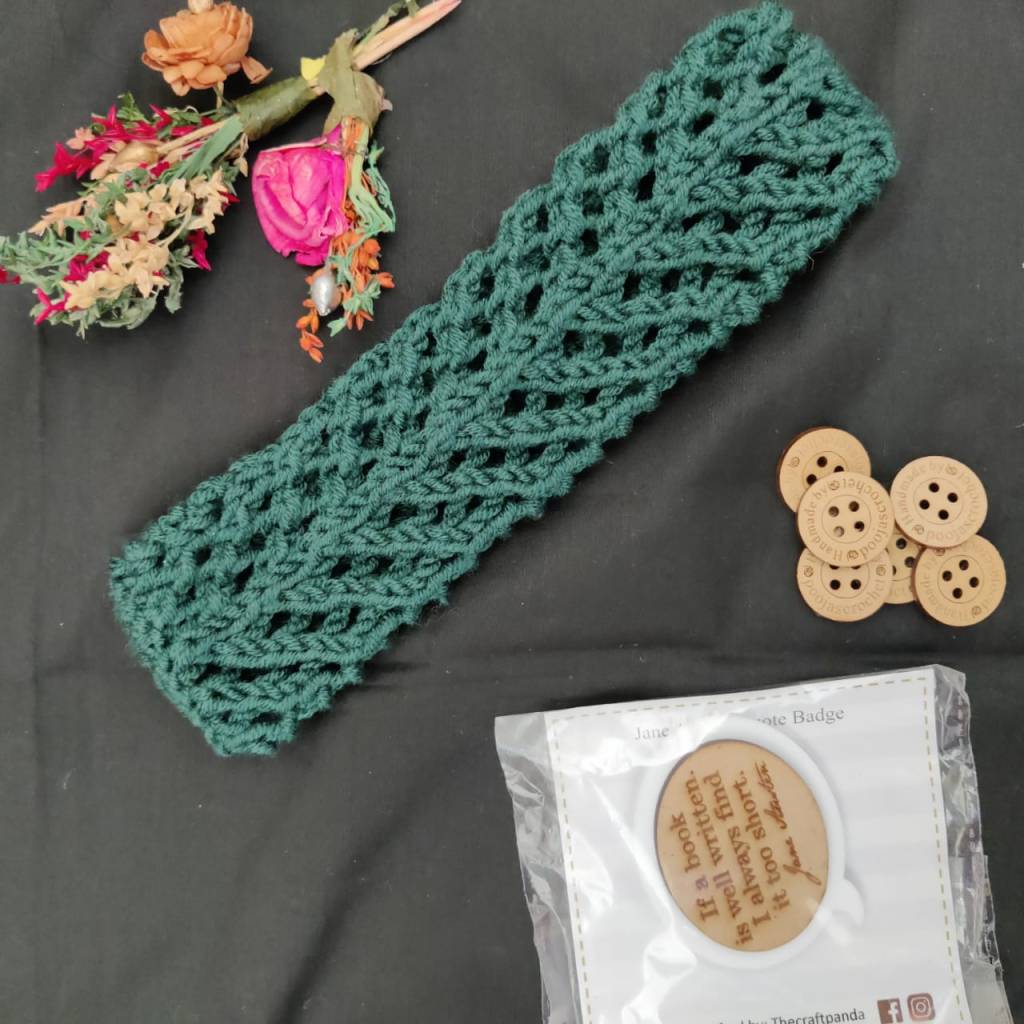
Our second week of the knit along will introduce you to another variation in knitting which is a lace pattern.
This involves making a lace pattern by incorporating yarn overs and joining stitches together.
For this pattern too you can use a dk weight yarn with 4 or 5 mm needles.
Method:
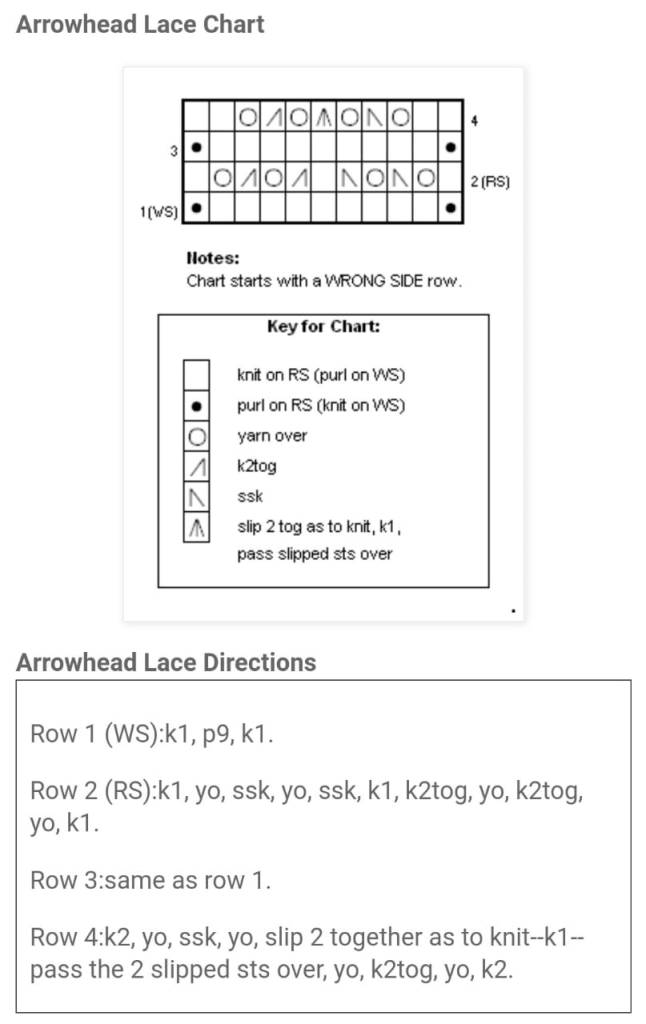
Cast on 11 sts.
Follow the arrowhead lace pattern (using chart or the youtube tutorial below) until the headband is approximately 18 inches long (or long enough to fit around your head when slightly stretched). Bind off and seam ends together.
To understand the working better, check out the video Tutorial below:
Hope you enjoy the project for this week. Please feel free to comment with your suggestions and queries.
Hope you are enjoying making the Seed stitch twist headband. This second part of the tutorial will teach you the finishing of the band and incorporating a twist. Please share your photos on Facebook and Instagram and you can DM us for queries. Happy knitting!
Let’s get started with basics.. knitting involves casting on stitches onto the knitting needles, knit and purl stitches and binding off to end the work.
Check out these tutorials to learn basic knitting.
This time we are having a knit along (KAL) and its perfect for beginners. A number of us find it easier to crochet than to work on two straght needle points, and some others want to revisit knitting which they put away years back. This KAL is perfect for all of you.
Now that we are approaching winter, lets make some warm winter accessories. Earwarmers are easily customisable to different designs and length, which makes them perfect for beginner knitters.
It is a set of 5 earwarmers/headbands which will be made over the period of 5 weeks. Each one is made with a different knitting style – cable, lace, twist, brioche, beads.
To participate in this KAL, you just need a few balls of stash yarn and a pair of corresponding knitting needles. DK to worsted weight acrylic or wool yarn is perfect to work with and easily matches 4mm or 5mm needles.
Click on the link below to register for this KAL!!
An extraordinary journey with fellow crafters has come to an end. We traveled the Tunisian highway and reached one milestone by creating the beautiful Pax shawlette. This is in no way the end but a stepping stone to all things tunisian.
The doubts that were cast were cleared with the help of video tutorials and a Facebook Live session. Not to mention, members stepping up and helping each other!! That’s the best part of being in a community that understands and goes the extra mile to share, to learn and to connect.
We would love to give a special mention to one of the most involved member from our community , Jayam Jammu ! Let’s give the loudest cheer for this awesome crafter who kept all of us on our toes and culminated her journey with a superb walk to show off her Shawlette. Take a bow Jayam!
We would also like to take this moment to give a shout out to Arunima , who is a versatile Indian designer creating beautiful Tunisian crochet designs. You can find her on Facebook and Instagram under the username Knitterknotter.
We hope that by giving you a glimpse of the Tunisian crochet technique , we have sparked a little something in you and may you go on to creating stunning Tunisian crochet projects!
Check out the participants video here:
Thanks once again for walking the road with Tunisian crochet!
Hoping to see you all in our next crafty journey!
Leave a comment below to let us know what you think!
We have successfully completed the two charts of pax shawlette and are at the very end of the pattern. Many have already completed the whole shawlette and we are very happy to see their finished objects.
The following is the explanation of the last two rows in simple English.
After completing chart B, you should have finished with one row of single crochet. You should have 451 sc.
Picot edging
Here the designer has designed the picot as (sc, ch2, sc) to be worked in the specified stitch.
Ch1, picot in the first stitch ( that is you make sc, ch2, sc in the same stitch), 1 single crochet in each of the next 4 stitches, picot, 1 sc in one each of next 2 sts, picot, 1 sc in one each of next 2 sts, picot, [1 sc in each of the next 8 stitches, picot, 1 sc in one each of next 2 sts, picot, 1 sc in one each of next 2 sts, picot]
Repeat the instructions in the square bracket till you reach the last 4 stitches. 1 sc on each of the next 3 stitches, picot in the last stitch. Fasten off. Weave in the ends.
You can watch the video here for better understanding:
Ta da ! You are done! Give yourself a pat of the back for a job well done!
The next step is blocking.
For this step you will need , a sink or tub to hold, cold water, mild soap, towels, t pins, foam boards, steam iron or hair dryer
Blocking refers to the process of washing and pinning the finished product to the desired dimensions. The blocking technique varies for the type of material used.
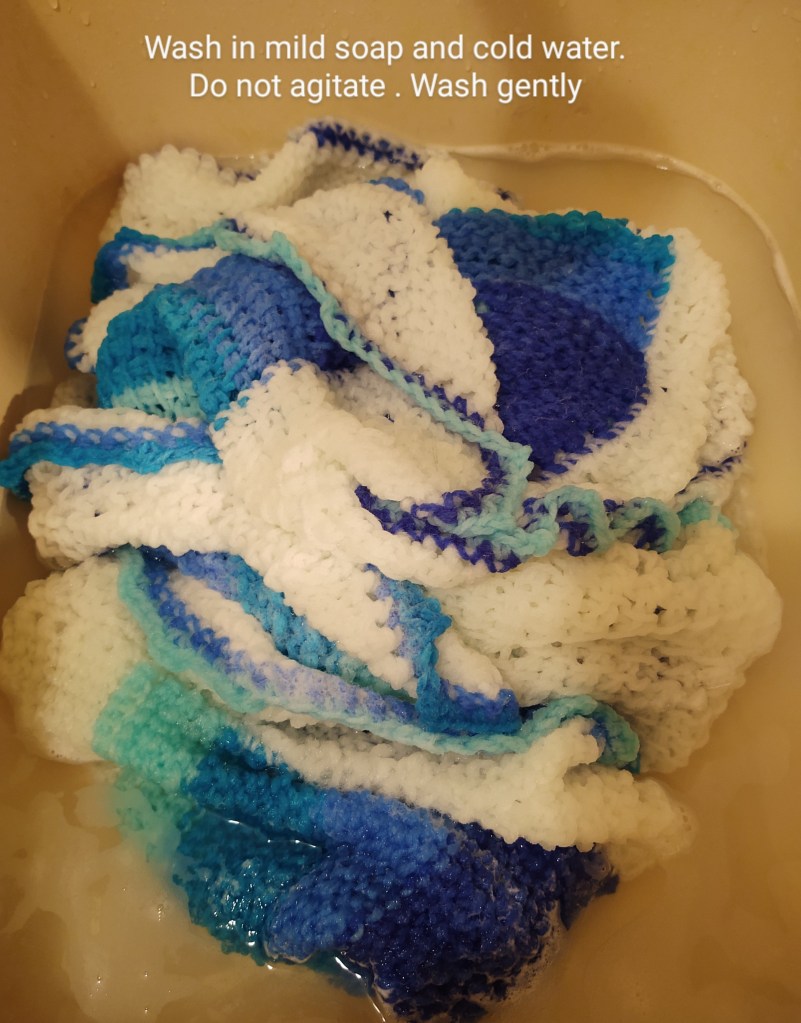
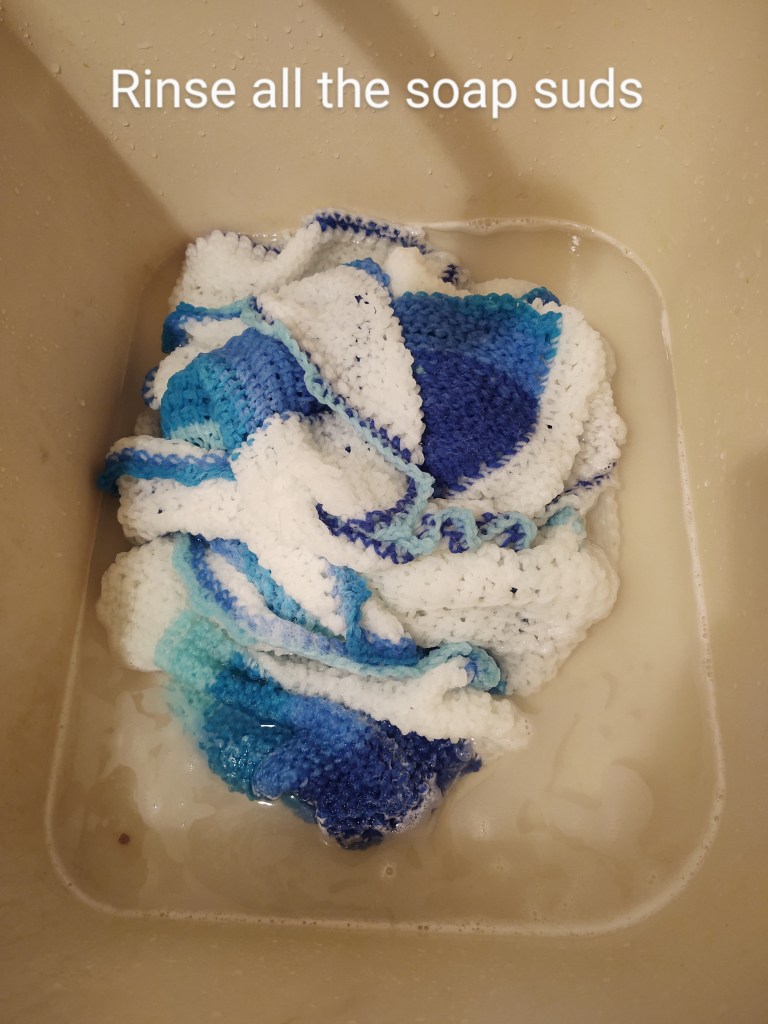
For acrylic you will gently wash the handcrafted piece in cold water and mild detergent. A few drops of the handwash soap or mild shampoo will do the trick. Rinse in water till the soap suds are removed. Do not wring( twist) the project to remove excess water. Squeeze out as much water as you can.
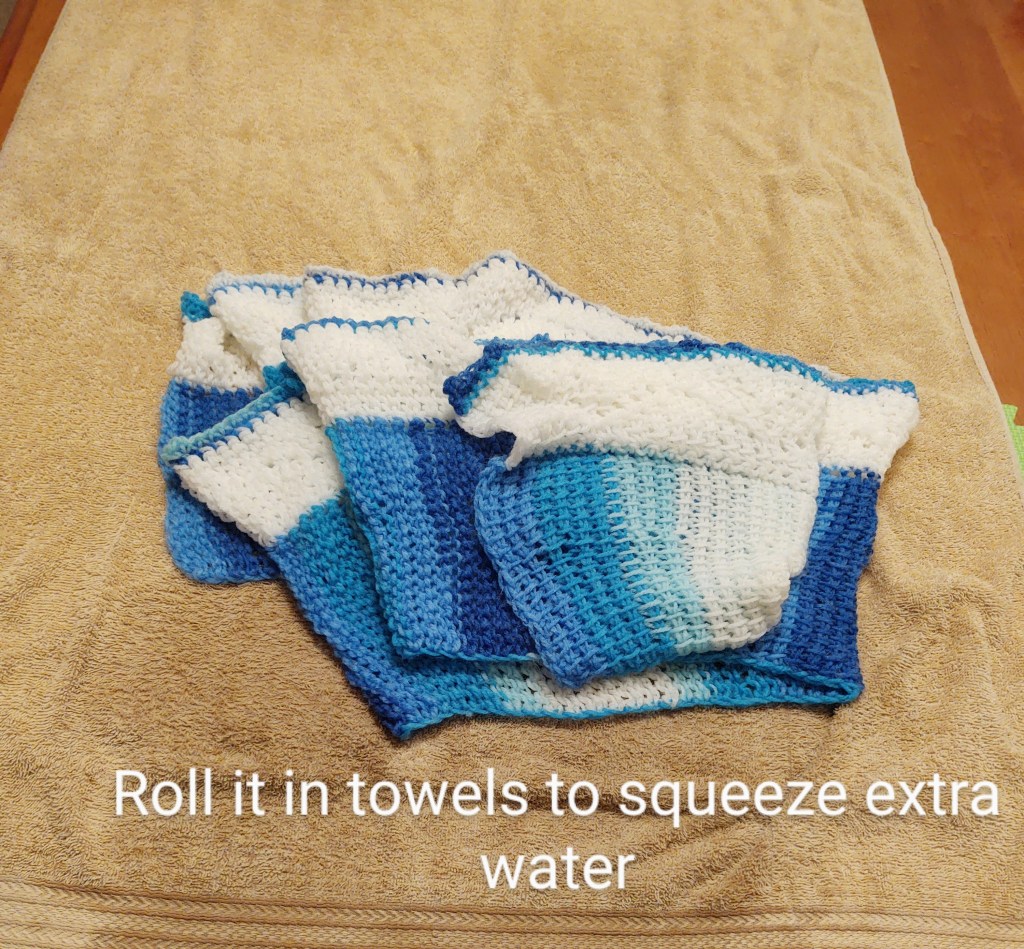
The project will become heavy with all the water it has absorbed.
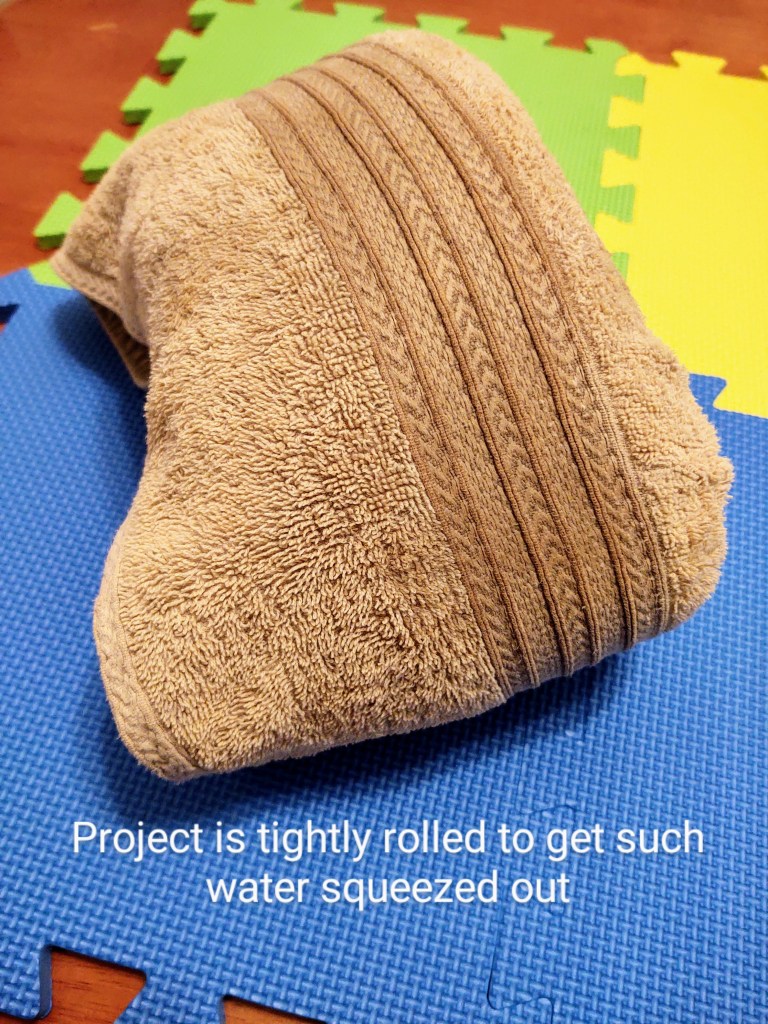
Now roll the piece in a thick towel. Use two towels if there is a lot of water to be removed.
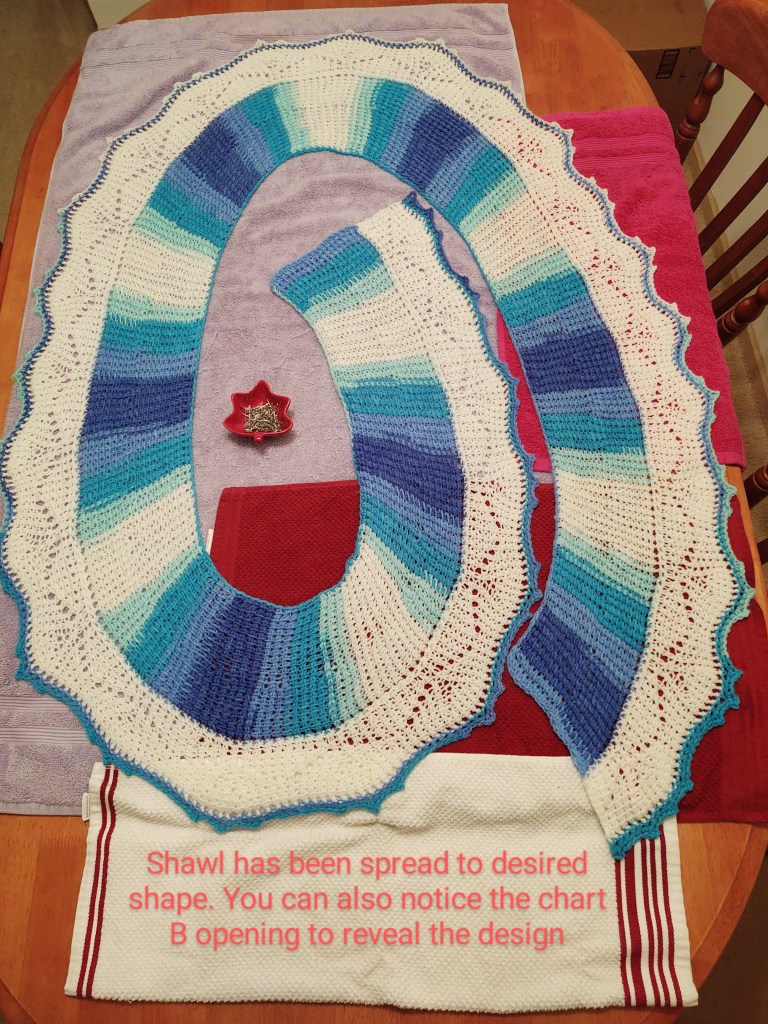
Arrange foam sheets ( or if you have a spare bed you can use that) and cover it with two to three layers of towel. Spread your finished project out and carefully shape the project with your hands to the desired shape.
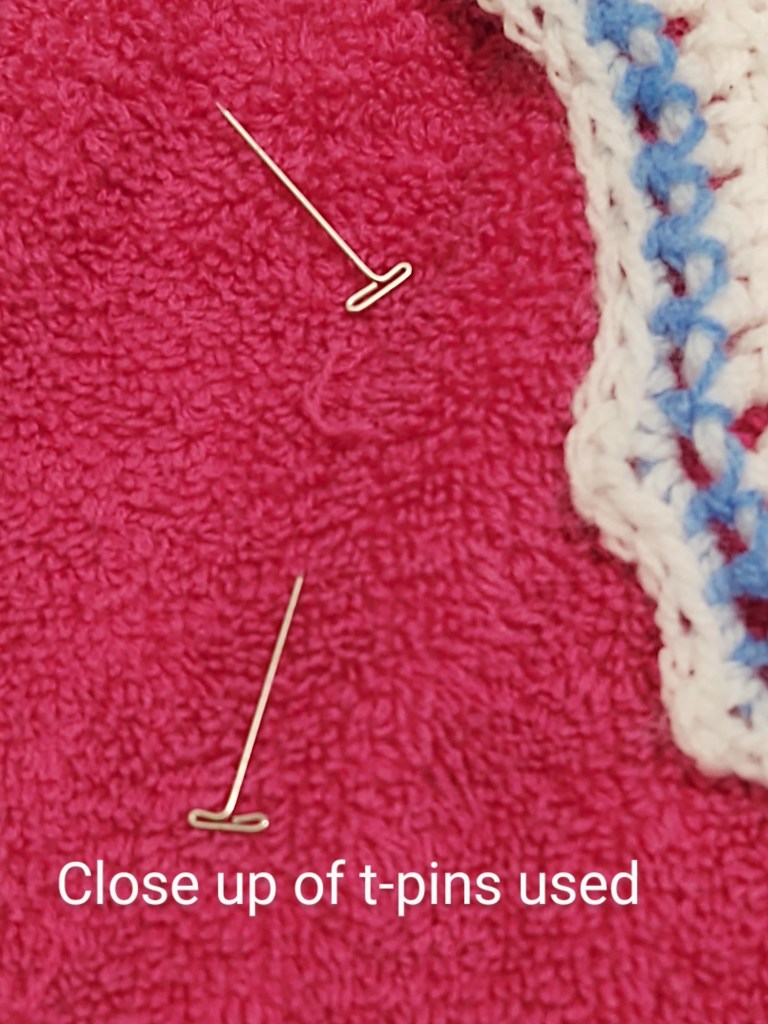
You will now take your t-pins and pin the points you want to be stretched. Usually one places the t-pins on the picots .
After you have adjusted the project to the shape you desire, you can leave it to air dry.
Once again if the material is acrylic, you can use steam to kill the fibres. This means that once the lace stitches open up you do not have to keep blocking everytime you wash.
Plug in the steam iron and use the steam to block acrylic. You should not place the iron box on the crochet piece. You should hover the iron box over the project a few inches at a time. Slowly move the iron box so that the entire shawl is blocked.
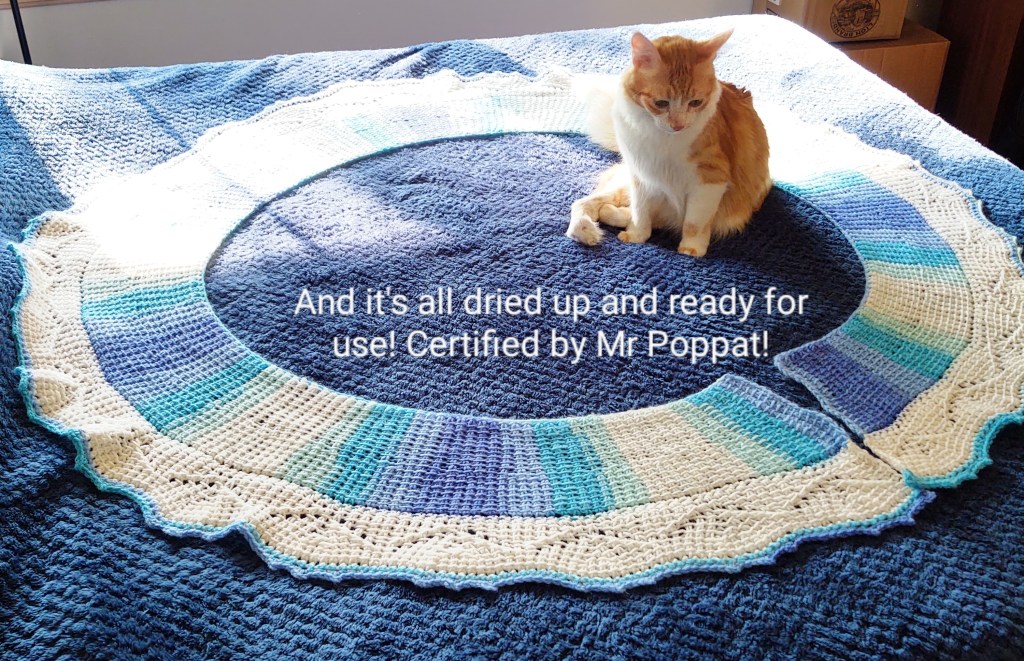
Leave it to air dry and once it’s done, remove the pins and take pictures, model it if it’s a wearable and show it off. Sit back and wait for compliments to flow your way!!
If you have used cotton , same principle but you can use starch to make your fo to have a crisp look.
For silk do not wash in water. Instead use a spray bottle and spray water to moisten the crochet / knit piece.
Then pin and let dry.
For wool if it says superwash then you can wash it and follow the same principle as acrylic. For non superwash wool , care must be taken to not agitate the fo as it will cause the wool fibres to fuse and felt.
Then pin and let dry.
You can check out the video below to understand blocking better:
Hello everyone! Most of you have finished the chart A and its time to move on to chart B!!
If you still need help with the Chart A instruction for the Pax Shawl you can check it out HERE.
Lets now begin with Chart B
After you complete chart A work one row of sc on the top edge of the shawlette. The wrong side of the shawlette will be facing you.
When it says pull up loop it means insert hook, yarn over and pull up loop.
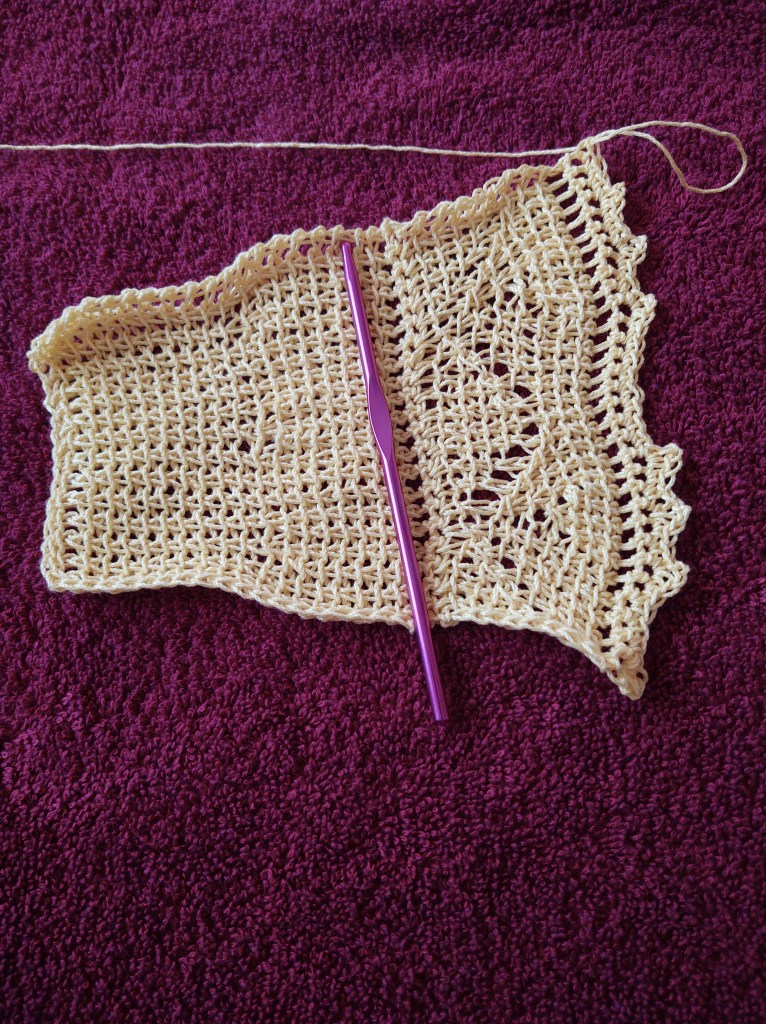
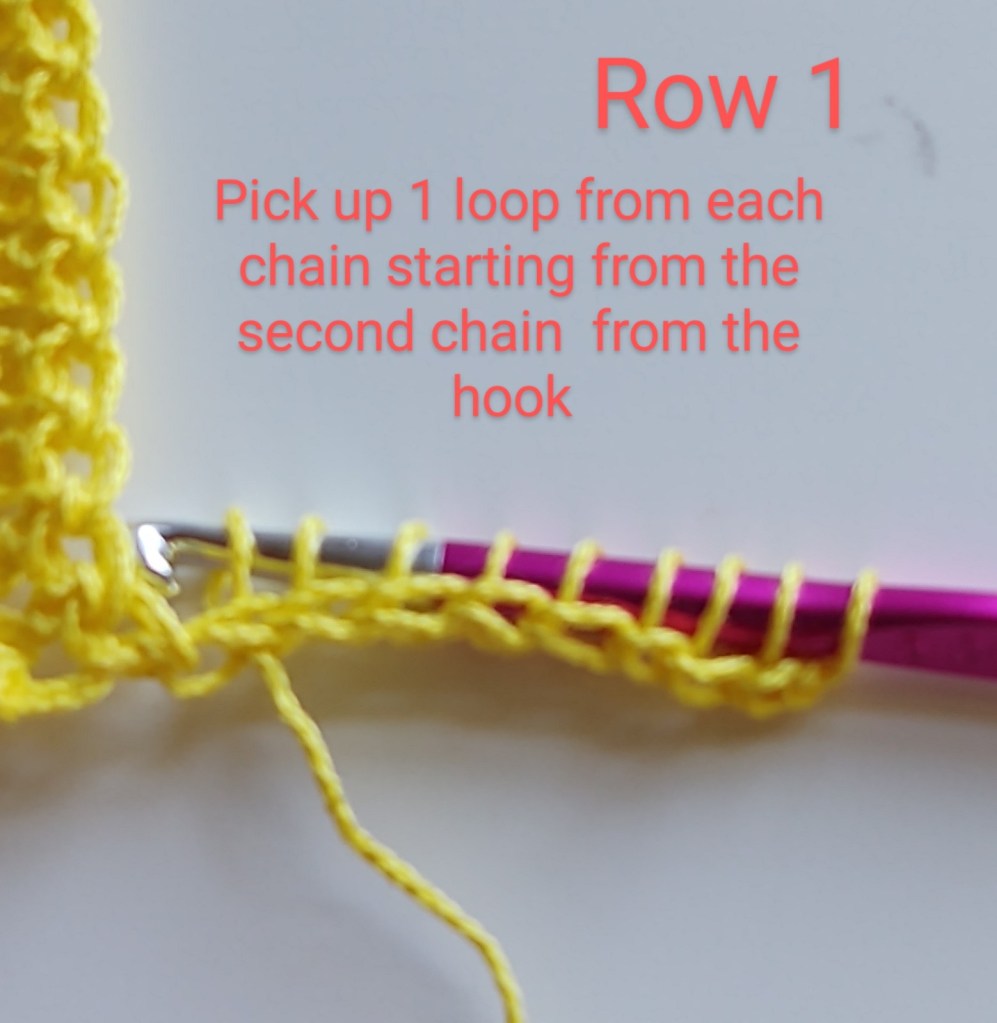
Chain 9.on this chain you will work the first linked 8 uple stitch which the designer has abbreviated as L8tr(linked 8 treble).
Source: IYC
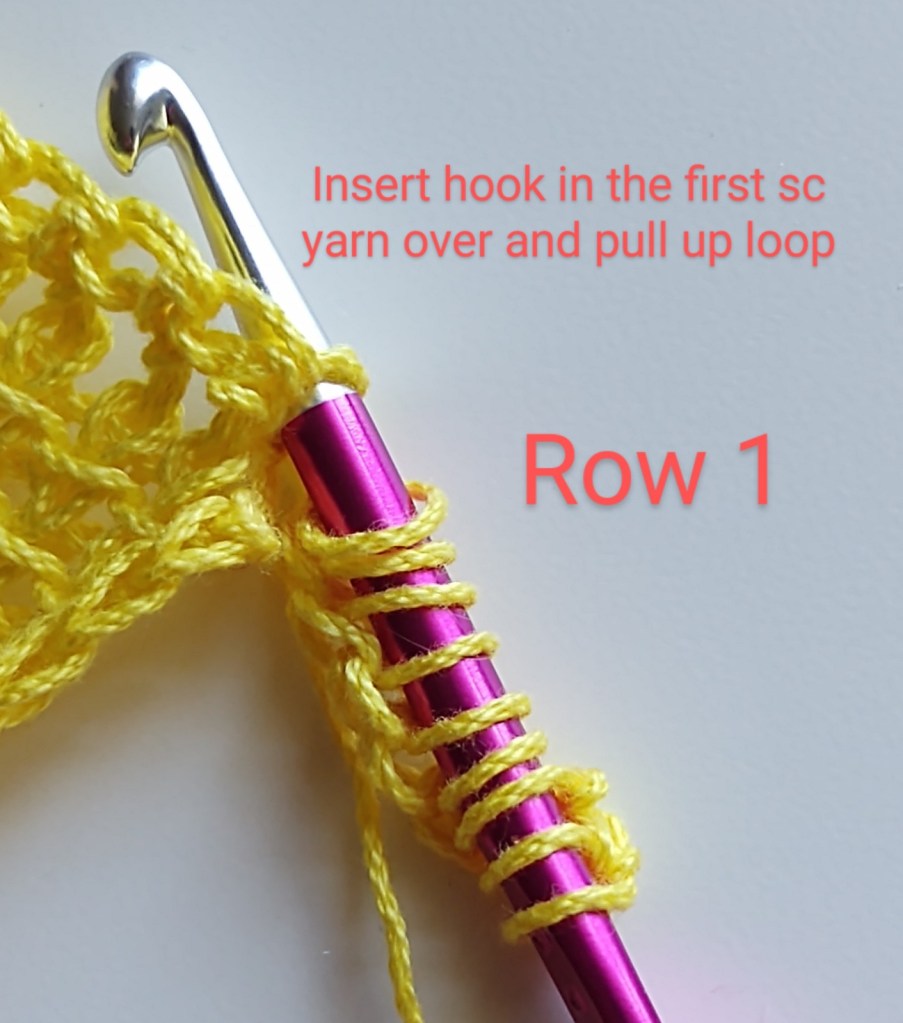
This is worked by picking up a loop, starting from the second chain from the hook all the way down to the last chain. You will have 8 loops ( not including the first loop on the hook). Next, insert hook into the first sc , yarn over and pull up a loop. This is the 9th loop. This row is represented on the chart as 8 white squares.
Source: IYC
Source: IYC
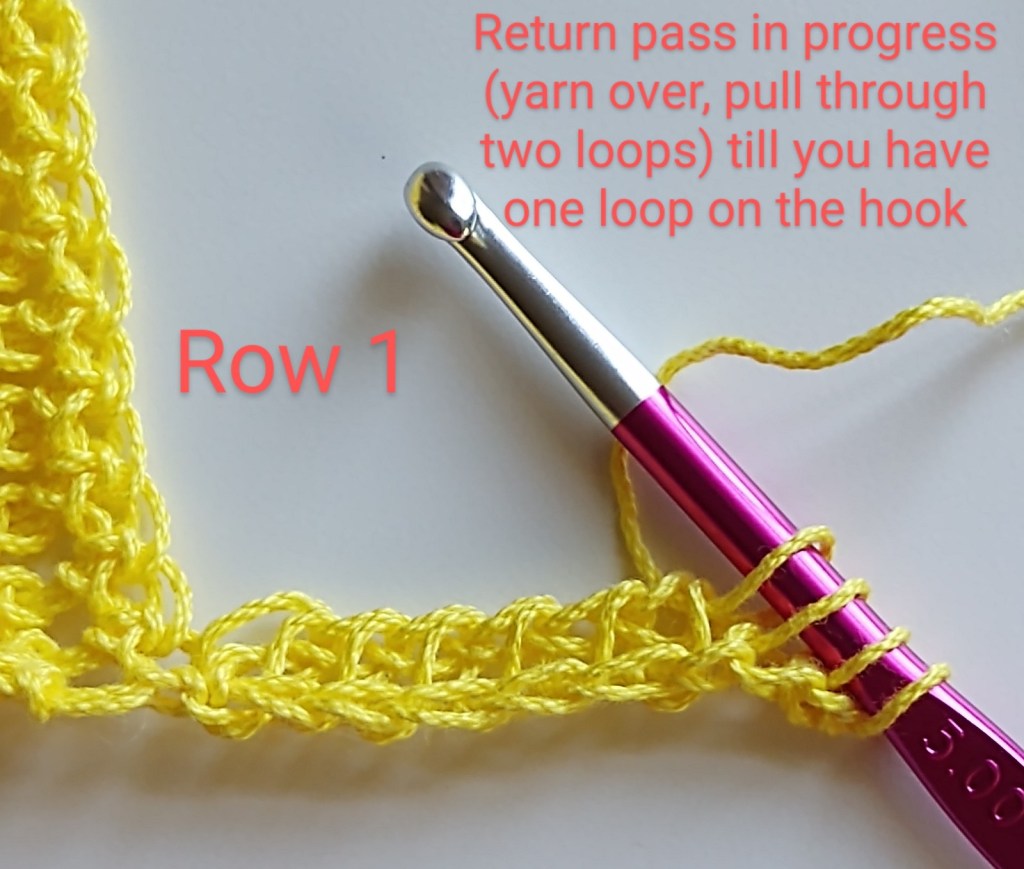
Work the return pass as you have been doing, yarn over, pull through 2 loops. Repeat until all loops have been used up and there is one loop on the hook.
Source: IYC
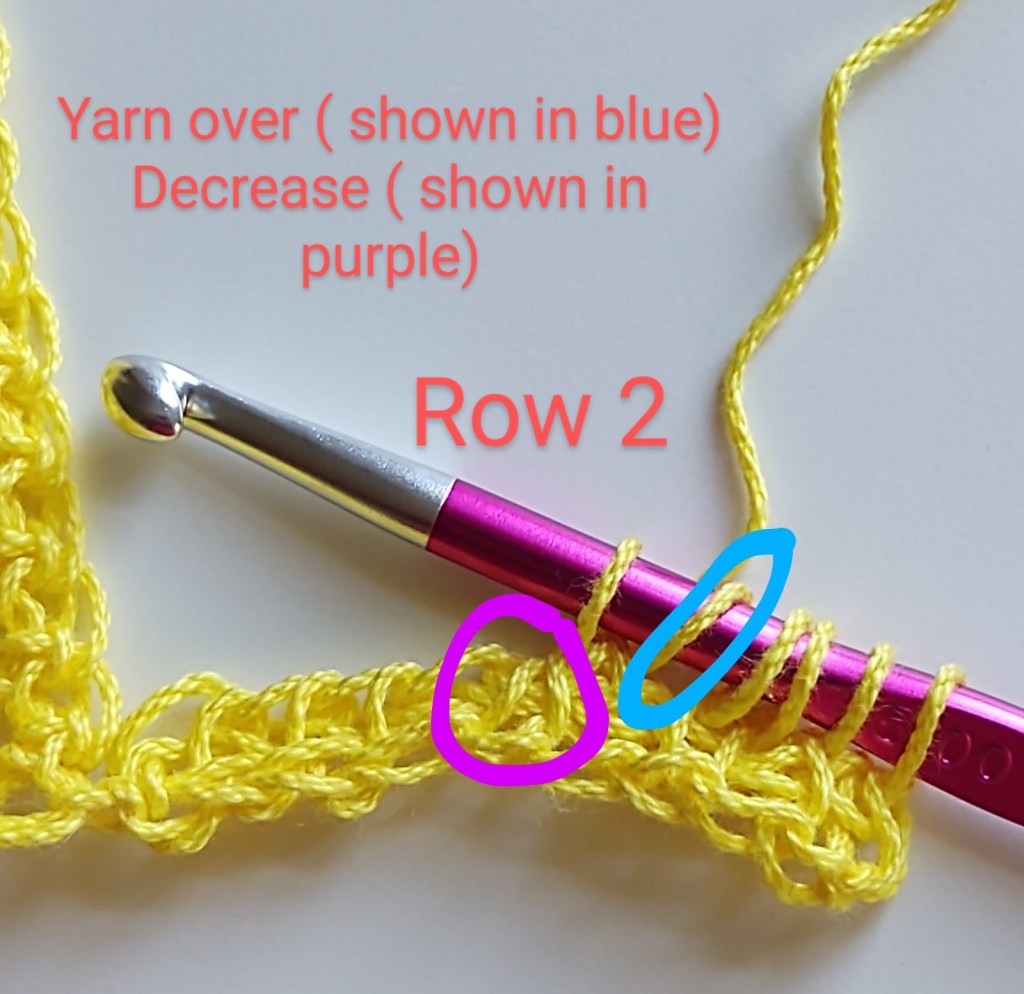
Second row of chart B.
Note: read this before starting
Here pay attention to the color of the squares. White square represents Tunisian simple stitch ,black triangle represents yarn over and grey squares that are connected represent one decrease.
The yarn over and decrease happen together.
The decrease is worked in this manner : insert the hook under two adjacent vertical bars, yarn over and pull up loop through both vertical bars
The tiny purple triangle represents short row. The short rows have numbers written on top which indicates how many loops you must have on the hook before you work the return pass. The loop on the hook at the start of the row is not counted.
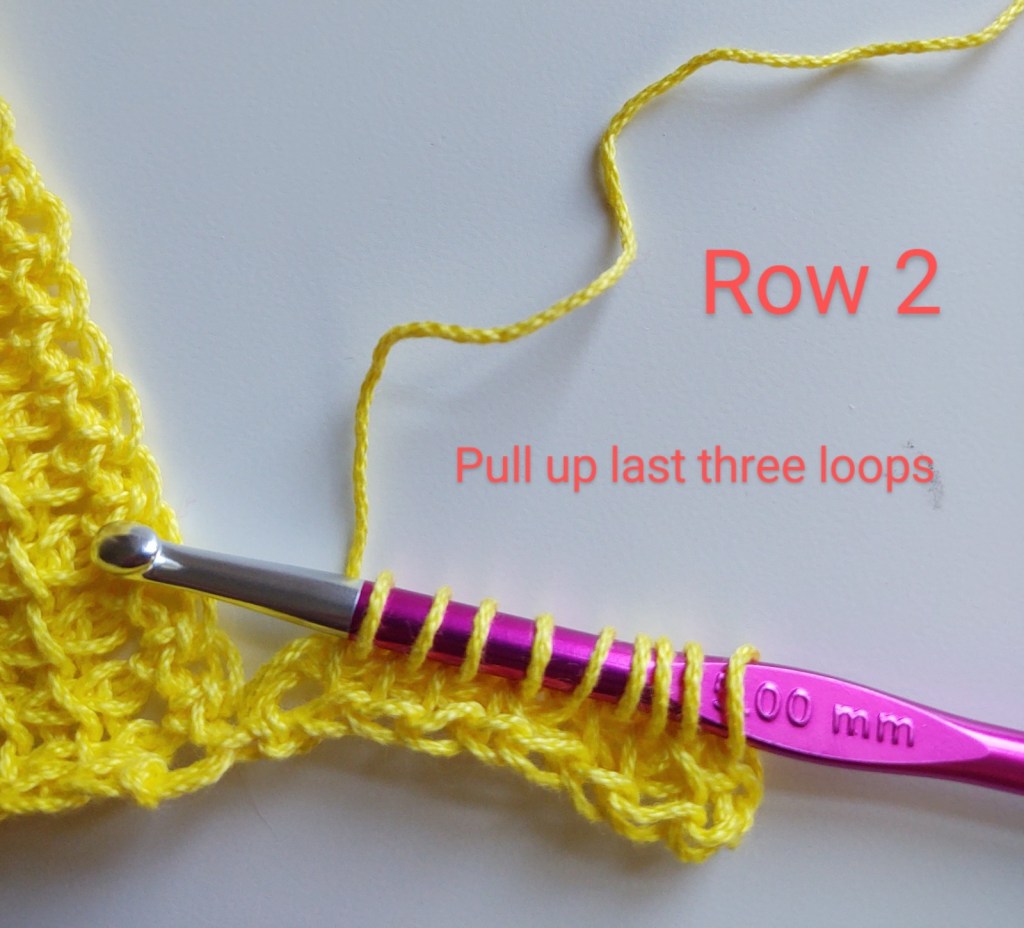
Forward pass : Pull up three loops starting from the second bar, yarn over, work 1 decrease, pull up one loop in each of the next 3 bars, insert hook in the next sc, yarn over pull up loop.
Source: IYCSource: IYC
Source: IYCSource: IYC
Return pass: (yarn over , pull through 2 loops ) repeat until you reach the end and have one loop on the hook.
Source: IYC
Source: IYC
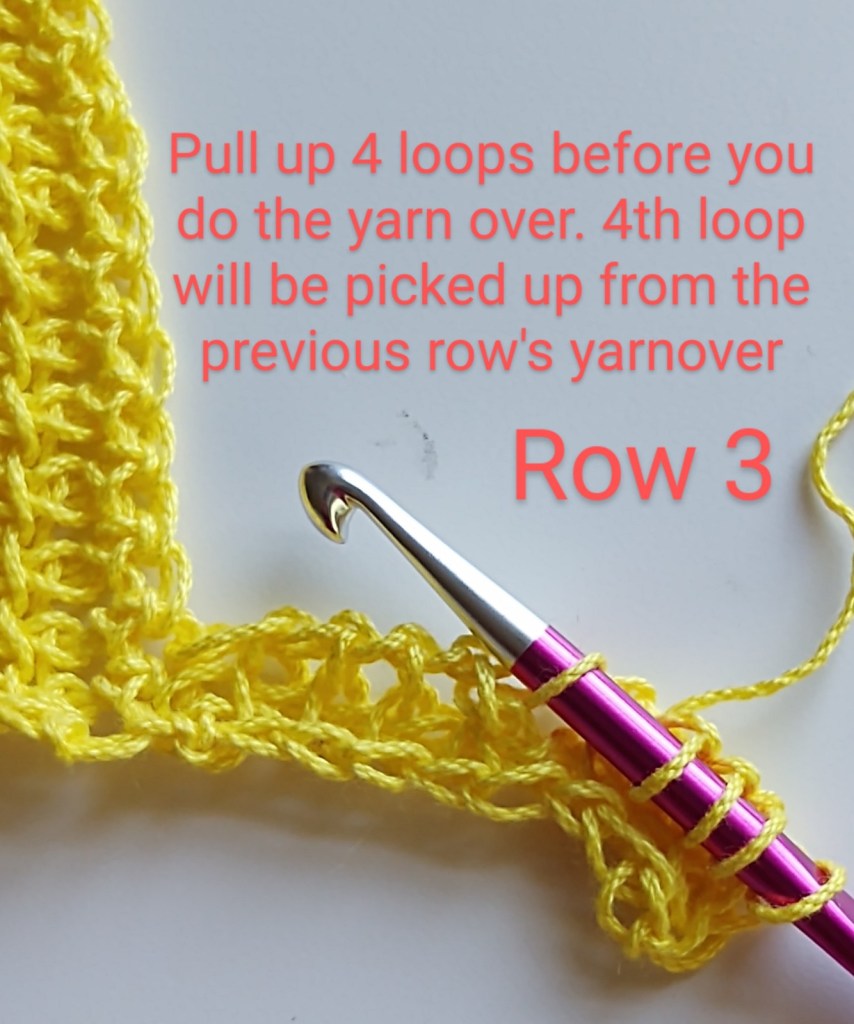
Third row:
Forward pass: Pull up 4 loops starting from the second bar( the fourth loop will be on the yarn over you did in the previous row),yarn over, decrease, pull up 1 loop in each of the next 2 bars, insert hook into next sc, yarn over pull up loop.
Source: IYC
Source: IYC
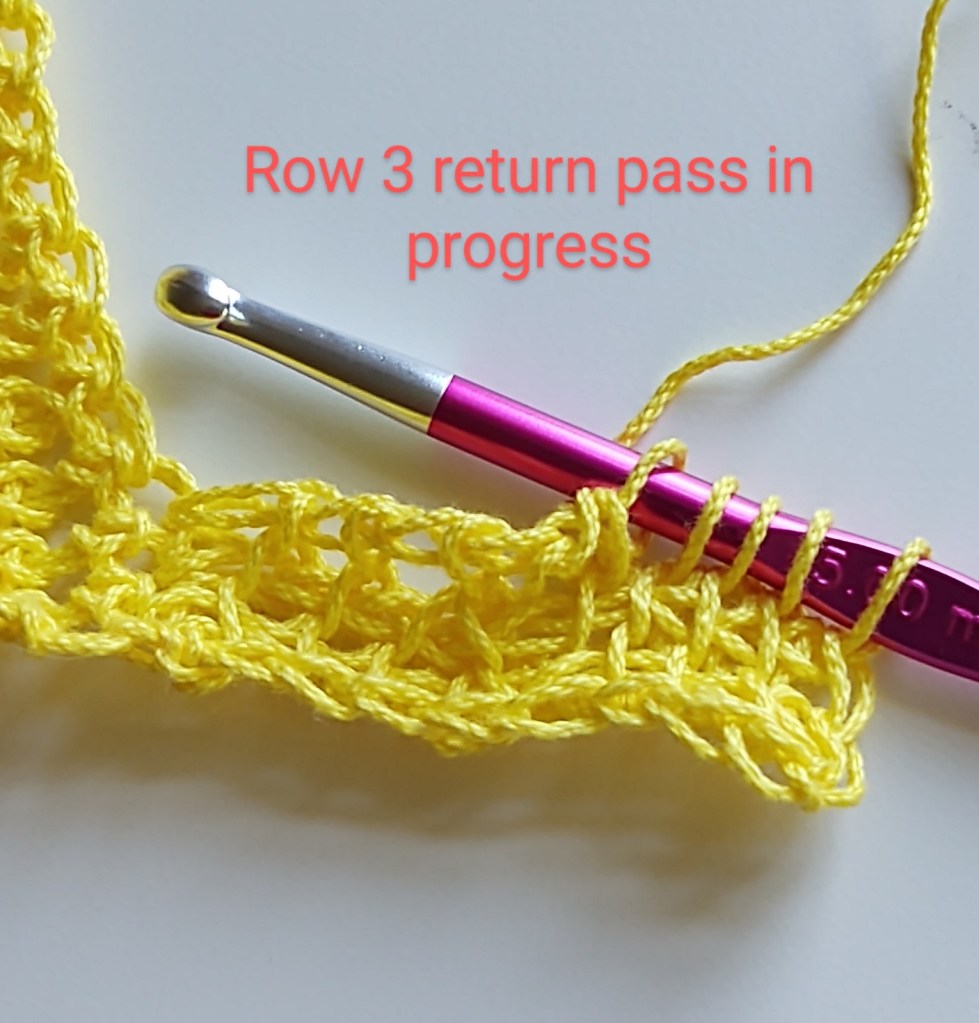
Return pass : (yarn over , pull through 2 loops ) repeat until you reach the end and have one loop on the hook
Source: IYC
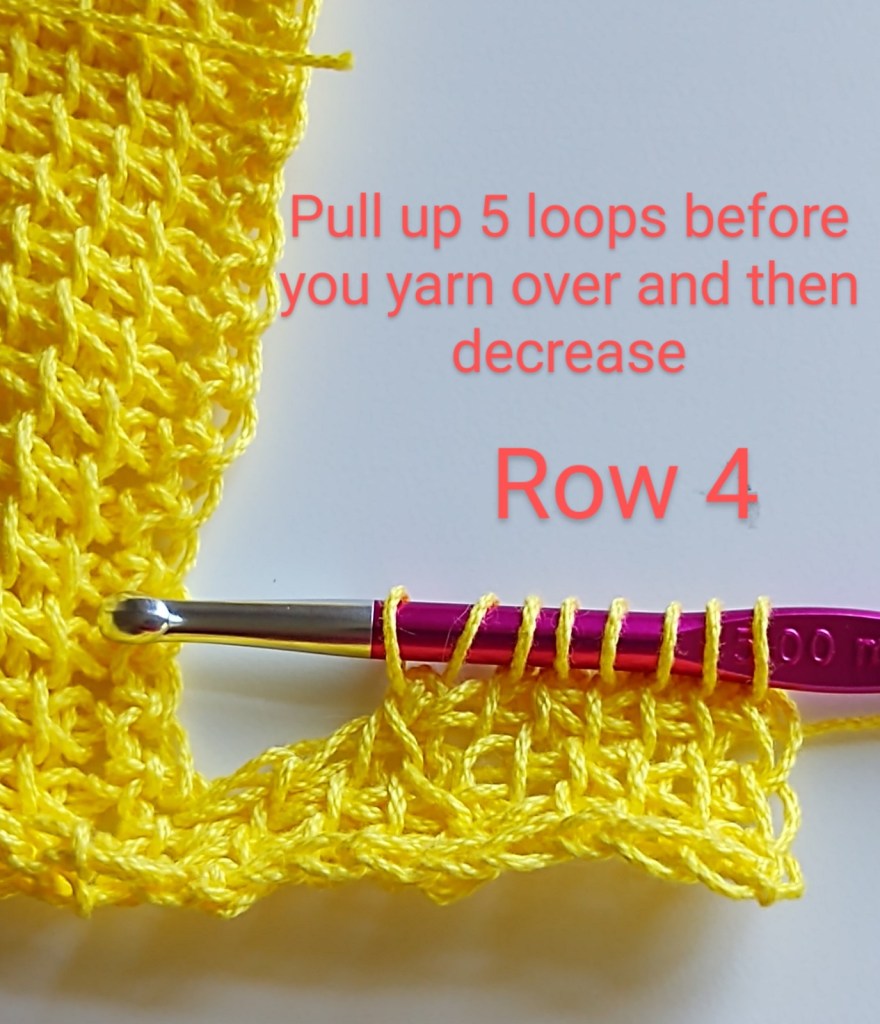
Fourth row:
Forward pass: Pull up 5 loops starting from the second bar( the fifth loop will be on the yarn over you did in the previous row),yarn over, decrease, pull up 1 loop in the next bar, insert hook into next sc, yarn over pull up loop.
Source: IYC
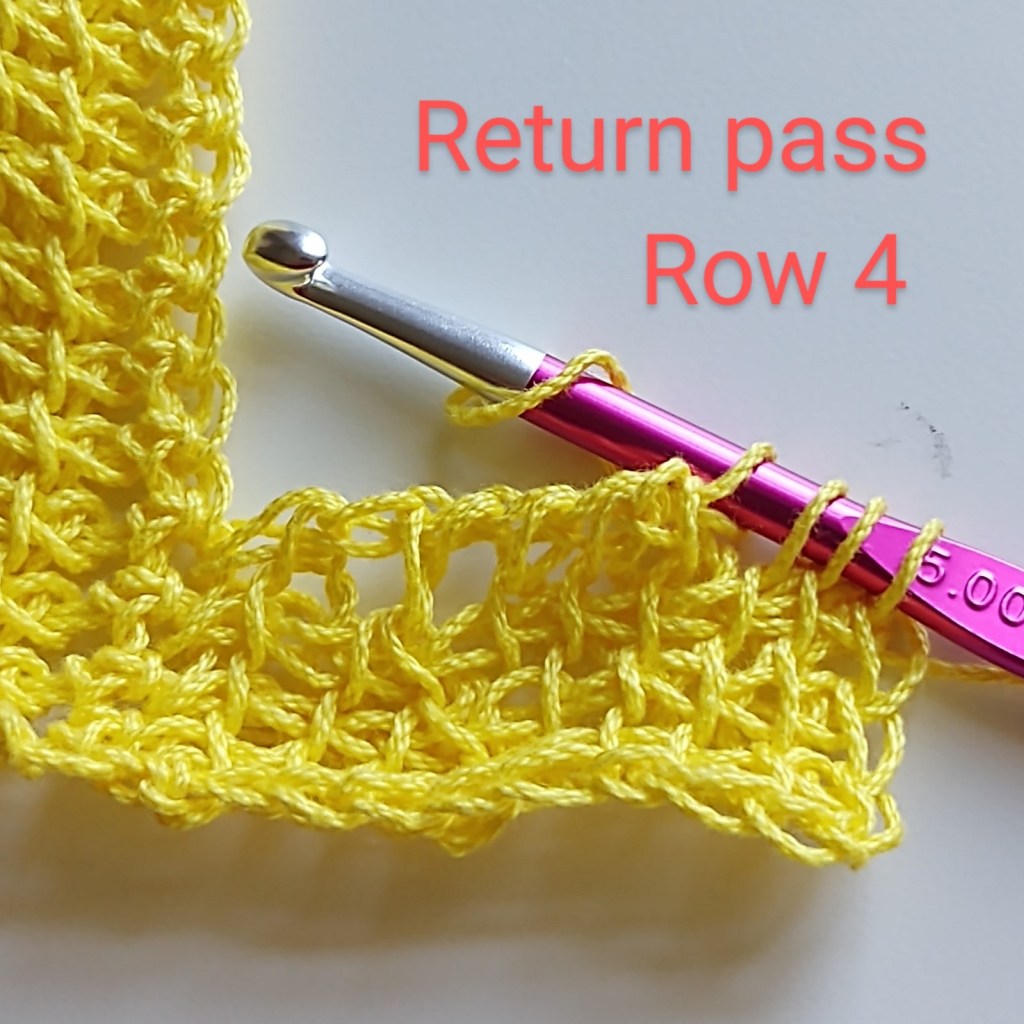
Return pass : (yarn over , pull through 2 loops ) repeat until you reach the end and have one loop on the hook
Source: IYC
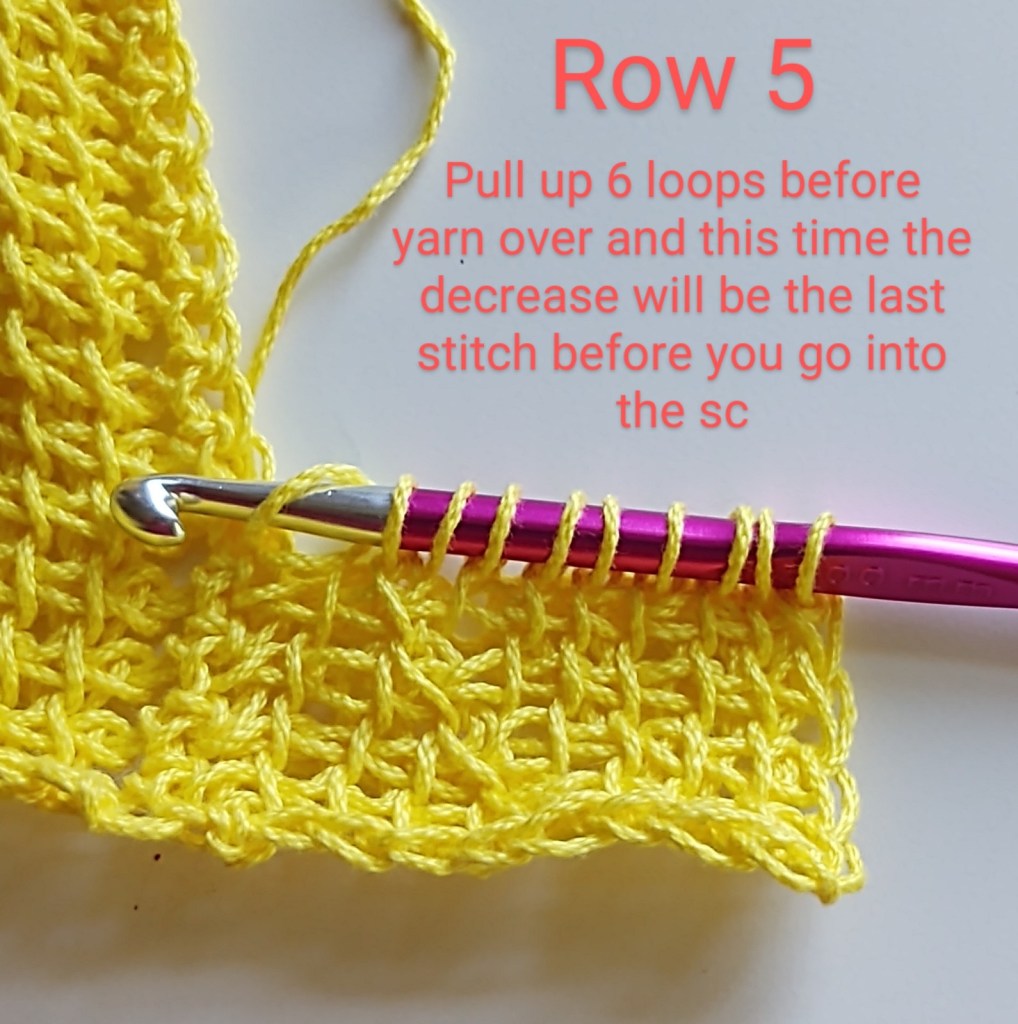
Fifth row:
Forward pass: Pull up 6 loops starting from the second bar( the fifth loop will be on the yarn over you did in the previous row),yarn over, decrease ( this time after the decrease there will not be any bar left to pull up a loop) insert hook into next sc, yarn over pull up loop.
Source: IYC
Return pass : (yarn over , pull through 2 loops ) repeat until you reach the end and have one loop on the hook
Source: IYC
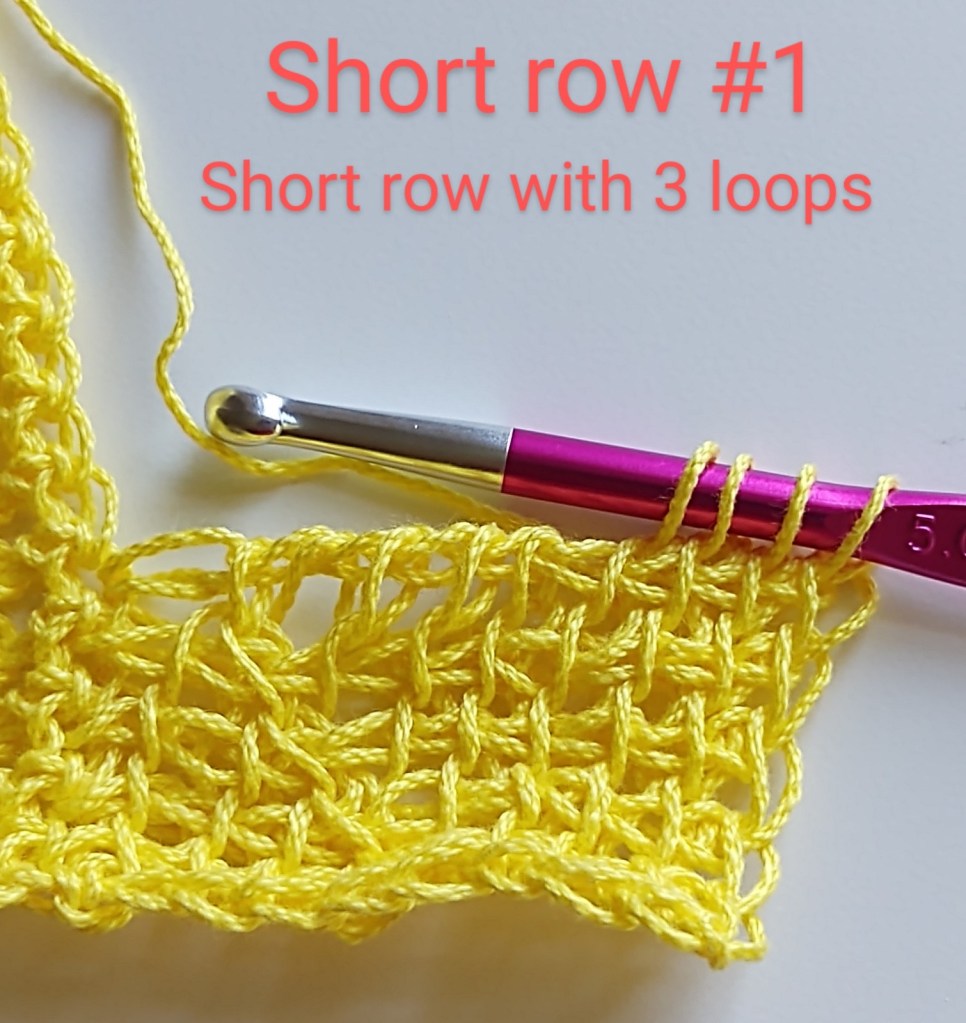
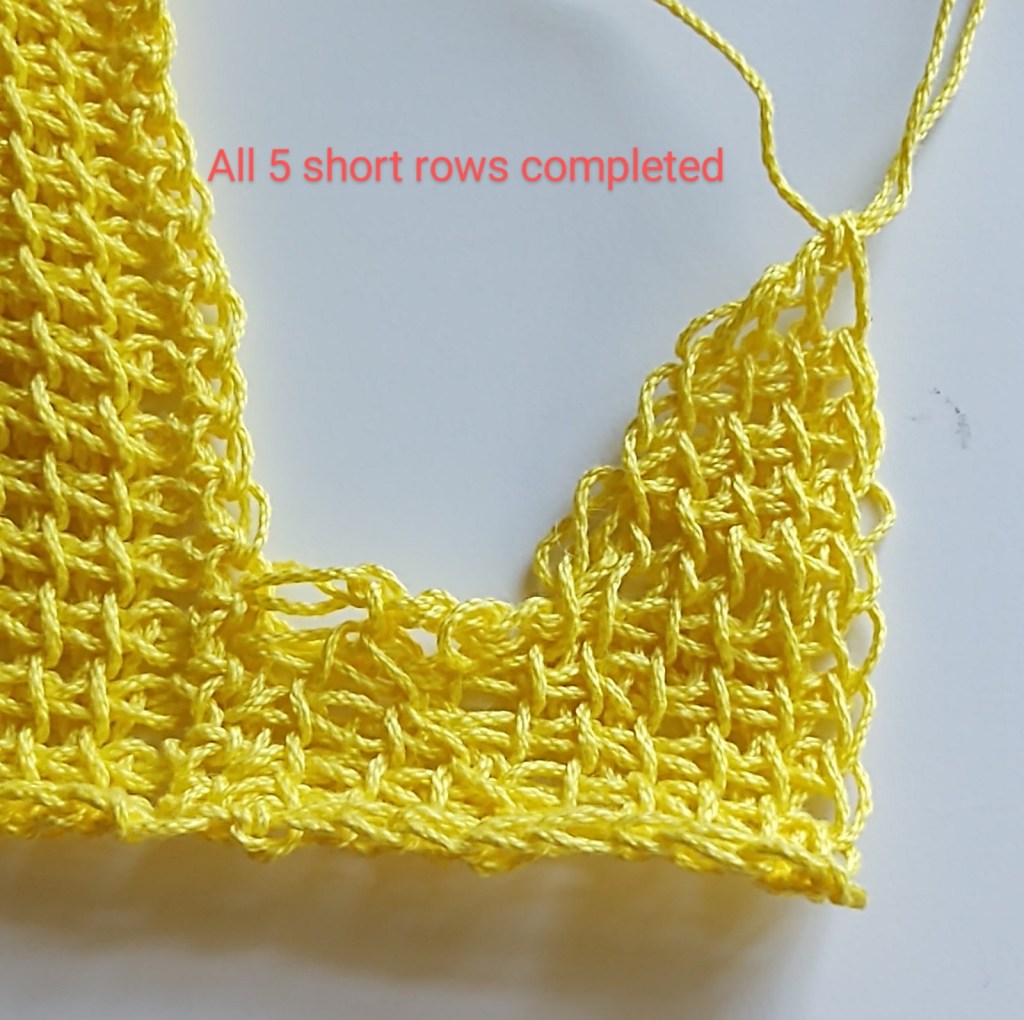
The next 5 rows are short rows.
The short rows will not connect to the sc row. Also remember to use two loops of the last bar when you go over row below to avoid the hole.
Short row 1: forward pass: pull up loop in 3 bars .
Source: IYC
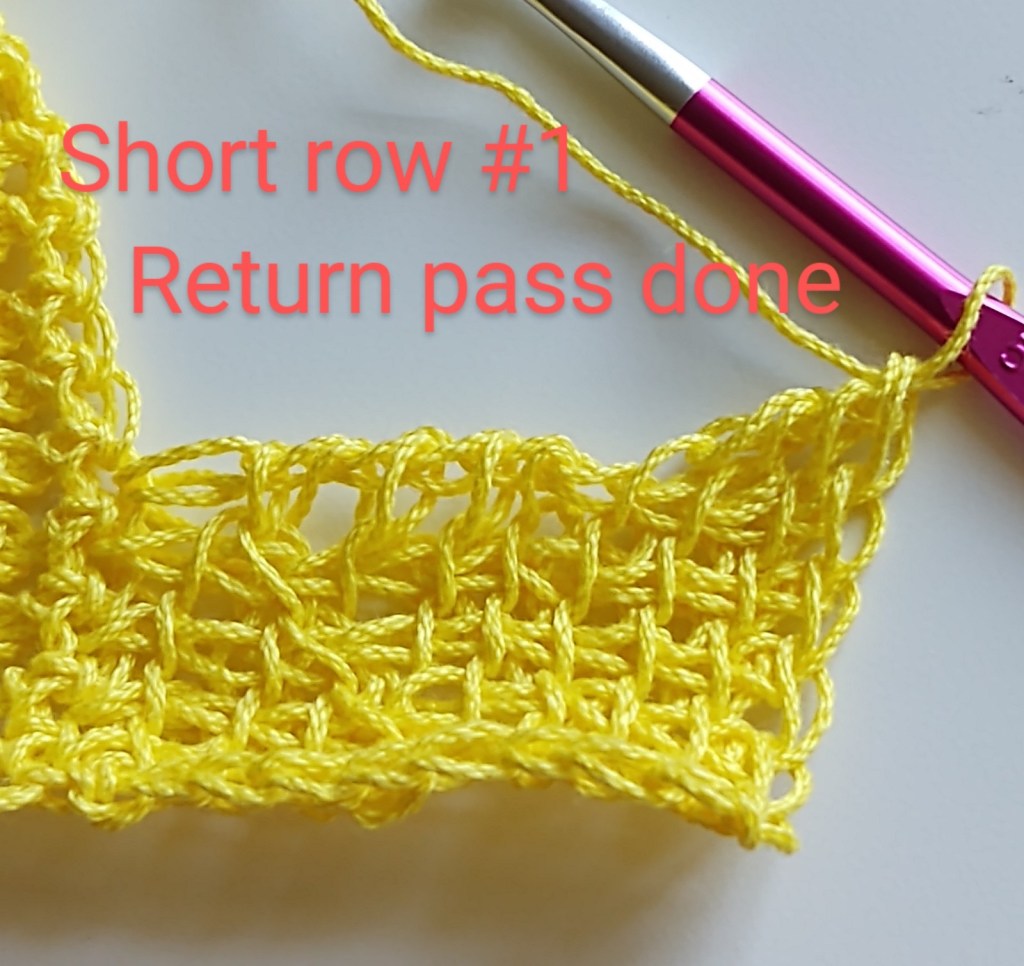
Return pass: yarn over , pull through 2 repeat until you have 1 loop on hook
Source: IYC
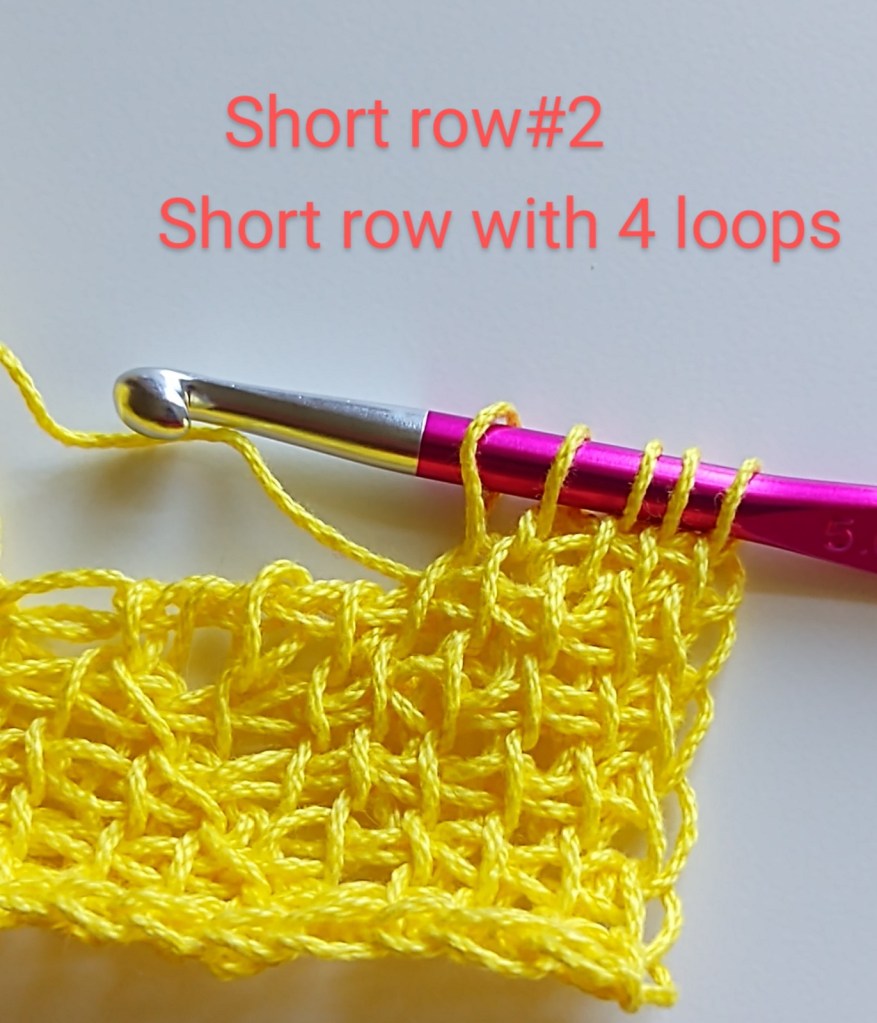
Short row 2: forward pass: pull up loop in 4 bars . For the 4th loop insert hook into the vertical bar one row below, yarn over and pull up loop.
Source: IYC
Return pass: yarn over , pull through 2 repeat until you have 1 loop on hook
Source: IYC
Short row 3: forward pass: pull up loop in 5 bars . For the 5th loop insert hook into the vertical bar one row below , yarn over and pull it up loop.
Source: IYC
Return pass: yarn over , pull through 2 repeat until you have 1 loop on hook
Source: IYC
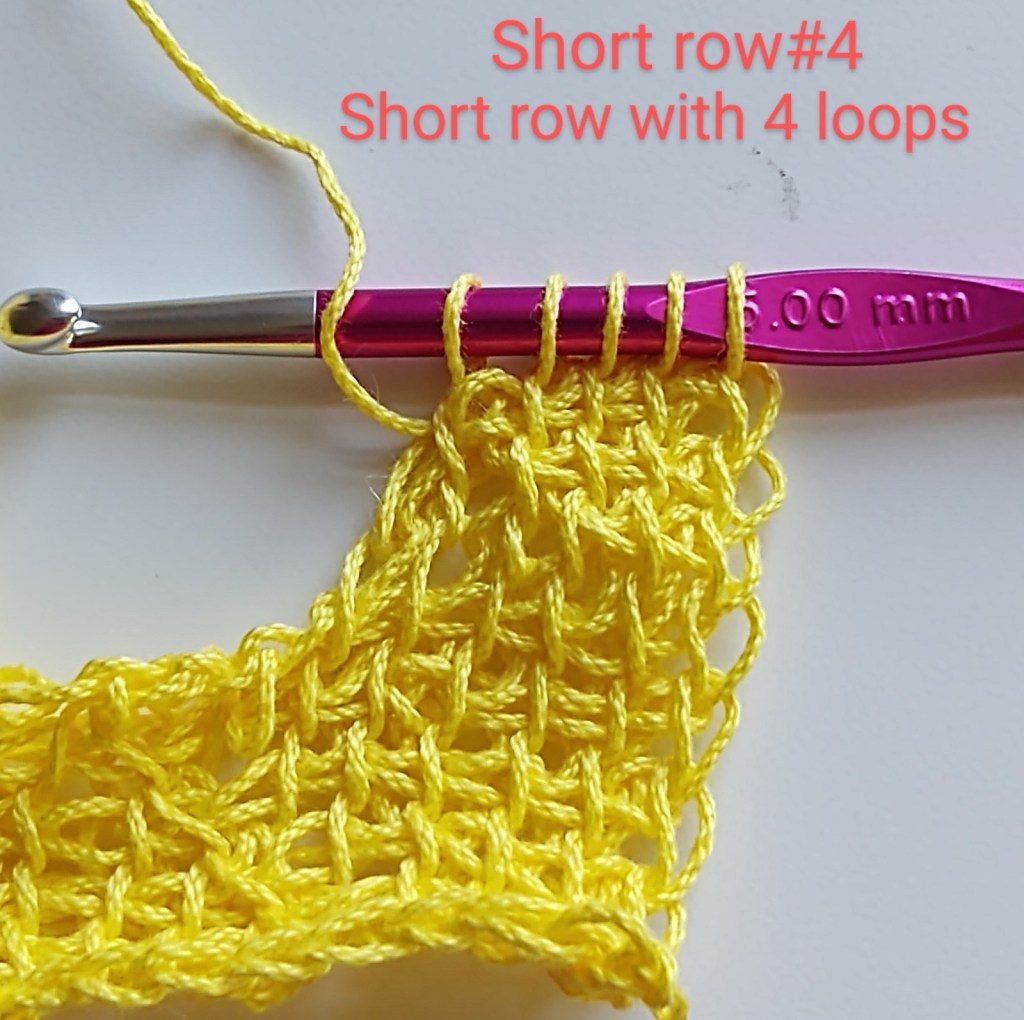
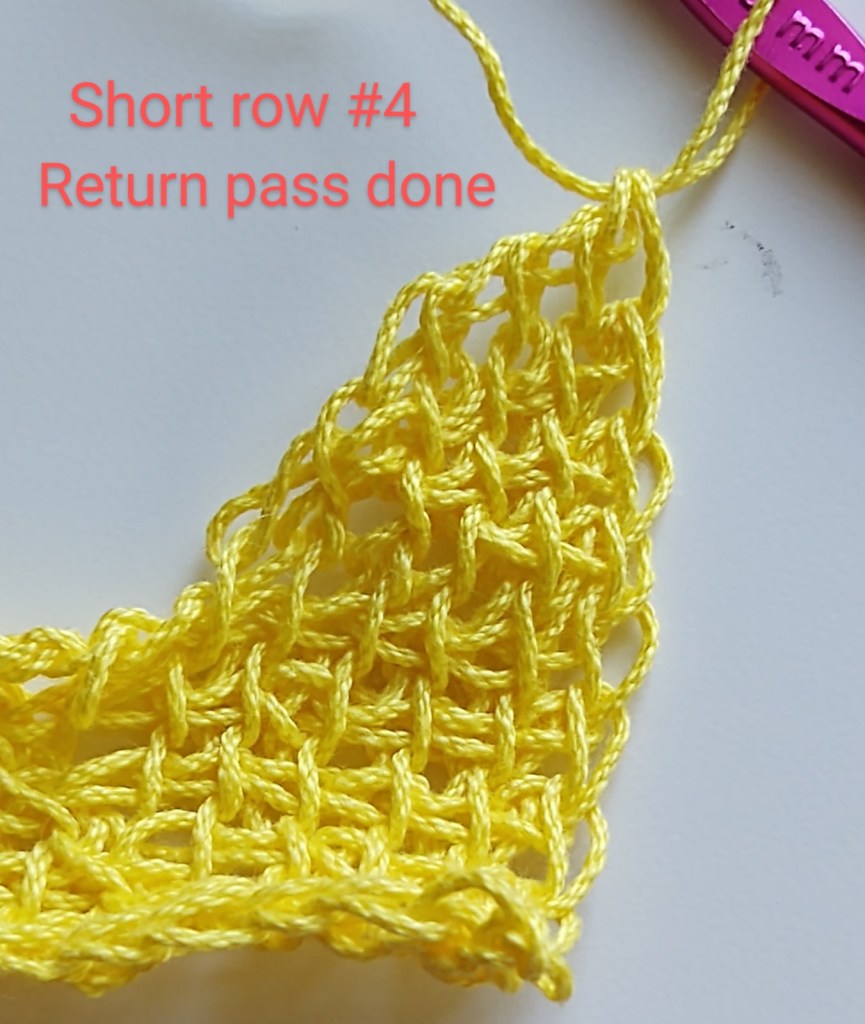
Short row 4: forward pass: pull up loop in 4 bars . Leave the last one unworked
Source: IYC
Return pass: yarn over , pull through 2 repeat until you have 1 loop on hook
Source: IYC
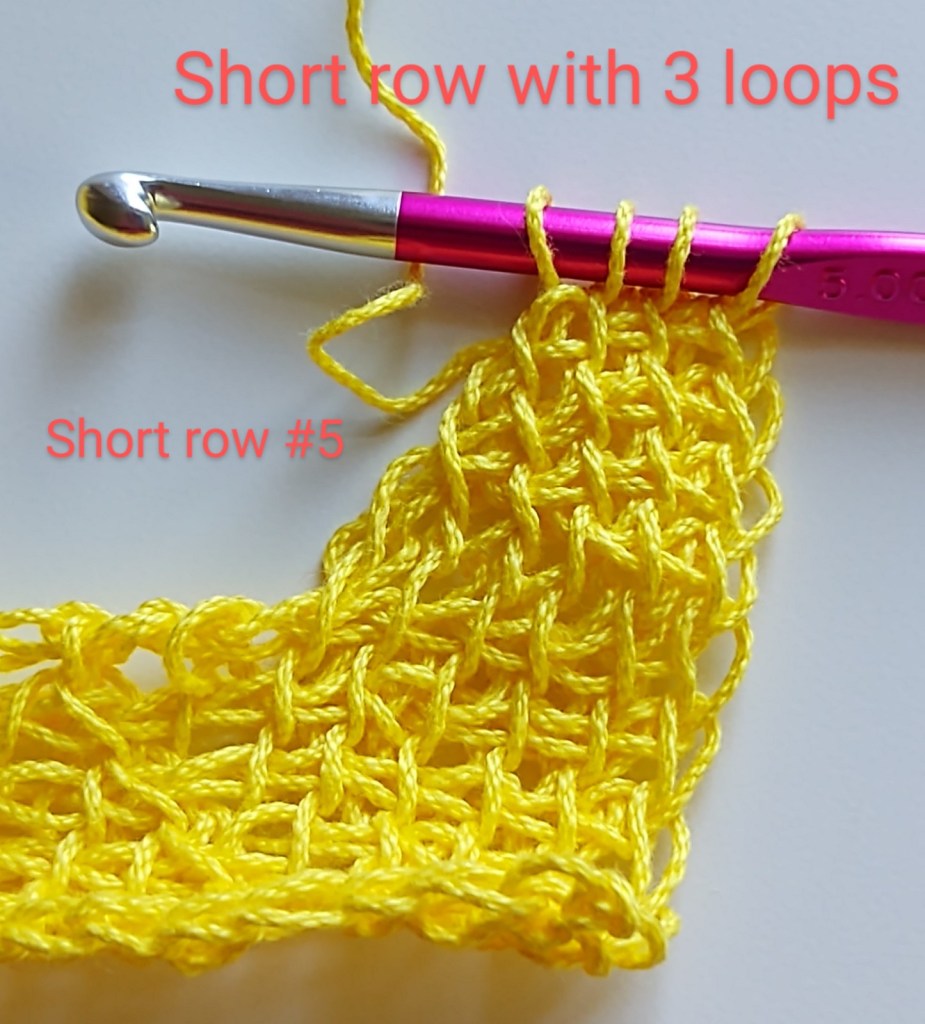
Short row 5: forward pass: pull up loop in 3 bars . Leave the last bar unworked.
Source: IYC
Return pass: yarn over , pull through 2 repeat until you have 1 loop on hook.
Source: IYC
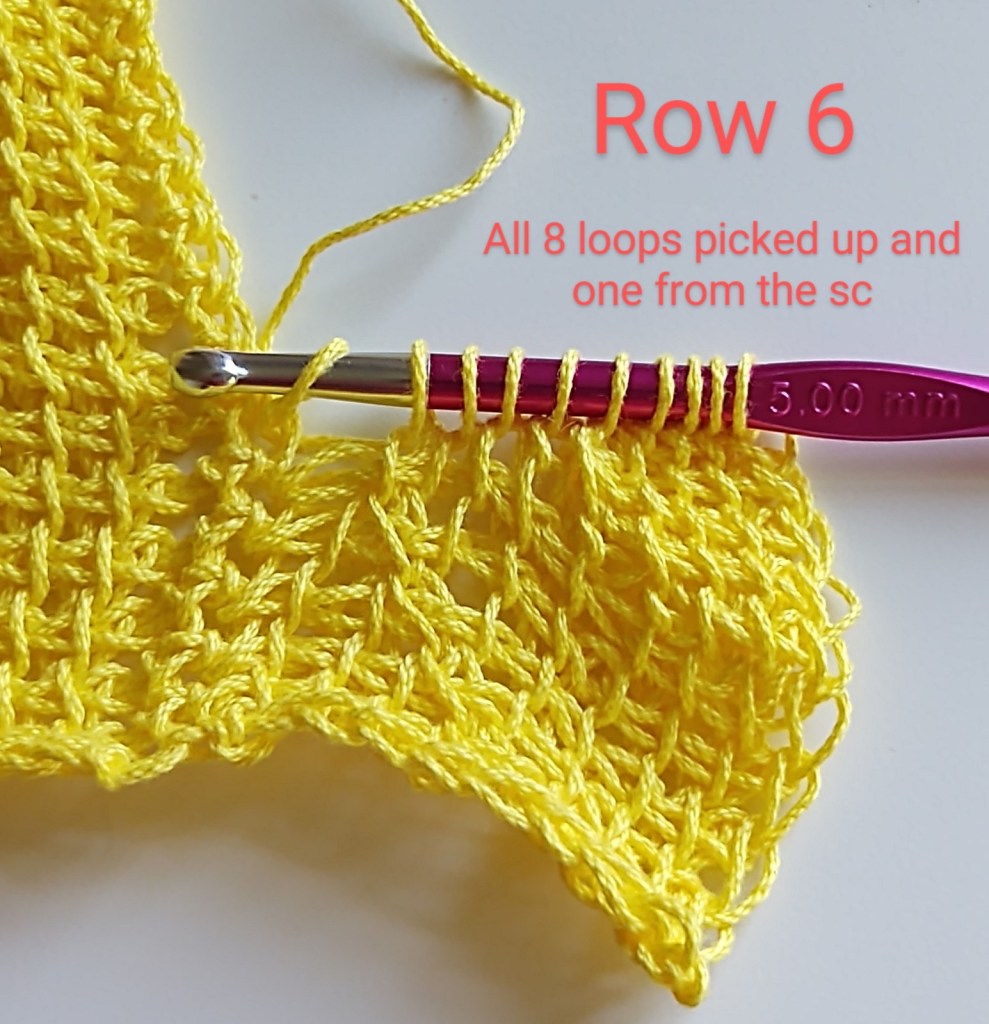
Row 6 : this row connects to the sc row. Which means you will pull up one loop in each of the vertical bars till you have 8 loops( not counting the first loop on the hook). You would have just finished short row with 3 loops , so you will pick up the three loops, then go one row below for 4th, again one row below for 5th, and one more time , one row below for 6th. The 7th loop will the the bar formed by the yarn over, and then the last loop from the next vertical bar. Next insert hook in the next sc , yarn over pull up a loop.
Source: IYC
Source: IYC
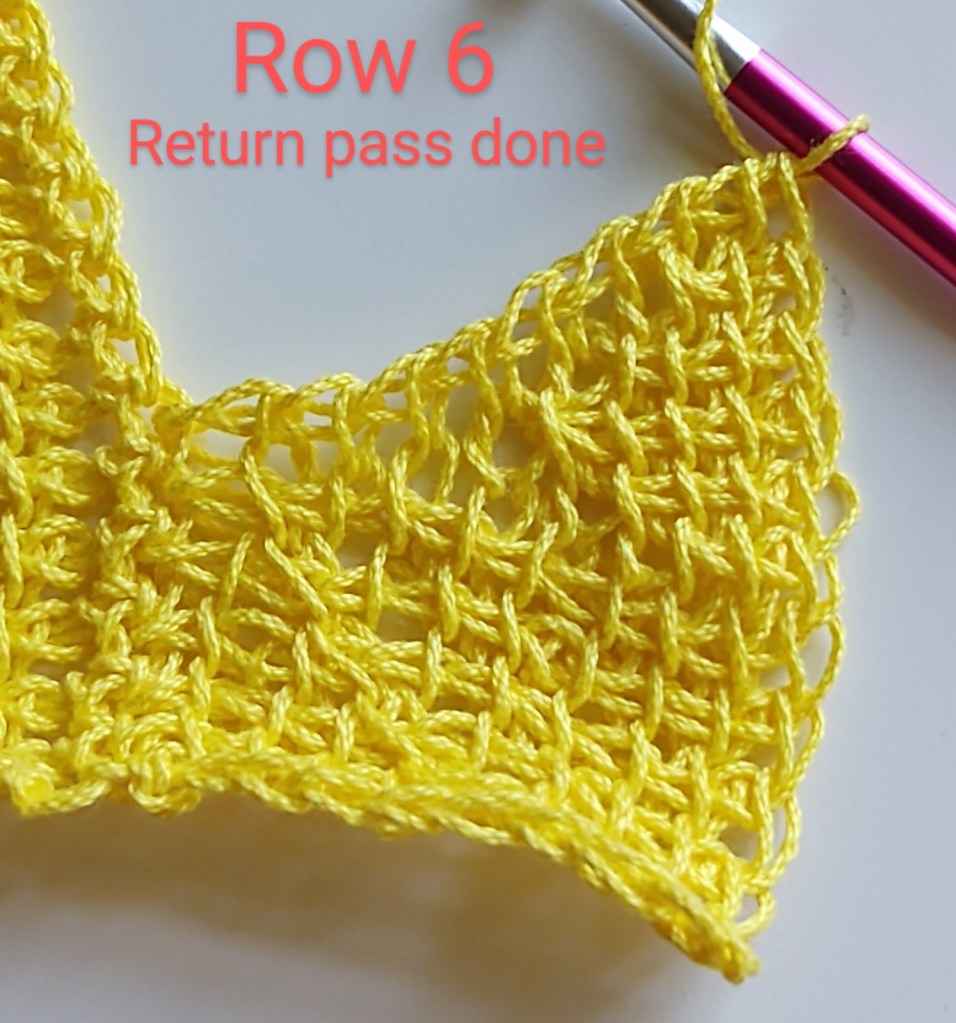
Return pass: (yarn over, pull through 2 loops) repeat till you have one loop on the hook.
Source: IYC
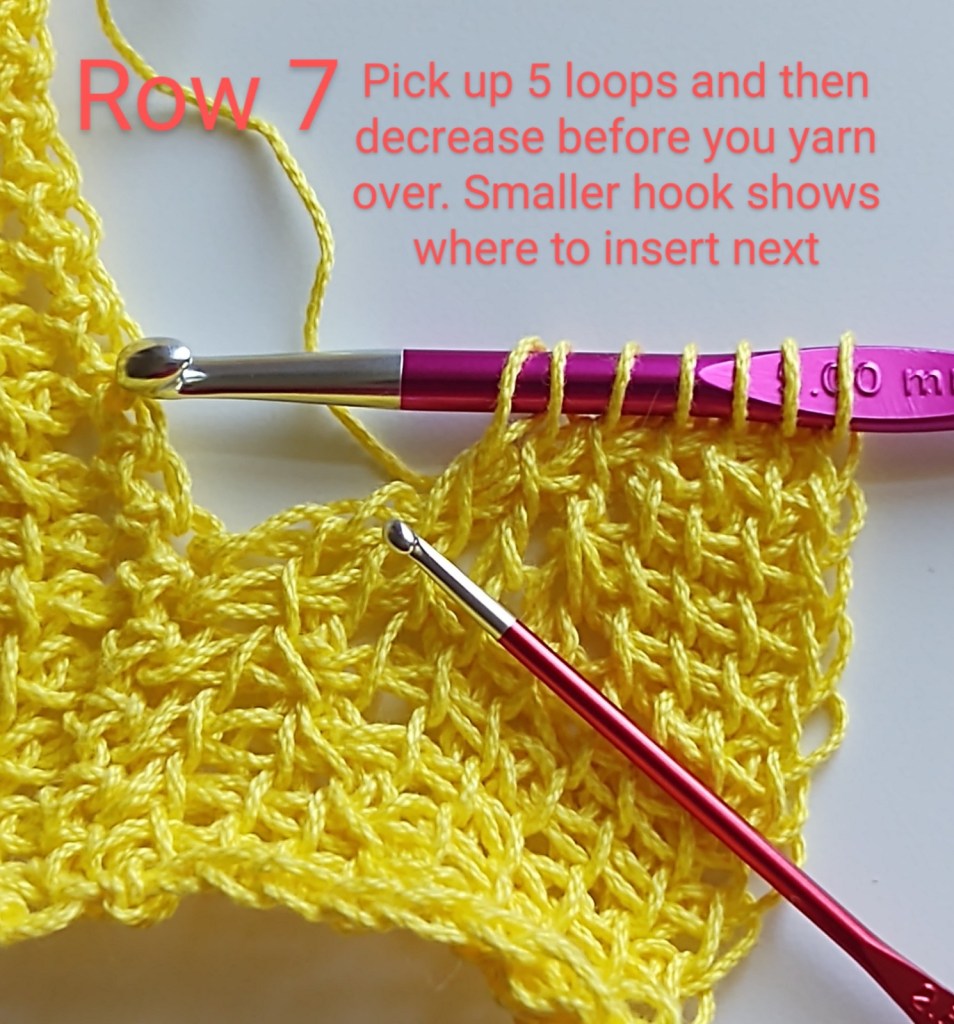
Rows 7-10 is going to be the opposite of Rows 2-5 where you will make the decrease first and then yarn over
Row 7 forward pass: pull up loop in 5 vertical bars, decrease using the next two vertical bars, yarn over, pull up loop in next bar, insert hook in sc, yarn over, pull up loop.
Source: IYC
Source: IYC
Return pass:( yarn over pull through 2 loops) repeat till you have one loop on hook
Source: IYC
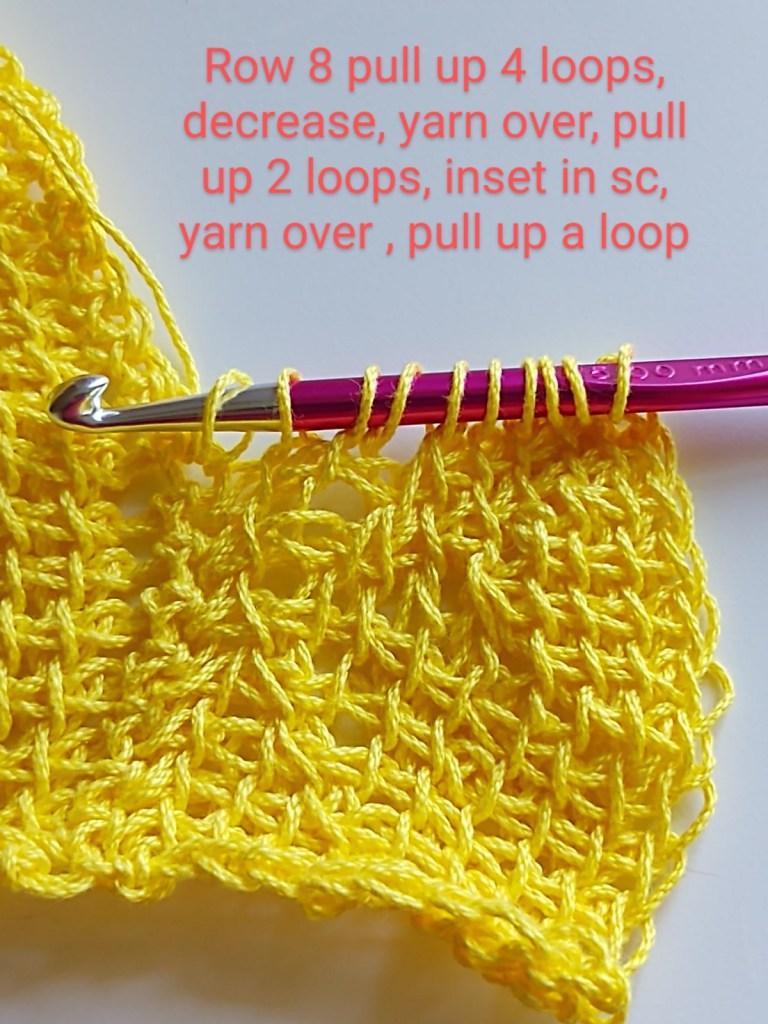
Row 8: forward pass: pull up loop in 4 vertical bars, decrease using the next two vertical bars, yarn over, pull up a loop in each of next 2 bars, insert hook in sc, yarn over, pull up loop.
Return pass:( yarn over pull through 2 loops) repeat till you have one loop on hook
Row 9: forward pass: pull up loop in 3 vertical bars, decrease using the next two vertical bars, yarn over, pull up a loop in each of next 3 bars, insert hook in sc, yarn over, pull up loop.
Source: IYC
Return pass:( yarn over pull through 2 loops) repeat till you have one loop on hook.
Source: IYC
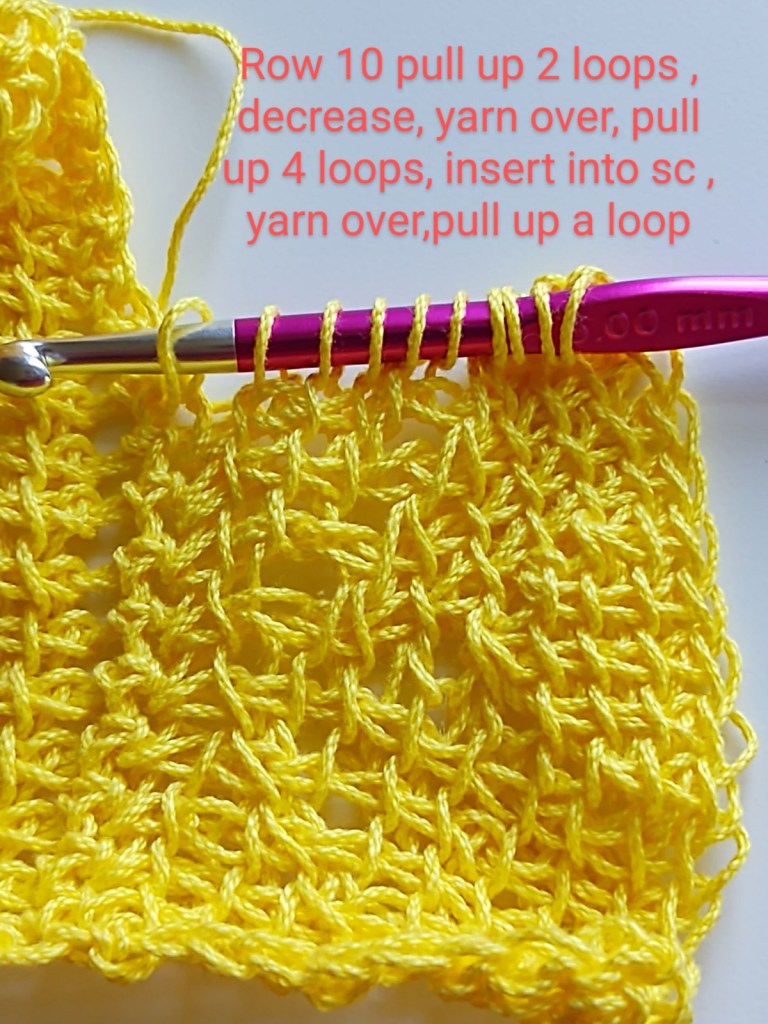
Row 10: forward pass: pull up loop in 2 vertical bars, decrease using the next two vertical bars, yarn over, pull up a loop in each of next 4 bars, insert hook in sc, yarn over, pull up loop.
Source: IYC
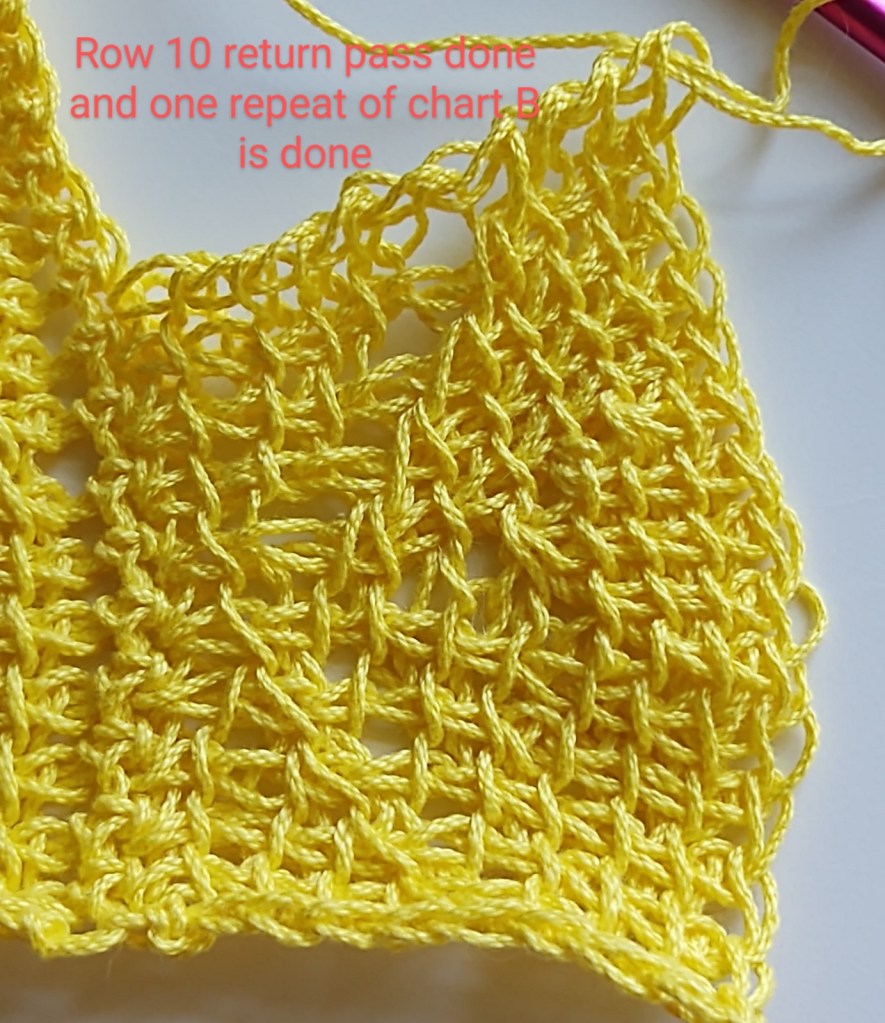
Return pass:( yarn over pull through 2 loops) repeat till you have one loop on hook.
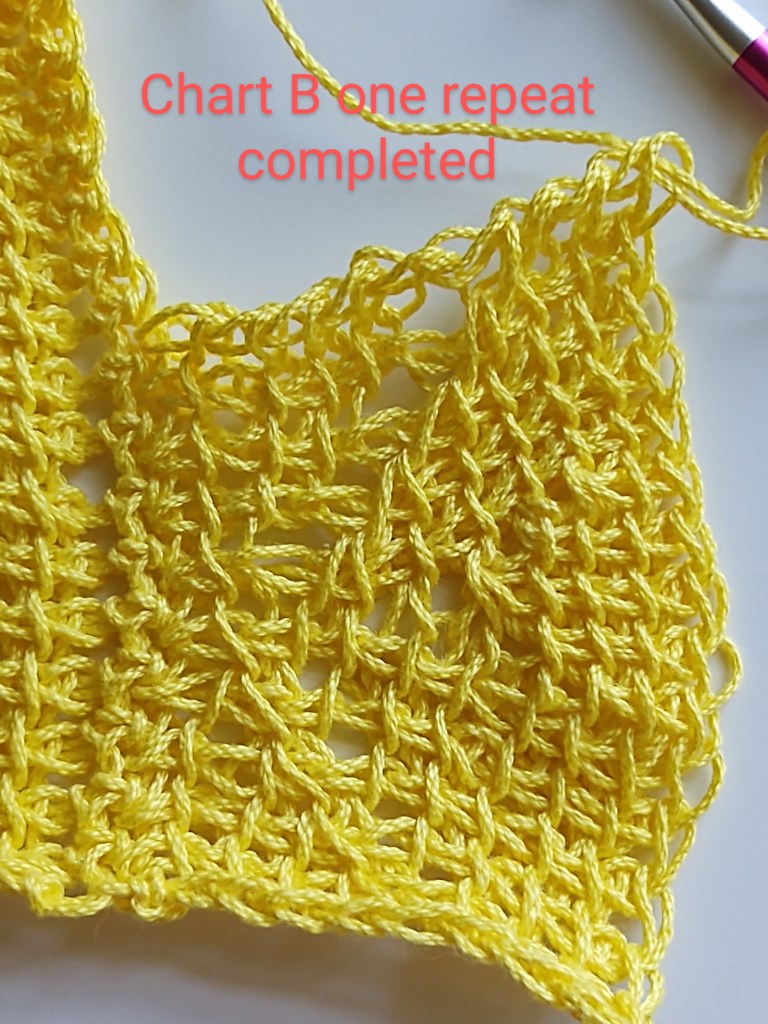
This completes one repeat of chart B.
Repeat this till the end.
Source: IYC
You can watch the tutorial here for better understanding:
Please feel free to leave your queries and comments below!
All images are copyright of IndiaYarnCircle and the respective makers, unless otherwise mentioned. You can read our disclaimer policy here.