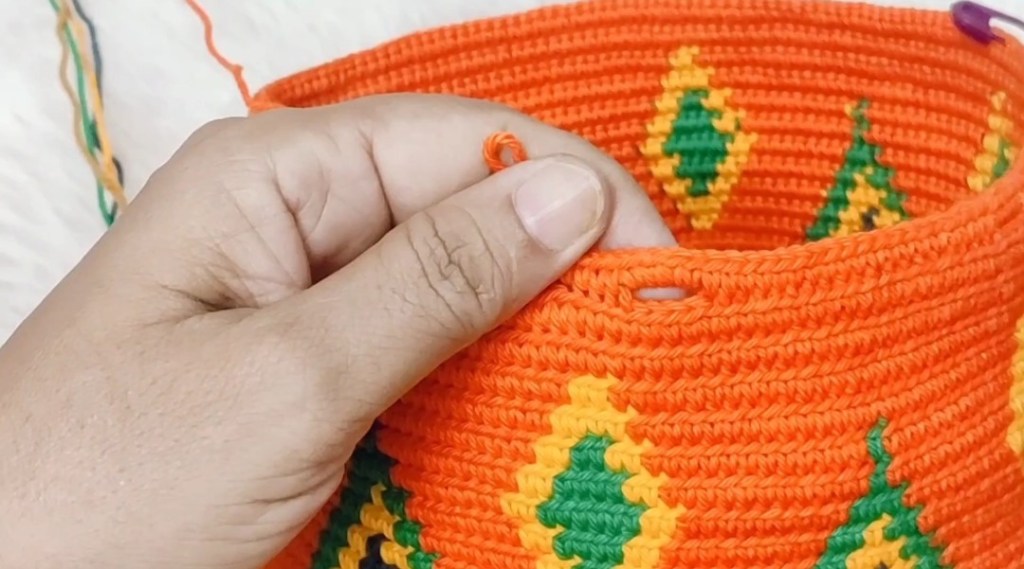
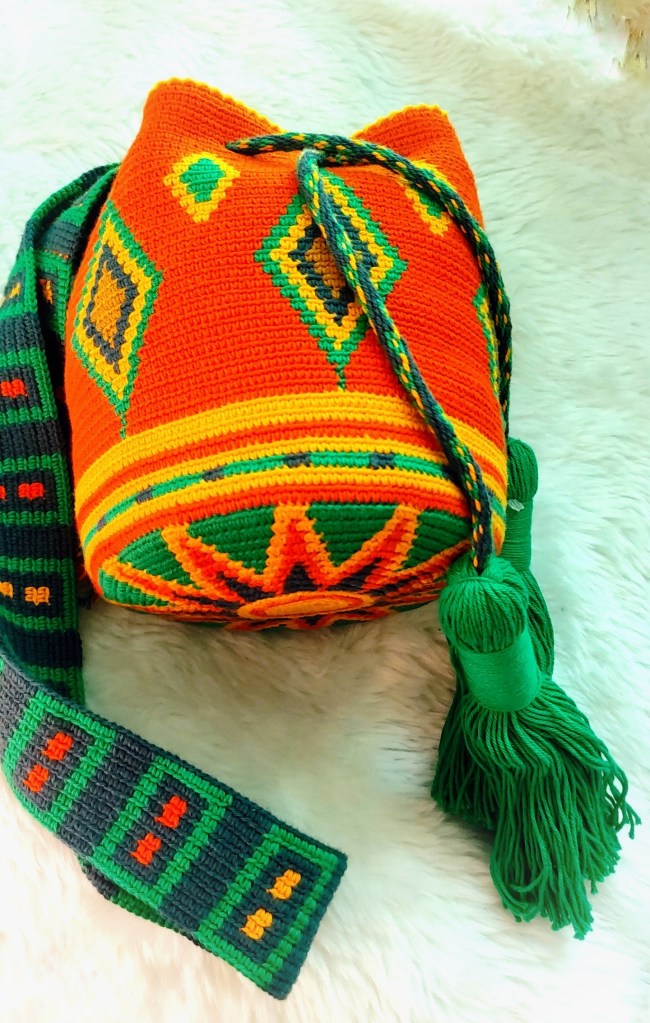
We will make Button holes in Round 33…Crochet 4 stitches around the yarns you carry. Slide the stitches if needed, pull the yarns gently. Skip 4 stitches and insert the hook in next stitch. In this video we will see how to make button holes:
As we work in spiral, there is a difference in height at the end of the round. we can minimize the height by cutting the yarns one by one in Round-36. 20 stitches before the end, cut yarn color E. 15 stitches before the end, cut yarn color D. 10 stitches before the end, cut yarn color B. At the end of the Row, cut yarn colorA.
Round-36. *30A* {6x} Round-37. Crab stitch with color C, (Do not make crab stitch in every stitch, skip every other stitch)
Graph
Thats it for Week 3! You can always get in touch with us by leaving a comment below or dm us on instagram @indiayarn.circle or join us on our facebook group where all the action happens!!
We would love to see your makes!! So dont forget to tag us @indiayarn.circle and our designer @handmadeby_ashita on instagram and facebook and use hashtags #sunburstdiamondcal #indiayarncircle #sunburstdiamondmochilacal #IYCcal
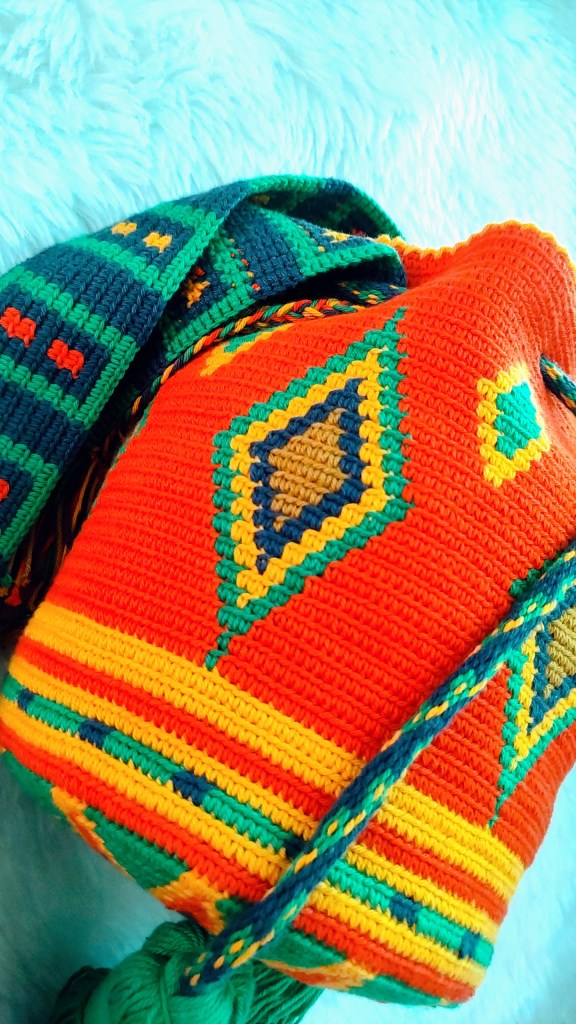
This week we will be starting with the body of the bag and as usual our guest designer Ashita has included written instructions with a video tutorial and graph!
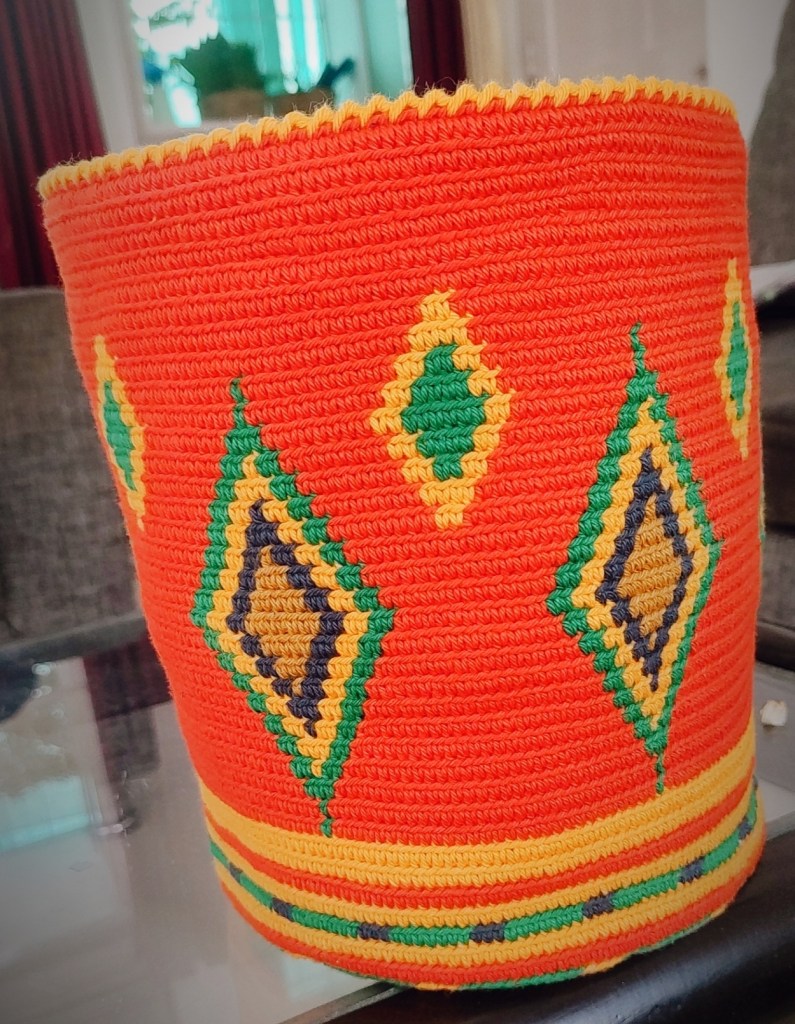
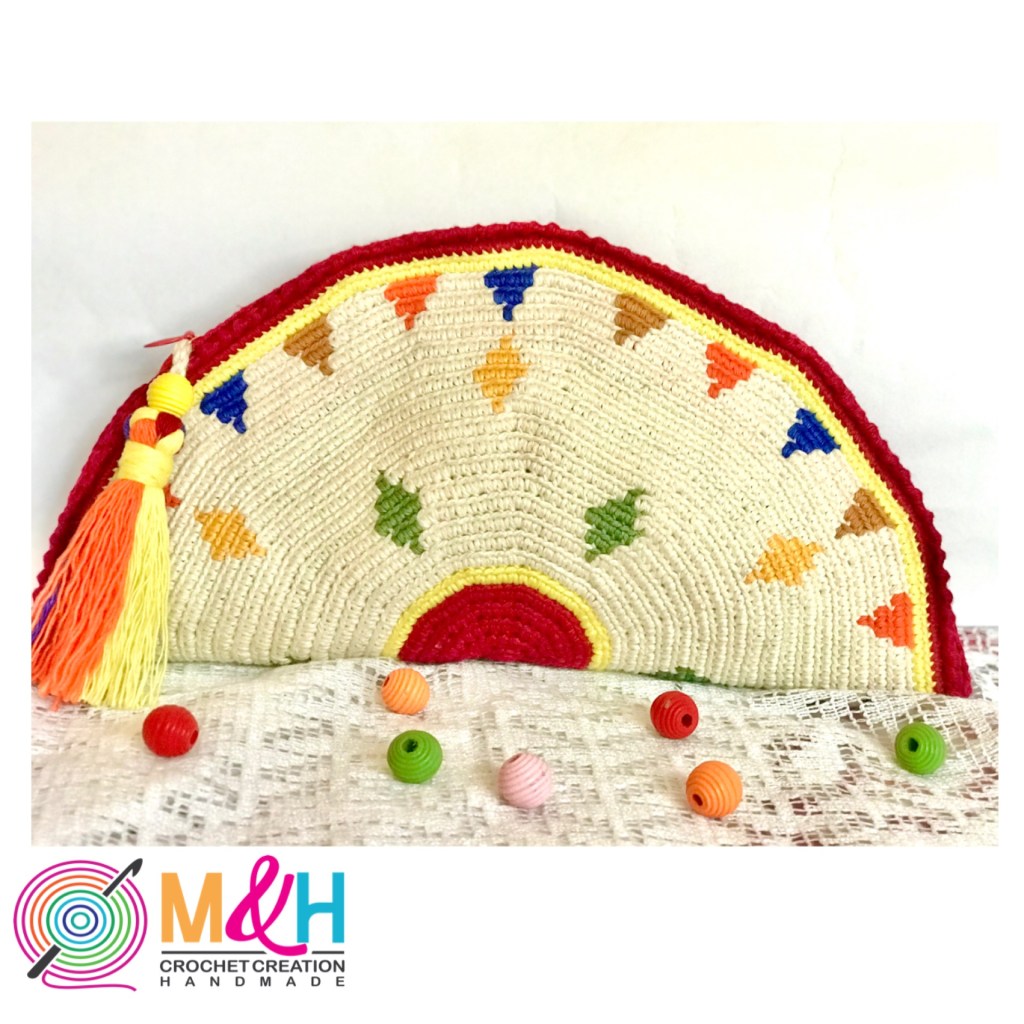
Side of the Bag
We don’t have to make any more increases for the side of the bag. Our work will go up when we stop increasing. Every 10 or 15 stitches we push our work to 90 degree angle and pull the carrying yarns one by one and massage the stitches in the direction of the hook.
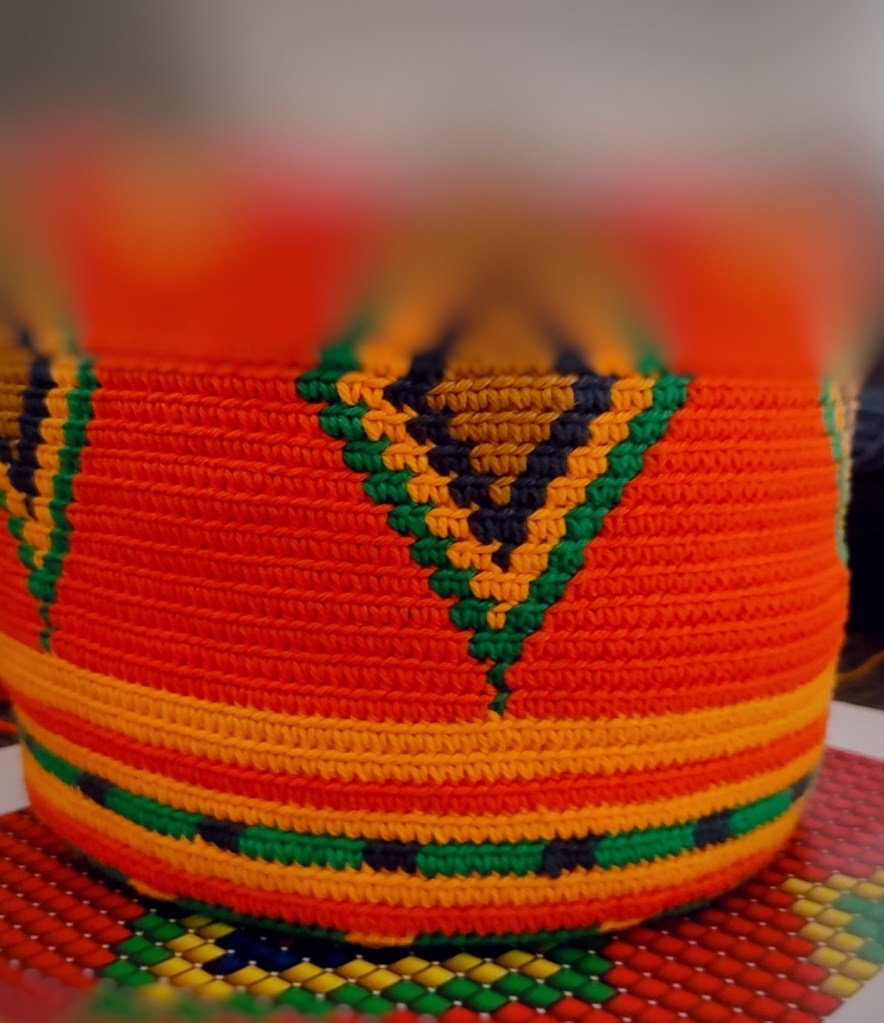
Transition from base to side
In this Video we will see how to start the side:
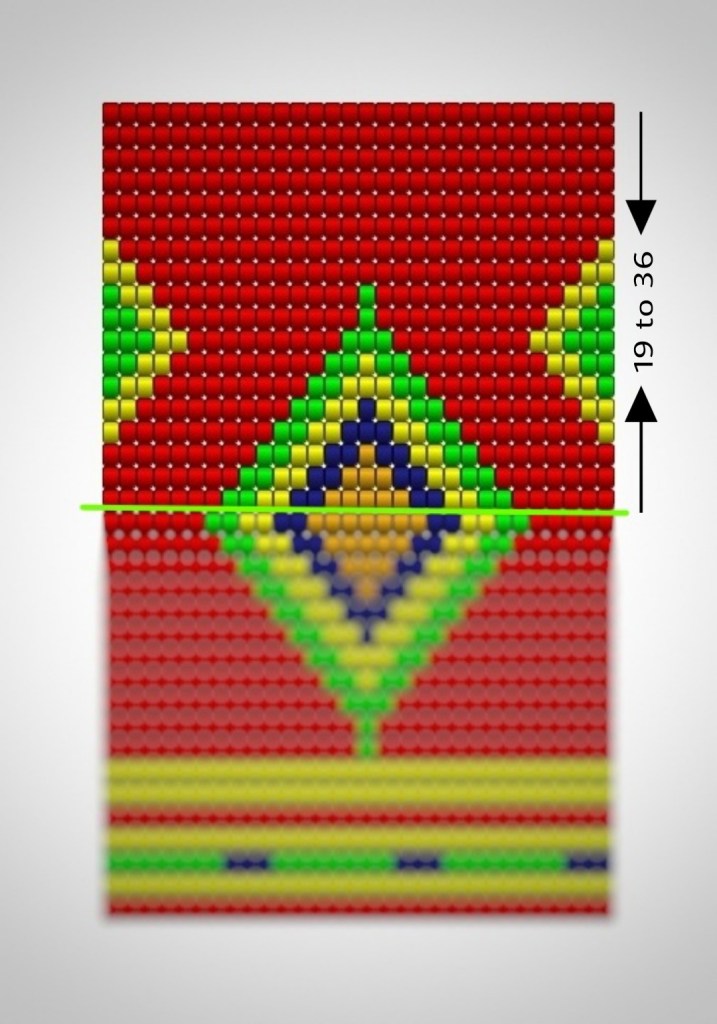
Graph
We will repeat this graph 6 times. Button holes starts at round 33.
Thats it for Week 2! You can always get in touch with us by leaving a comment below or dm us on instagram @indiayarn.circle or join us on our facebook group where all the action happens!!
We would love to see your makes!! So dont forget to tag us @indiayarn.circle and our designer @handmadeby_ashita on instagram and facebook and use hashtags #sunburstdiamondcal #indiayarncircle #sunburstdiamondmochilacal #IYCcal
Hello Everyone!!! The Sunburst Diamond Mochila Bag CAL has begun!!! We are so excited!
Hope you have gathered all the materials required for the Sunburst Diamond Cal!
If you have no clue about what we are talking, you can check out all about the cal, our geust designer, the material list, notes on starting and tips and tricks required for the CAL, AND REGISTER HERE.
This week we officially kick start the CAL with instructions for making the base of the bag.
Week — 1: Base
Abbreviations
A = Orange B = Green C = Yellow D = Navy Blue E = Light Brown 2 C = crochet 2 stitches with color C 2 D = crochet 2 stitches with color D 2 A = crochet 2 stitches with color A 2 B = crochet 2 stitches with color B 3 B = crochet 3 stitches with color B 4 B = crochet 4 stitches with color B 5 B = crochet 5 stitches with color B 4 C = crochet 4 stitches with color C inc = increase (2 single crochet in one stitch) inc C = increase with color C inc DA = increase with 2 colors (one stitch in color D and one stitch with color A) * * = repeat what is between * * {6x} = repeat 6 times what is between * * {12x} = repeat 12 times what is between * * ( ) = total number of stitches at the end of the round
NOTES
1. The whole bag will be worked in back loops only. 2. We carry all the yarns throughout the whole bag. 3. We Pull the carrying yarn GENTLY every few stitches and massage the stitches in the direction of the hook. 4. Use the yarn FROM INSIDE OF THE SKEIN and when change the color, pick up the yarn from the skein and follow to our work. 5. Stitch counts at the end of each round is mentioned in brackets (#).
Written instructions
ROUND 1 TO 8
Round 1. With color C make 6 sc in magic circle……………………………….add yarn color A Round 2. * inc C* {6x} (12)………..add yarn color B Round 3. * inc C* {12x} (24)………..add yarn color D Round 4. *1C, inc C* {12x} (36)……….add yarn color E Round 5. *1A, inc A, 1A* {12x} (48) Round 6. *2C, inc C, 1C* {12x} (60) Round 7. *1A, 1D, inc D, 2D* {12x} (72) Round 8. *2A, 1D, inc D, 1D, 1A* {12x} (84)
LINKS
Round 1 to 4:
Round 5 to 8:
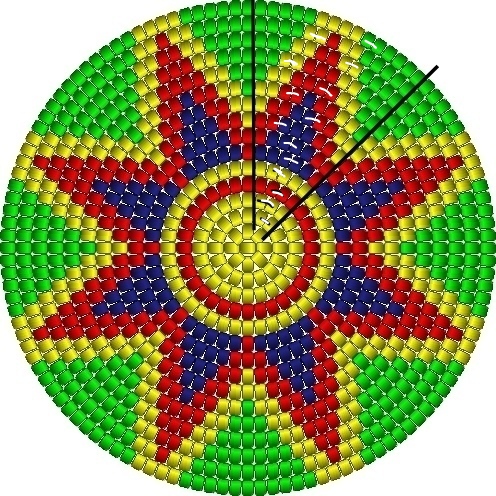
GRAPH
REMINDER
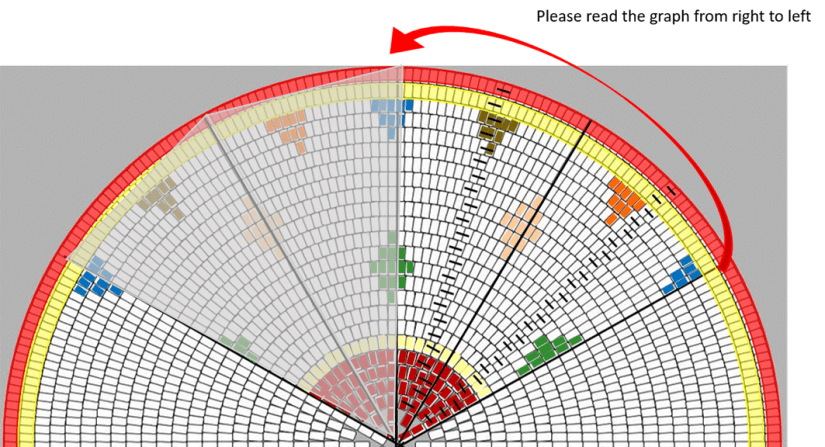
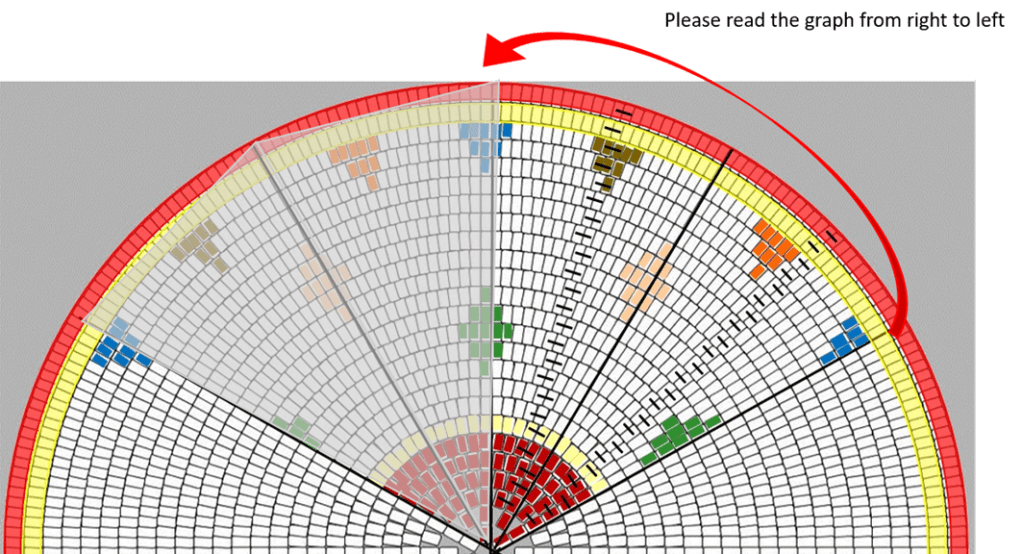
1. We will follow 1/8th part of the graph only and not the complete graph. 2. The graph starts at round 3 3. Read the graph from right to left. 4. The white lines mark the increases.
Thats it for Week 1! You can always get in touch with us by leaving a comment below or dm us on instagram @indiayarn.circle or join us on our facebook group where all the action happens!!
We would love to see your makes!! So dont forget to tag us @indiayarn.circle and our designer @handmadeby_ashita on instagram and facebook and use hashtags #sunburstdiamondcal #indiayarncircle #sunburstdiamondmochilacal #IYCcal
We hope you all enjoyed making the Solitaire Mochila CAL by Rosy of @mnhcrochetcreation and we loved seeing all your entries for that CAL! Check out the final makes of all the participants HERE!
We are back with a brand new CAL and this one is going to blow your minds!
Designed by the very talented Ashita Javeri of @handmadeby_ashita especially only for this CAL, the Sunburst Diamond Mochila bag will make you fall in love with mochila crochet and up your crochet game!
Before we dive into the specifics of the CAL, let’s hear from the Designer herself and know a little more about her journey into crochet and designing.
Ashita Jhaveri
My name is Ashita, a happily married mum to a daughter, a self-taught crocheter and the maker behind handmadeby_ashita on Instagram.
My passion for crochet started about 6 years ago. Spent my whole childhood and youth watching my grandma and my mama creating beautiful things with yarns. But it wasn’t until I saw a crochet page on Facebook that I felt the need to learn to crochet. This was how my journey started. I started my Facebook page with the purpose to inspire anyone with a do-it-yourself attitude. I am a home-maker, my days are often busy but I always find time to pick up my crochet hook to create beautiful things.
I learned crochet entirely by watching tutorials on YouTube and I am happy to pass it on to the people who want to learn this art. I came across Mochila work last year but never initiated anything until one of my friends asked me to make her a Mochila Bag. I then, visited Marion’s Facebook group, watched her YouTube tutorials to get started and tried my first Mochila Bag (it would never have been possible without her tutorials). I am still a beginner to mochila techniques, but managed to create my second design to inspire everyone and grab their hooks and say, “this is my crochet!” Yes, I say we can. And I look forward to seeing YOUR OWN Mochila.
Special mention to my friend Rosy for encouraging and supporting me to do this CAL without which I would have never thought of taking this up. It’s been an absolute pleasure to collaborate with India Yarn Circle and working as a team with all of you.
PRESENTING….
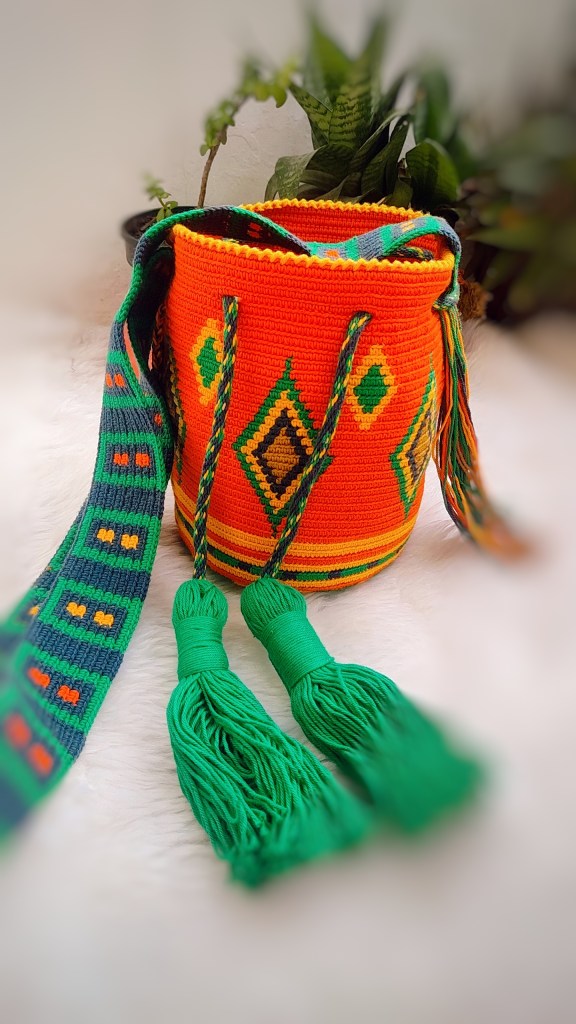
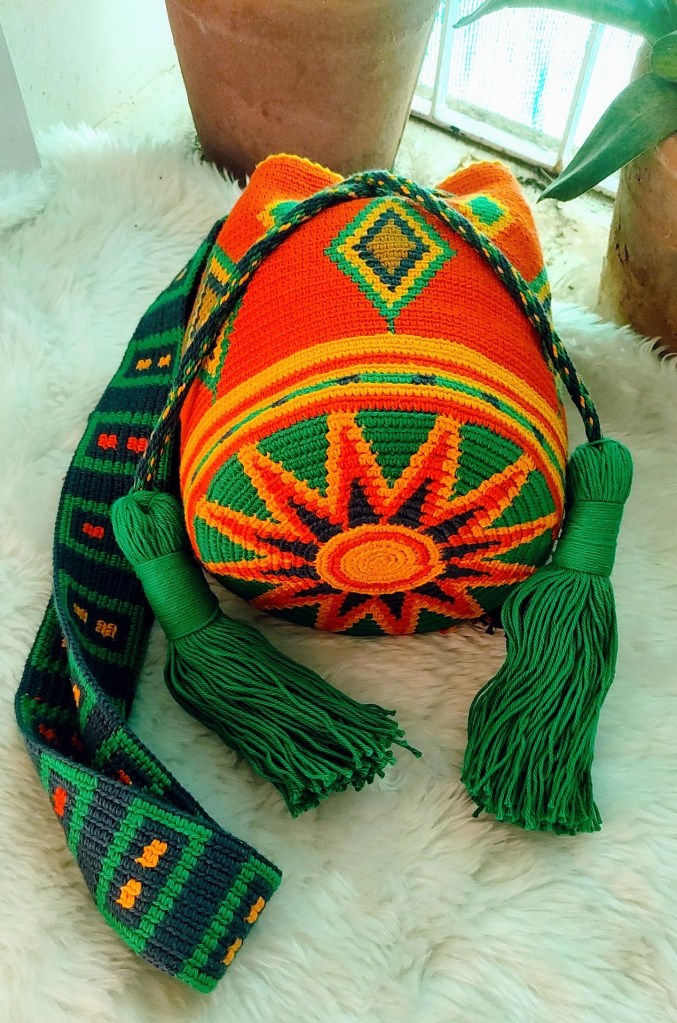
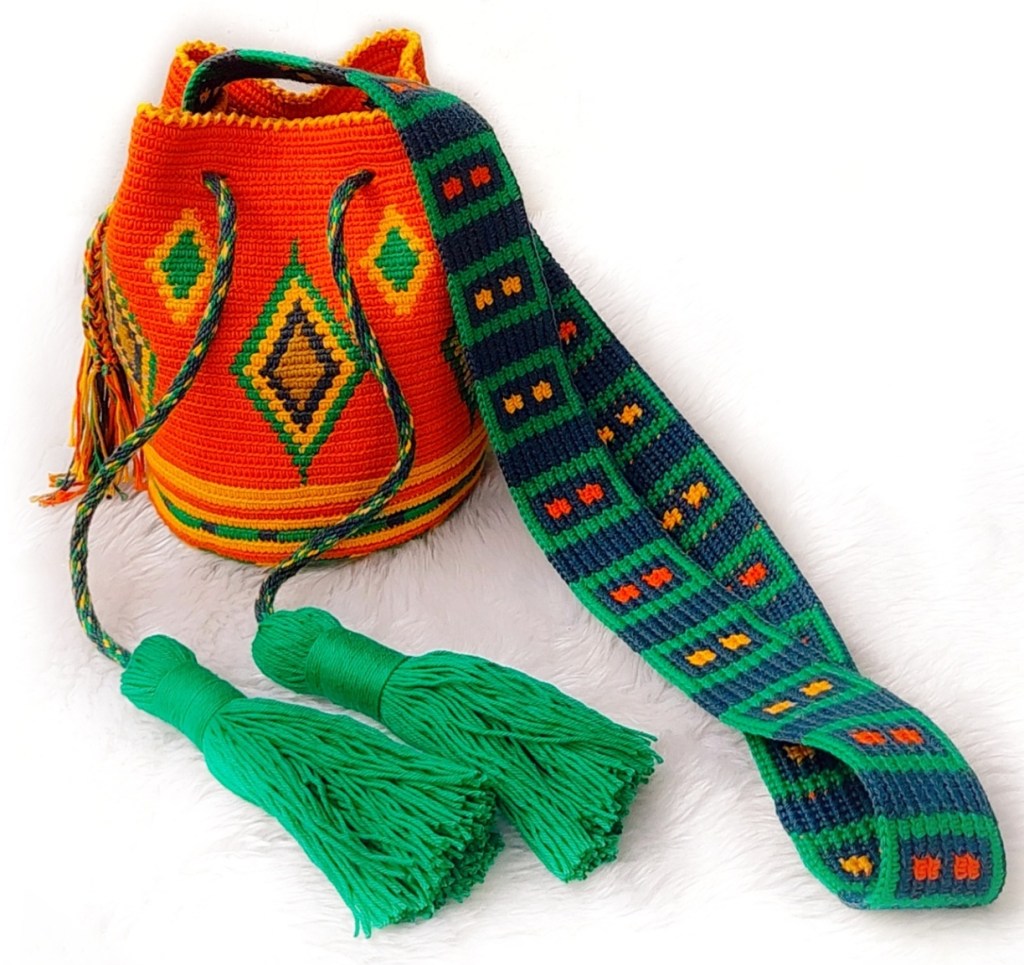
The Sunburst Diamond Mochila Bag
This Bag is designed with the purpose to learn Mochila techniqes.
The IndiaYarnCircle team and Ashita will guide and help you every step of the way to make this gorgeous design.
So dont worry! We got you!
Let’s Dive in and see how you can participate in this CAL:
The CAL will be running for 4 – 5 weeks and each week part of the pattern will be published on our blog here. The first week is for registration and gathering of the materials and next week onwards we will begin making the bag.
You only need to register for the CAL (scroll all the way below to the register here button).
Join our facebook group for all the CAL discussions and queries. (Scroll down to find the link)
Follow us on instagram and blog for regular updates and future events.
MATERIALS
* Recommended Yarn for Mochila bag is Mercerized cotton yarn, 125 meter/ 50 grams.
The sample bag is made with 100% cotton, 4ply, DK weight yarn.
* Color A, Orange – 81 grams * Color B, Green – 93 grams * Color C, Yellow – 40 grams * Color D, Dark Blue – 57 grams * Color E, Light Brown – 14 grams
* Stitch marker * A pair of scissors * darning needle
Hook 2 or 2.5mm crochet hook (I have used 1.9mm hook with 100% 4ply yarn)
You can choose any colour combinations you like and build you own colour pallete for the bag.
Measurements
Bottom: 10.7cm / 6.3 inch Height: 20 cm / 8 inch
Level
Easy/ Beginner
Some tips and Notes before we begin
Important The whole bag will be worked in BACK LOOP ONLY.
Tension: It is important to have an even tension throughout the bag. We will need to give each stitch attention and SLOW DOWN. when there are so many color changes it will not be difficult but when there is no color changes or a very few color changes, we can easily pull the yarns that we carry, too much or not enough. When we will pull the yarns too much, the work will get smaller and wider/wavy when we will pull the yarns not enough. The only reason we pull the carrying yarn is to get the yarns straight within the stitches and never to get the stitches closer together.
Color Change and massaging the Stitches
In this video you can see how to change color and massage the stitches every few stitches.
How to Prevent Yarns from Tangling Use the yarn from the inside of the Skein. Place the yarns in front of you. Make sure the distance between your work and the skeins is not too long. When you change the color, pick up the yarn from the skein and follow to your work.
Two color increase: Round 9 and 10 of our base have two color increase. Round 9: 1C, 2A, 2D, inc DA, 1A…. * 1C = one stitch with color C 2A = two stitches with color A 2D = two stitches with color D inc DA = insert the hook in the next stitch, 2 loops on the hook of color D, take the color A yarn, pull through 2 loops, insert the hook in the same stitch again, and make second stitch.
This Mochila will have 5 colors and to make our bag firm, we carry all the yarns throughout the whole bag.
For the base:
Graph: There are 3 ways we can make our Mochila base. With 8 increases, with 10 increases and with 12 increases. To make our base flat and firm, 8 increases is just not enough so we will be making our base with 12 increases. The program i have used here is originally for bead designs which always have 8 increases. I have divided the base in 8 equal parts and seperated 1/8th part to repeat 12 times. i.e. we will repeat only 1/8th part 12 times not follow the full graph.
Now that all the basics are covered lets set you up for the CAL.
Can you believe week 1 of the Solitaire Mochila CAL is already over?
We hope you are progressing well in making your Solitaire Purse and we would love to see all your pics! Join our facebook group to share or follow us on instagram and tag us! Use hashtags #solitairemochilacal #mochilacal2021 #indiayarncircle
If you are new here, check out all the registration and material details HERE and Week 1 Instructions HERE
Now that you are all caught up, lets begin with week 2
WEEK TWO
Week Two is from Row 13 to Row 24
Note:
Please keep in mind all the techniques mentioned in the Week 1 CAL so that you can perfect your work.
Written instructions
Full pattern has been divided into 12 triangular parts. You will repeat 2 triangular pattern 6 times(unless specified otherwise) . (the unshaded parts are two triangles which you have to repeat 6 times)
Row 22 * 3F, 6C, inc C, 5G, 13C, 2H, inc H, 1H, 8C, 2F* (Repeat * to * 6 times) [276] pick up yarn B
Row 23 * 10B, inc B, 11B* (Repeat * to * 12 times) [288] pick up yarn A
Row 24 * 10A, inc A, 12A* (Repeat * to * 12 times) [300] cut the yarn.
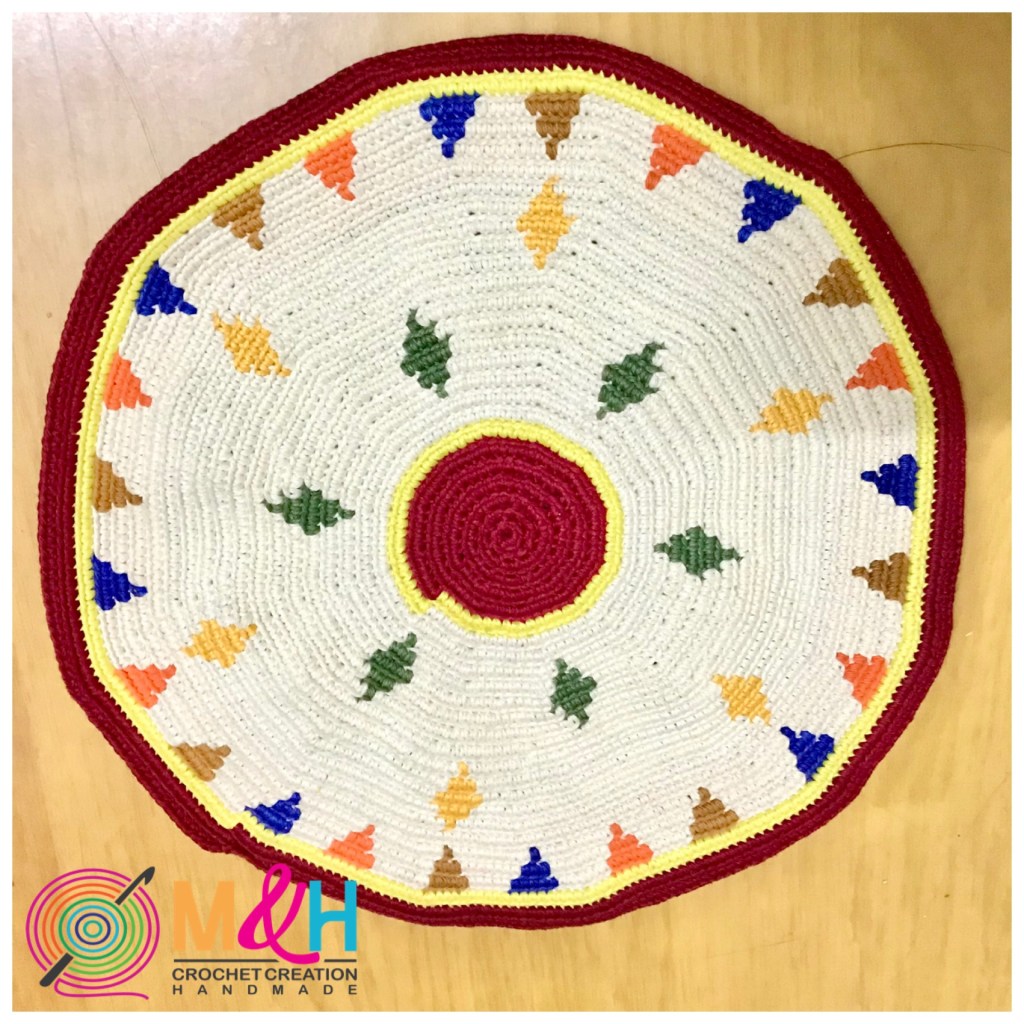
Fold the round base into half exactly and put stitch markers on both ends. I made a fold along the line where you begin your rows and shifting of colours can be noticeable. If you do this, rest of your pattern will look neat.
Row 25 Leave two sc after the marker and make 1A into each. Skip 2sc before you reach the next marker. Cut the yarn. Continue on the other side the same thing and cut the yarn.
Stitching two pieces:
Have a look at Marion Verloop’s tutorial on how to join the two pieces:
By using this method just make 25 slip stitches both corners and leave the middle for stitching the zip.
Add Zip:
Stitch your zip on the extra row which you made.
Add Crab Stitch
Marion has shown very clearly how to add the crab stitch. On the last row i.e Row 25 you made sc on the back loop, so you will make crab stitch on the front loop all around.
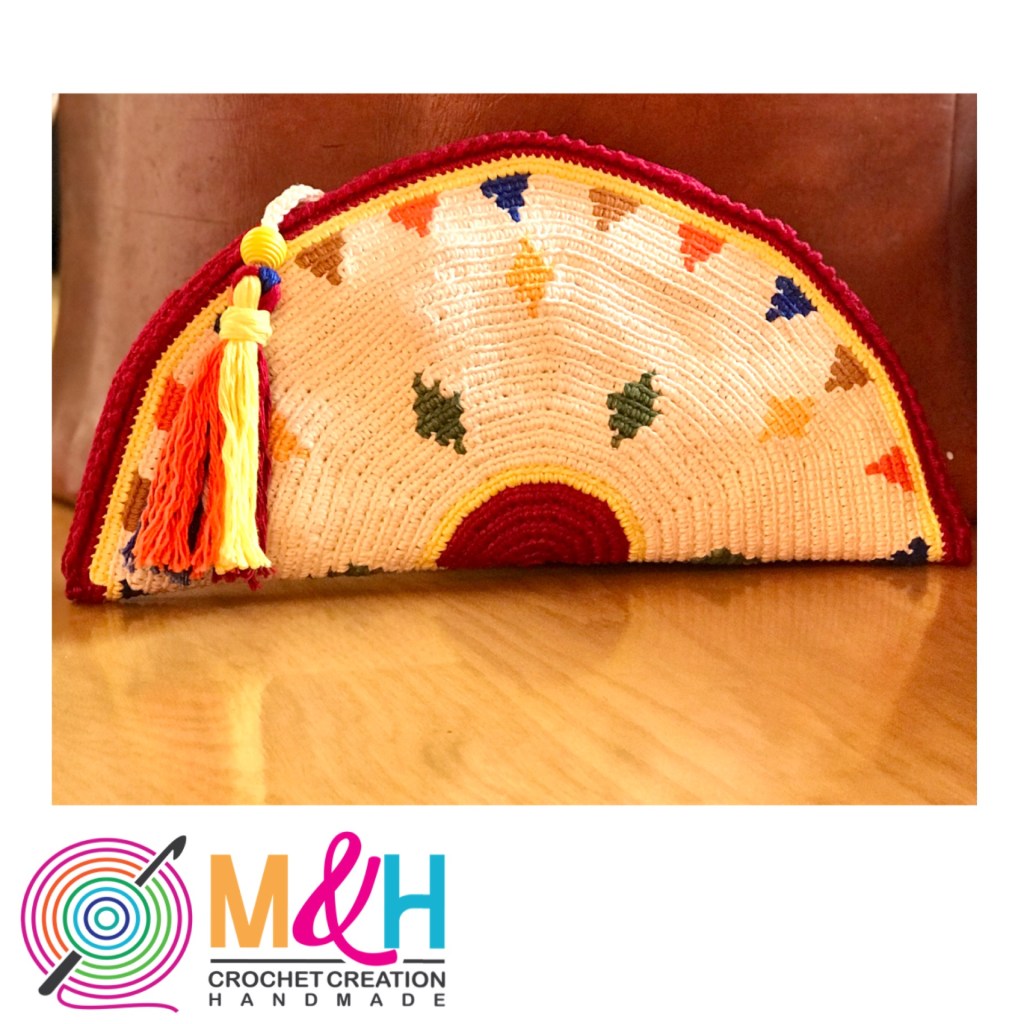
Add Tassel:
Its upto you how you want to make your tassel but if you want to make a tassel like Marion’s then here is the link:
And that’s it!!!! Your bag is complete.
We would love to see all your pics! Join our facebook group to share or follow us on instagram and tag us! Use hashtags #solitairemochilacal #mochilacal2021 #indiayarncircle
We are so excited to start the Mochila CAL 2021 with Rosy of @mnhcrochetcreation!! Hope you all have gathered all the materials and are ready to go at it with us!
If you are new here and still wondering what the CAL is about, you can read our introductory post HERE.
Also if you still havent registered for the CAL please register at the earliest!
Mercerized Cotton Yarn. (I am using White Rose Cotton Yarn. You can use Laura Yarn, Gulera 4 Ply, Anchor 4060, Kotton 4 ply, Mercerized Cotton yarn from Yarnkart
Scissor
Zip for Bag – 18 / 20 cm
Lining Material (optional)
COLOUR INDEX
Note: The above colour index is just an example. Please use your imagination and use any colour combination of your choice.
Abbreviations
A = Red
B = Yellow
C = Cream
D = Green
E = Peach
F = Blue
G = Orange
H = Brown
2A = crochet 2 stitches with color
inc A = increase with color A inc
AB = increase with 2 colors (one stitch in color A and one stitch in color B)
* * = repeat what is between
* * [2x] = repeat 2 times what is in between
* * (12) = total number of stitches at the end of the round
Pick up different colour = before the next colour change, do a normal yarn over with current yarn and then second yarn over with new colour.
Before you start your mochila CAL, here are some of the links that you must see and learn. These are excellent step by step tutorials given by Marion Verloop:
Basic Mochila techniques
Yarn Over and Yarn Under
Adding a new Yarn
Note: Incase any of you don’t understand or want a detailed video of my pattern, please write to us or comment on our Instagram or Facebook page.
Techniques
After you have checked out all the Youtube tutorials by Marion Verloop, please remember the following points before you start the CAL
Single Crochet is always worked on the back loop. If you accidentally work the full single crochet you will see the difference it looks very different
Always mark the first stitch of the new row with stitch marker
In mochila, you will never slip stitch before moving onto the next round. Just remove the stitch marker and carry on to the next row.
When you change your yarn colour, pull up the new colour yarn in the second pull through.
Stitches have to tight so that other colour yarns are not visible.
Please read the graph from right to left
Measurement
Size of the round base is 26cm
When you fold it, you will get a height of 12cm
Week 1
Written instructions
Full pattern has been divided into 12 triangular parts. You will repeat 2 triangular pattern 6 times. (the unshaded parts are two triangles which you have to repeat 6 times)
1. With colour A crochet 6 sc in the magic circle
Row 1 2A in each stitch (12) Add colour B
Row 2 *2A inc* (24) Add color C
Row 3 * inc A, 1A * (Repeat * to * 12 times) [36] Add colour D
Row 4 * inc A, 2A * (Repeat * to * 12 times) [48] Add colour E
Row 5 * 1A, inc A, 2A * (Repeat * to * 12 times) [60] pick up yarn B in the last stitch
Row 6 * 1B, inc B, 3B * (Repeat * to * 12 times) [72] pick up yarn C in the last stitch
We cannot wait to see your colour choices and your makes!! tag us @indiayarn.circle and @mnhcrochetcreation and use the hashtag #mochilacal2021 and #solitairemochilacal
Please feel free to comment and revert with your queries below or join our facebook group where the CAL is being hosted or DM us on instagram
Time is surely flying by!! February is done and we are already into week 3 of the Dream CAL now!
Are you as excited as we are? Have you started you cal yet?
If not you can check out the week 2 instructions HERE to get you started. You can also share your Progress pictures on our facebook group or post it on instagram, tag us @indiayarn.circle , the designer @naore_the_blot and use the hastag #dreamcal2021
We have seen quite a few gorgeous versions being posted and we cannot wait to see them finished.
Wondering where all this is happeneing? Join our facebook group and follow us on instagram to see all crafty things.
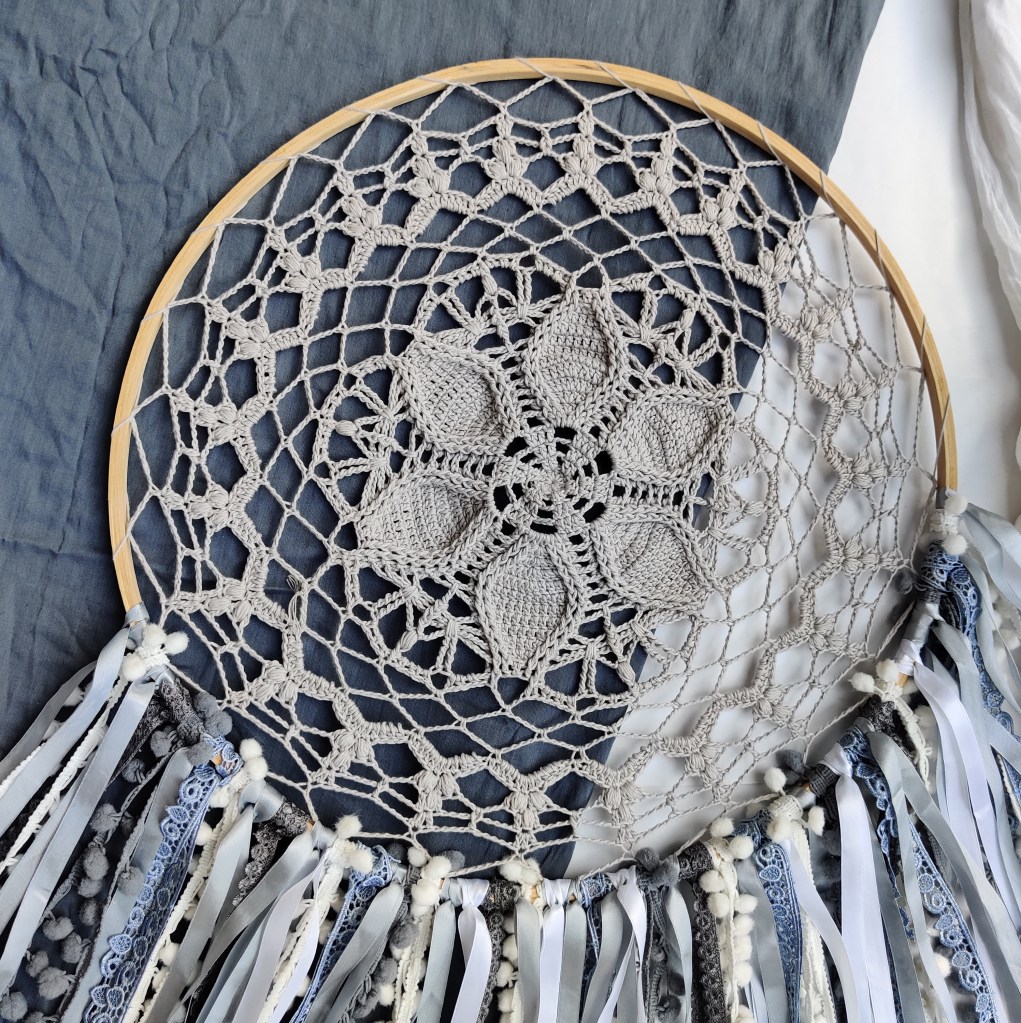
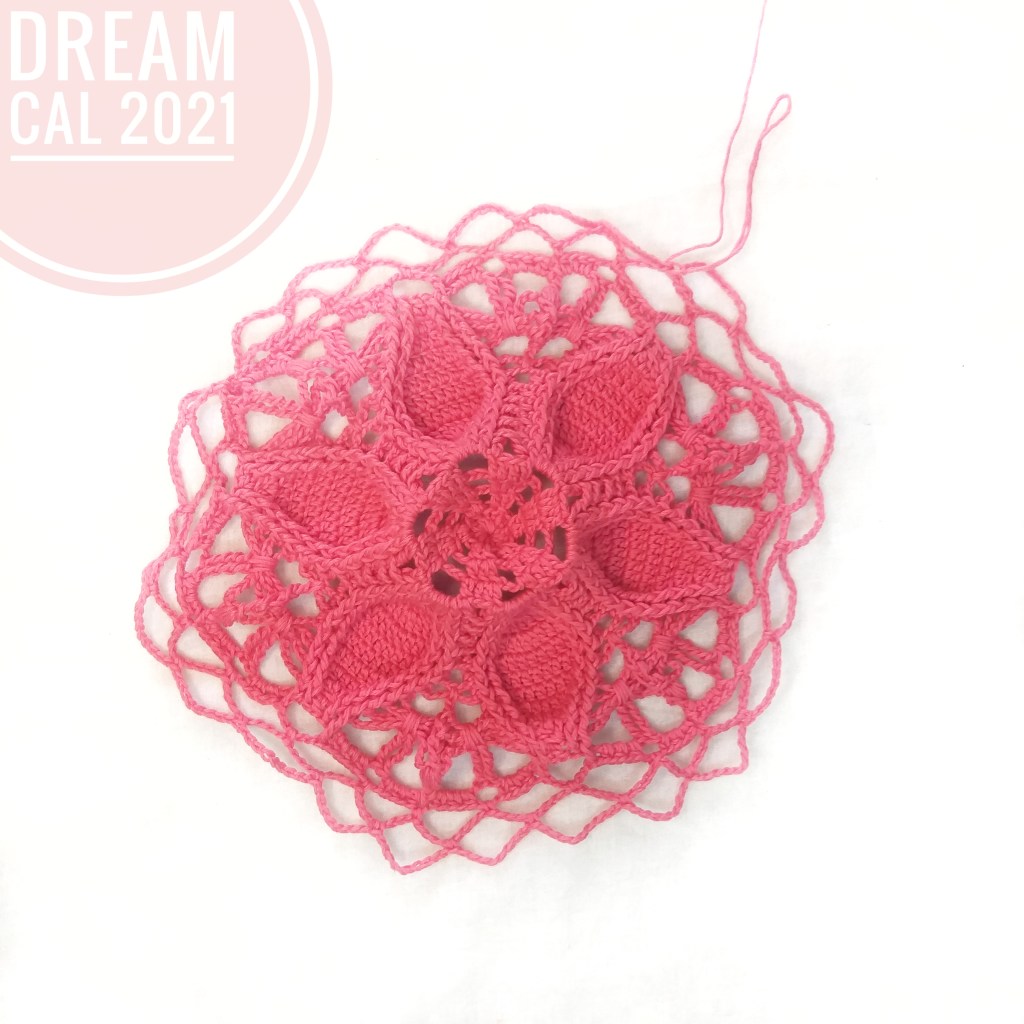
Week 3 is going to be fun, as we complete our doily, block it and learn how to attach it to the ring and see our dreamcatcher finally taking shape.
We have a few additions to the notes for the pattern, hence we are listing it down again.
For all the instructions and video tutorial from the start till Row 19 check out our previous blog post HERE.
PATTERN:
NOTES :
Ch3 is considered as 1Dc in all rows.
Slst at the end of each round is to close the round. So slip stitch into the third chain of the first Ch3 of the respective rounds or slip stitch to the starting Bpdc stitch of each round.
Ch1 before the Bpdc is not considered as a stitch.
The number (a) written at the end of each round, indicates the number of stitches in the round.
Number mentioned before a stitch is the number of stitches in the same stitch, and number mentioned after with the “x” is the number of repeats in the consecutive stitches. Eg : 3Dc x2 means, do 3 Double crochet into the same stitch and again 3 Double crochet into the next stitch as well.
(Sl+ch1) y times is used to reach to the centre of chain space and is not considered as a stitch in the total no of stitches.
Chains in between stitches is considered as a stitch in the total count.
INSTRUCTIONS:
R20 : (slst into the Ch sp, Ch1) x2, 1Sc into the same sp, (Ch9, 1Sc into the next Ch sp) x23, Ch9, slst into the first Sc (240)
R21 : Ch1, 1Sc into the same sp, (10Dc into the Ch sp, 1Sc into the previous SC st) x23, 10Dc into the Ch sp, slst into the first Sc (264)
R22 : slst x5 into the next 5 sts, Ch3, 1PS & 1Dc into the same st,1Dc, 1PS & 1Dc into the next st, {Ch5, sk 9 sts and (1Dc, 1PS & 1DC) x2 } x23, Ch5, slst into the first Sc (264)
R23 : slst x3 into the next 3 sts, Ch3, 1PS & 1Dc into the same st, (Ch4, 1Sc into the Ch sp, Ch4, sk 3 sts and 1Dc, 1PS, 1Dc into into the sp between the 2 Dc ) x23, Ch4, 1Sc into the Ch sp, Ch4, slst into the third Ch of the first Ch3 (288)
R24 : slst x1 into the next st, Ch3 & 2Dc into the same st, (Ch4, 1Fpdc through the previous Sc, Ch4, 3Dc into previous PS) x23, Ch4, 1Fpdc through the previous Sc, Ch4, sl into the third Ch of the first Ch3 (288)
R25 : slst, Ch1, 1Sc into the same st, (Ch12, 1Sc into the 2nd Dc of the 3Dc of previous round) x 23, Ch12, Slst into the first Sc, Ch1 and cut the yarn. Weave in the end (312)
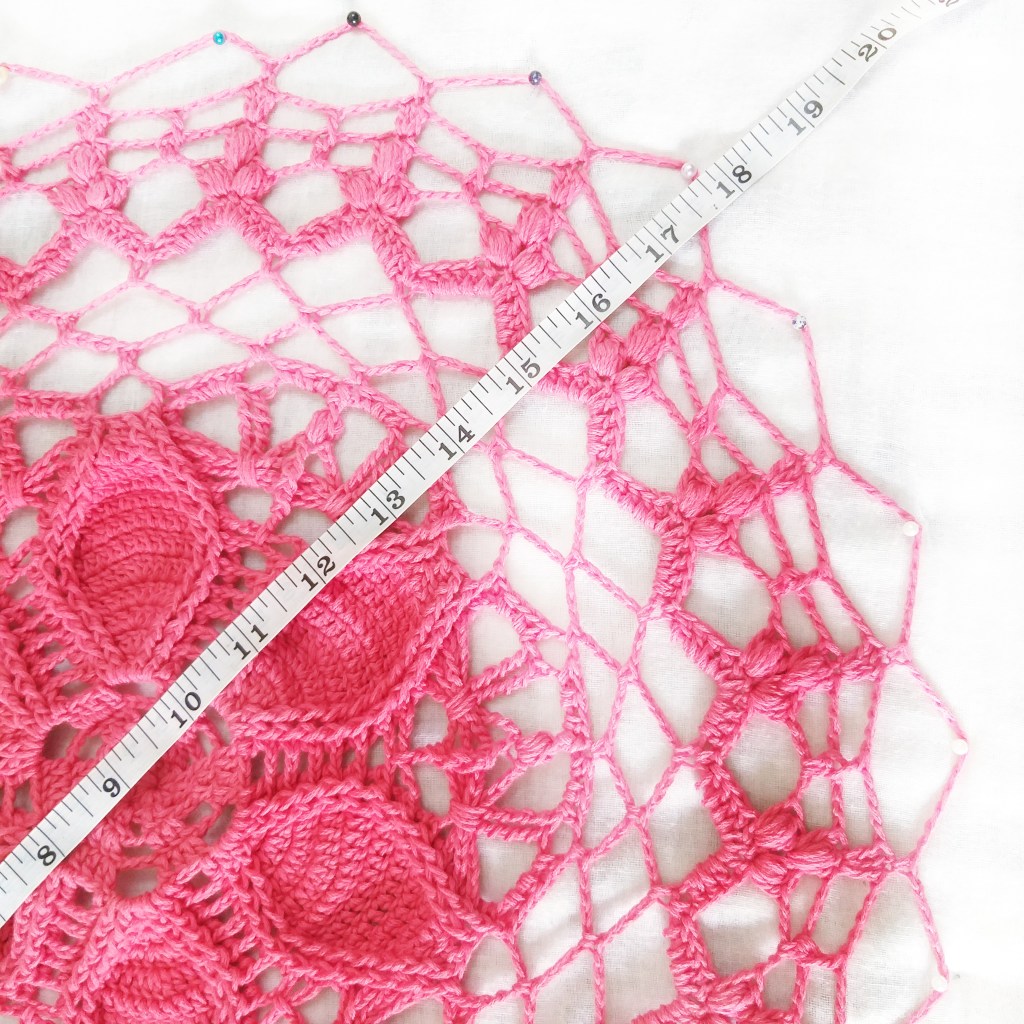
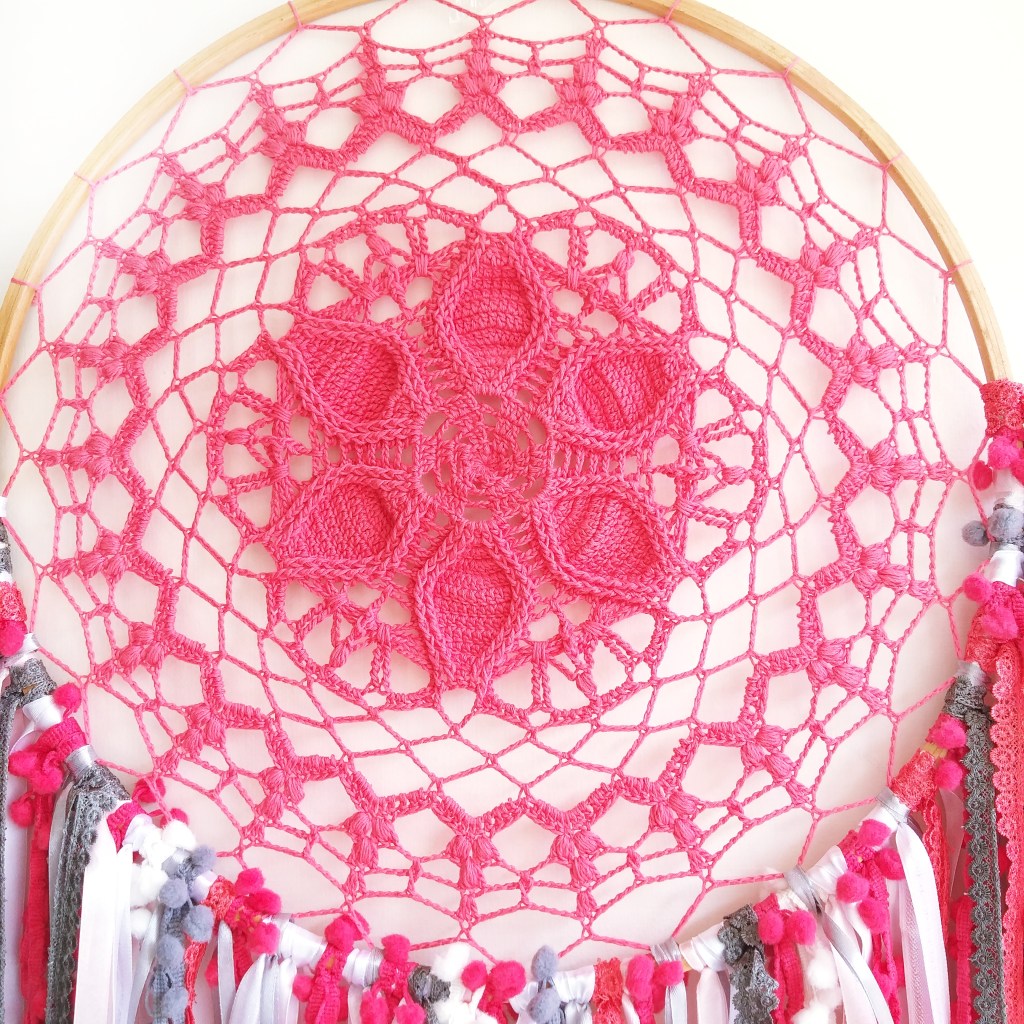
This completes the Doily for Dream Cal 2021. When you pin it down the way you do for blocking, it will measure up to 18”. If you are using a smaller hoop for the dream catcher, stop the Doily accordingly a few rounds before Round 25.
How to attach the Doily to the Hoop
Cut 24 small pieces of the same yarn measuring around 6inches (Choose a length convenient for you to hold and tie) . Tie the 12Ch sp to the Hoop using these small yarn pieces. Make 3 to 4 knots to secure. Cut the excess and make the knotted portion behind the hoop and further secure with an adhesive. (adhesive is optional). This method and a totally different method is explained in detail in the part 03 video attached.
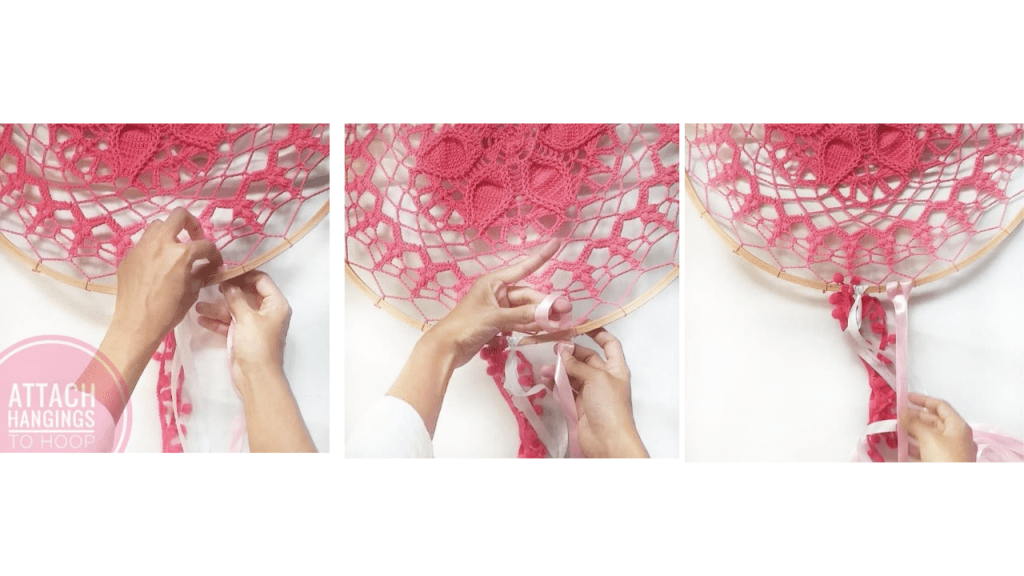
How to attach the Hangings
The length of the hangings can be your personal choice. The length used for the sample is same as that of the diameter of the Hoop used, ie, 18 inches. The hangings are folded into two and then we make a knot through the hoop. Hence the length of each hanging to be approx 38 inches. (18 inches +18 inches + 2 inches extra for tying the knot) Fold the lace into two and place it beneath the hoop and take it over the hoop. Take the tail portion through the inside of the fold and tighten it by pulling the tail portion.
After hanging all the Laces, trim the bottom portion into a “V” shape.
You can check out the video tutorial for the same below:
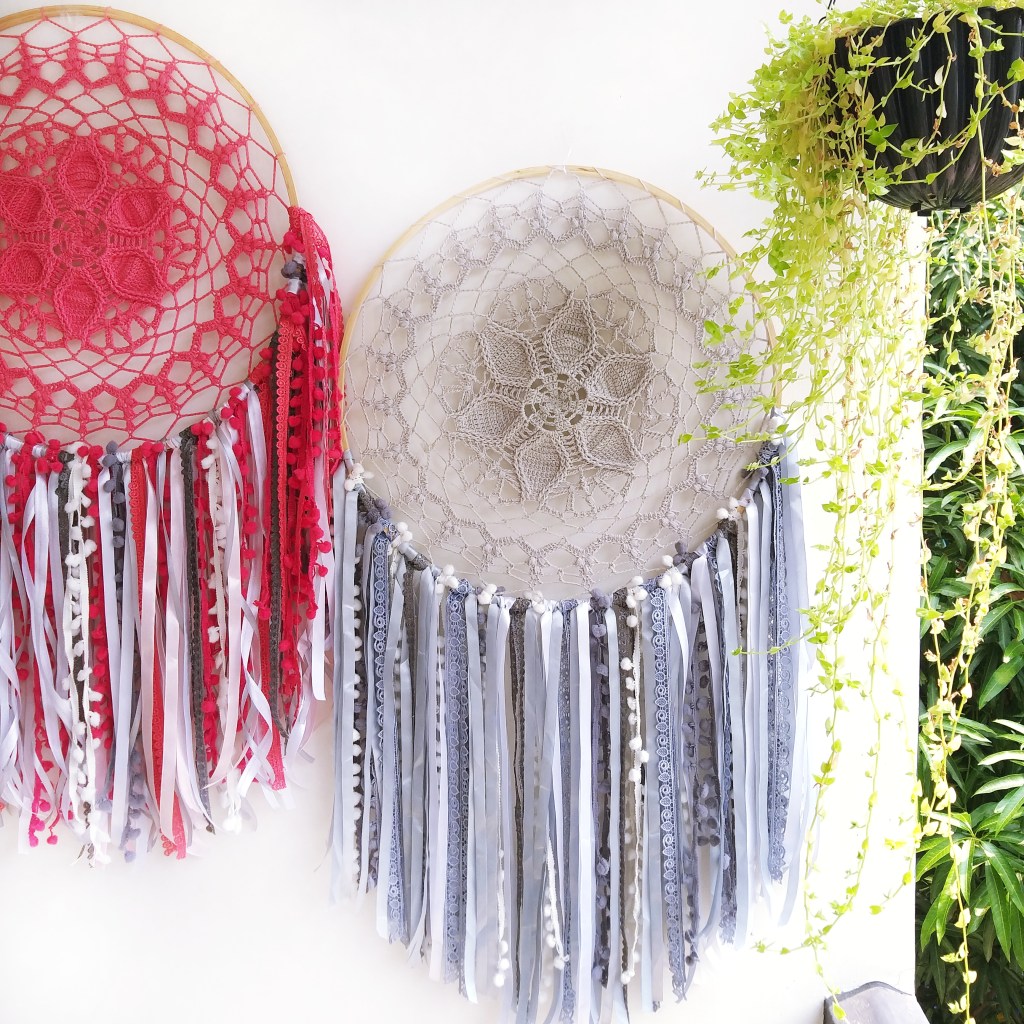
We have come to the end of the Dream Cal 2021 and now you all have a beautiful Dream Catcher to enhance the aesthetics of your favourite space.
Hope you all enjoyed making this with us. Please share your Photos and videos with Dream catcher and tag @indiayarn.circle and @naore_the_blot on Instagram and Facebook. Also use #dreamcal2021.
Please feel free to comment below with your queries and suggestions.
And it’s kick off!!! We are so excited to start the Dream CAL and hope you have collected all the materials required for the same!
We will be listing down the material list again for you to get started in case you havent got it yet!
We shall be providing the Written instructions as well as video tutorial for the CAL and our entire team is available to answer your queries over here or over the IYC FACEBOOK group!
So Week 2 is split into 2 parts for the convinience of the video tutorial and working. Each part has a seperate video tutorial, and we hope it will definitely be helpful. Kindly go through the written pattern in detail, especially the key, special stitches and the notes!!!
Lets Get Started!!!
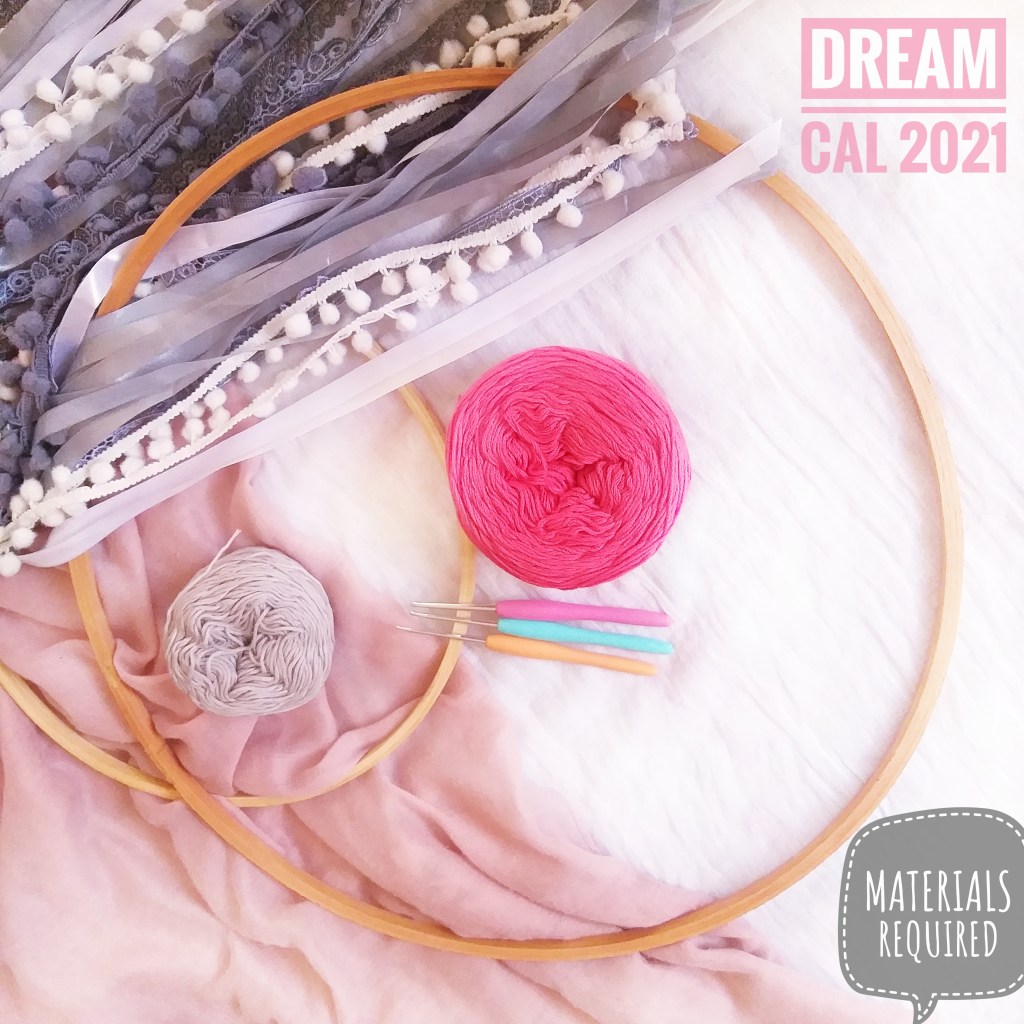
MATERIALS :
3ply Cotton Yarn , 170 metres yardage.
Hook : 2.5 mm
Hoop : 18” metal / wooden hoop
Hangings can be anything of your choice, like Satin Ribbons, Pompom Laces, Cotton Laces, feathers, macramé cords, etc
The completed doily when pinned in shape to block will measure upto 18 incjes diameter.
SPECIAL STITCHES :
QRTR : Quadruple Treble : Yarn over 4 times, insert the hook into R12 chain space and pull through, (YO and pull though 2 loops) 5 times.
PS : Puff Stitch : (YO insert the hook into the stitch, yarn over and pull up a loop through that stitch ) 5 times, YO pull through the first 10 loops on the hook and YO pull through last 2 loops and close the puff.
NOTES :
Ch3 is considered as 1Dc in all rows.
Slst at the end of each round is to close the round. So slip stitch into the third chain of the first Ch3 of the respective rounds or slip stitch to the starting Bpdc stitche of each round.
Ch1 before the Bpdc is not considered as a stitch.
The number (a) written at the end of each round, indicates the number of stitches in the round.
Number mentioned before a stitch is the number of stitches in the same stitch, and number mentioned after with the “x” is the number of repeats in the consecutive stitches. Eg : 3Dc x2 means, do 3 Double crochet into the same stitch and again 3 Double crochet into the next stitch as well.
PATTERN :
PART 1:
R1 : MC, Ch3, 11Dc, slst (12)
R2 : Ch3+1Dc, (Ch2, sk 1 st & 2Dc into the next) X5, Ch2, slst (24)
R16 : Ch1, 1Bpdc, Ch5, 1QrTr x2 into the Ch5 sp of R12, Ch5, 1PS into the Fpdc, Ch5, 1QrTr x2 into the Ch5 sp of R12, Ch5, (1Bpdc, 1Fpdc x2, 1Dc, 1Fpdc x2, 1Bpdc, Ch5, 1QrTr x2 into the Ch5 sp of R12, Ch5, 1PS into the Fpdc, Ch5, 1QrTr x2 into the Ch5 sp of R12, Ch5) x5, 1Bpdc, 1Fpdc, x2, 1Dc, 1Fpdc x2, slst (192)
R17 : Ch1, 1Bpdc, (1Hdc, Ch1) x2 & 1Hdc into the Ch5 sp, Ch2, sk the 2QrTr and (1Hdc, Ch1) x2 & 1Hdc into the Ch5 sp, 1FpHdc into the PS, , (1Hdc, Ch1) x2 & 1Hdc into the Ch5 sp, Ch2, sk the 2QrTr and (1Hdc, Ch1) x2 & 1Hdc into the Ch5 sp, (1Bpdc, 1Fpdc, Ch5, sk 3 sts, 1Fpdc, 1Bpdc, (1Hdc, Ch1) x2 & 1Hdc into the Ch5 sp, Ch2, sk the 2QrTr and (1Hdc, Ch1) x2 & 1Hdc into the Ch5 sp, 1FpHdc into the PS, , (1Hdc, Ch1) x2 & 1Hdc into the Ch5 sp, Ch2, sk the 2QrTr and (1Hdc, Ch1) x2 & 1Hdc into the Ch5 sp) x5, 1Bpdc, 1Fpdc, Ch5, sk 3 sts, 1Fpdc, Ch2, 1Tc into the first Bpdc to close the round. (204)
R18 : Ch1, 1Sc into the same sp, (Ch8, 1Sc into the Ch2 sp, Ch8, 1Sc into the FpHdc, Ch8, 1Sc into the Ch2 sp, Ch8, 1Sc into the Ch5 sp) x5, Ch8, 1Sc into the Ch2 sp, Ch8, 1Sc into the FpHdc, Ch8, 1Sc into the Ch2 sp, Ch8, slst into the first Sc. (216)
R19 : (slst into the Ch8 sp, Ch1) x3, 1Sc into the same sp, (Ch8, 1Sc into the Ch8 sp, Ch9, 1 Sc into the Ch8 sp) x11, Ch8, 1Sc into the Ch8 sp, Ch9, slst into the first Sc (228)
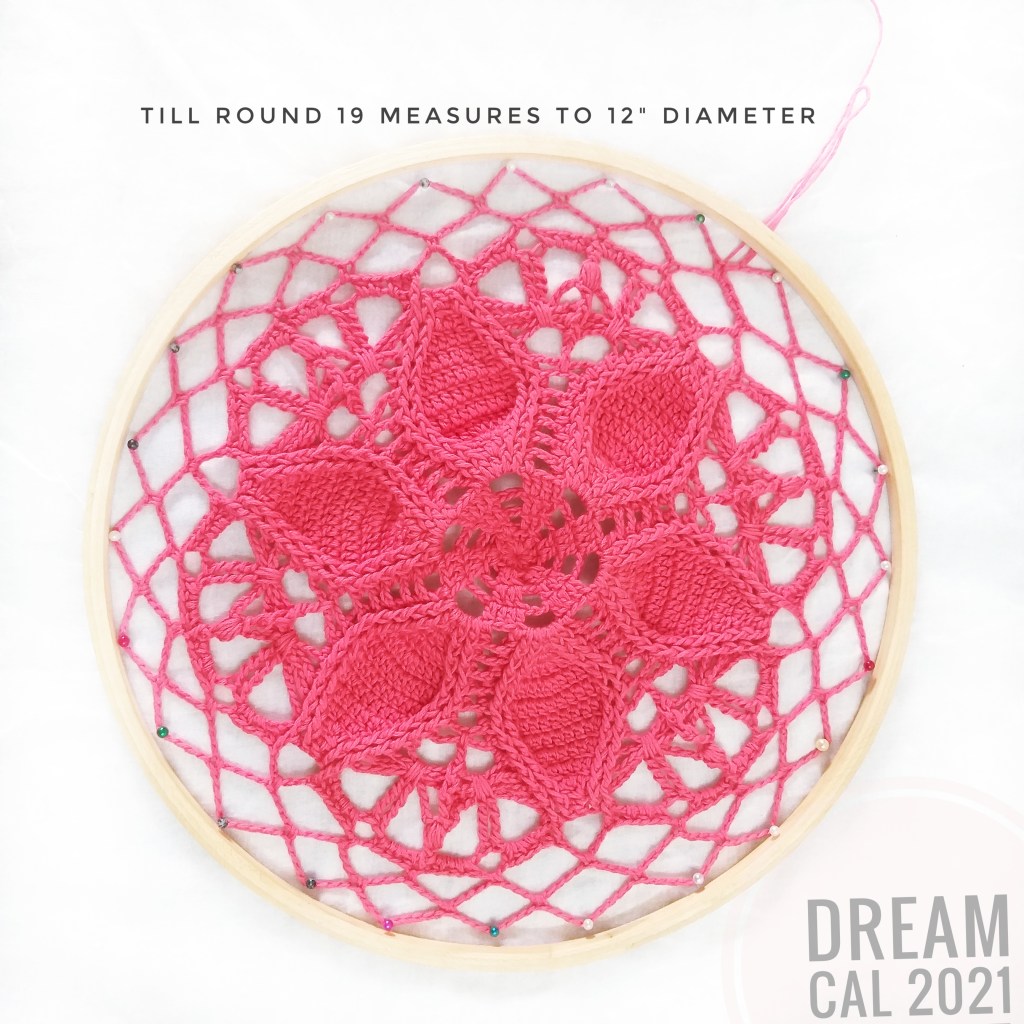
Once you complete Round 19, it should measure 12 inches diameter when pinned like the way you do for blocking.
Check out the video tutorial for Part 2 – Round 12 to 19
We cannot wait to see your progress, so dont forget to tag us @indiayarn.circle , the designer noumin @naore_the_blot and use the hashtag #dreamcal2021
Please feel free to comment below with your queries and suggestions.
Are you ready to register for our next CAL? We have completed our Summer Cal and Winter Cal, and now we are here with our DREAM CAL 2021, we will be making a dreamy dreamcatcher with Crochet doily as focus.
This crochet along will be hosted by Noumin aka naore_the_blot
Interested??? Just scroll to the end of this post and Click the register button. This is to help us keep the logistics straight so that we can award the certificates to all of you who complete the CAL.
If you wish to keep the design as a doily, you may do so. If you can’t find a big hoop to attach the crochet piece, you can alter it to fit the hoop you can get.
We will have weekly release of various parts and there will be written and video instructions for the same.
It’s totally doable!!! Come on , join in, what are you waiting for???
Materials required :
1. Hoop – 18″ diameter is preferred. (12″ and above will be considered fit for the certificate) .
2. Yarn – 3 ply cotton yarn (3ply acrylic also works fine, but cotton is considered suitable for dreamcatchers) .
3. Hook – 2.5mm.
4. Hangings – Satin ribbon, pompom lace, cotton lace, feathers, macrame cords (anything of your choice)
170 meters yardage .. (The sample is made using 3ply soft cotton from pradhan 60gms approx. )
or you can use any yarn and hook which meets the gauge below:
Gauge :
18 DC X 9 Rows = 3″ X 3″ square
Yarn Options:
Please check gauge before deciding with any of the yarn below
Gulera 3ply soft cotton
Anchor 4057
3ply yarnkart cotton
3ply kotton
Hobby India
Bliss cotton
White Rose cotton
Now that you are all set with all the information, click below to register!!!
Week 4 of the Winter KAL 2020 involves brioche knitting.
Brioche knitting is a family of knitting patterns involving tucked stitches, i.e., yarn overs that are knitted together with a slipped stitch from the previous row. Such stitches may also be made by knitting into the row below and dropping the stitch above.
This type of knitting leads to a thick and ribbed pattern which is perfect for shawls and sweaters and anything warm.
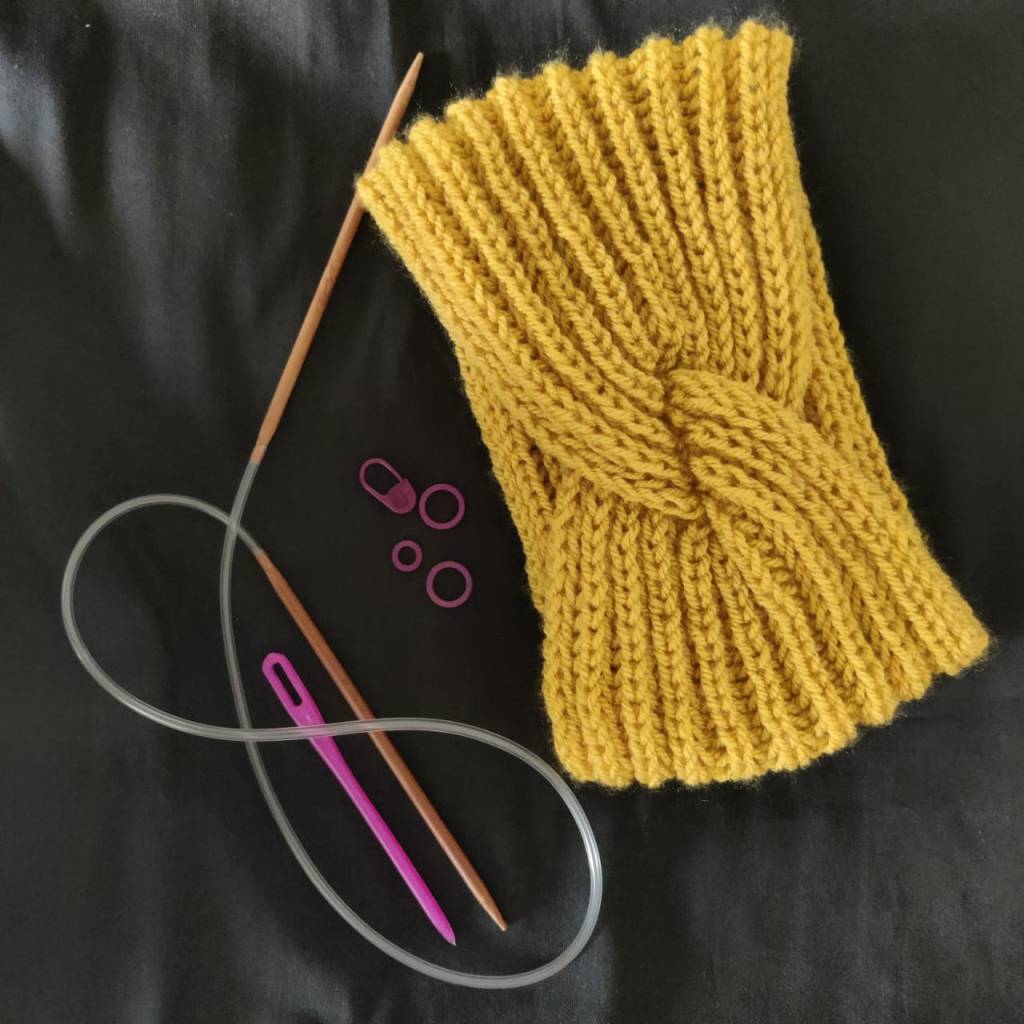
The headband has a very elegant and chic twist in the middle (a clever way to hide the seam!).
You can easily match your headband to your outfit.
Knit headband
The pattern is worked back and forth and is very easy to memorize, which makes it a quick project. You can also find a video tutorial of this headband at the end of the written instructions.
I hope you will enjoy knitting this headband with a twist!
To knit the headband you will need:
DK or worsted weight yarn, 4 or 5 mm knitting needles, tapestry needle
Pattern:
Cast on about 20 stitches (customisable) using long tail cast on
Row 1 (foundation row): Yarn over, slip 1 stitch purlwise, knit 2 together, repeat from * to * until the end of the row.
Row 2: Yarn over, slip 1 stitch purlwise, knit yarn over and the slipped stitch together, repeat from * to * until the end of the row.
Work row 2 for 20 inches or desired length.
Bind off loosely.
See the video for the twist
Fold into half, sandwich together and sew in all the four edges. Invert it to reveal twist.