Community Activity, IYC

Dream CAL – WEEK 2 – Part 1, 2

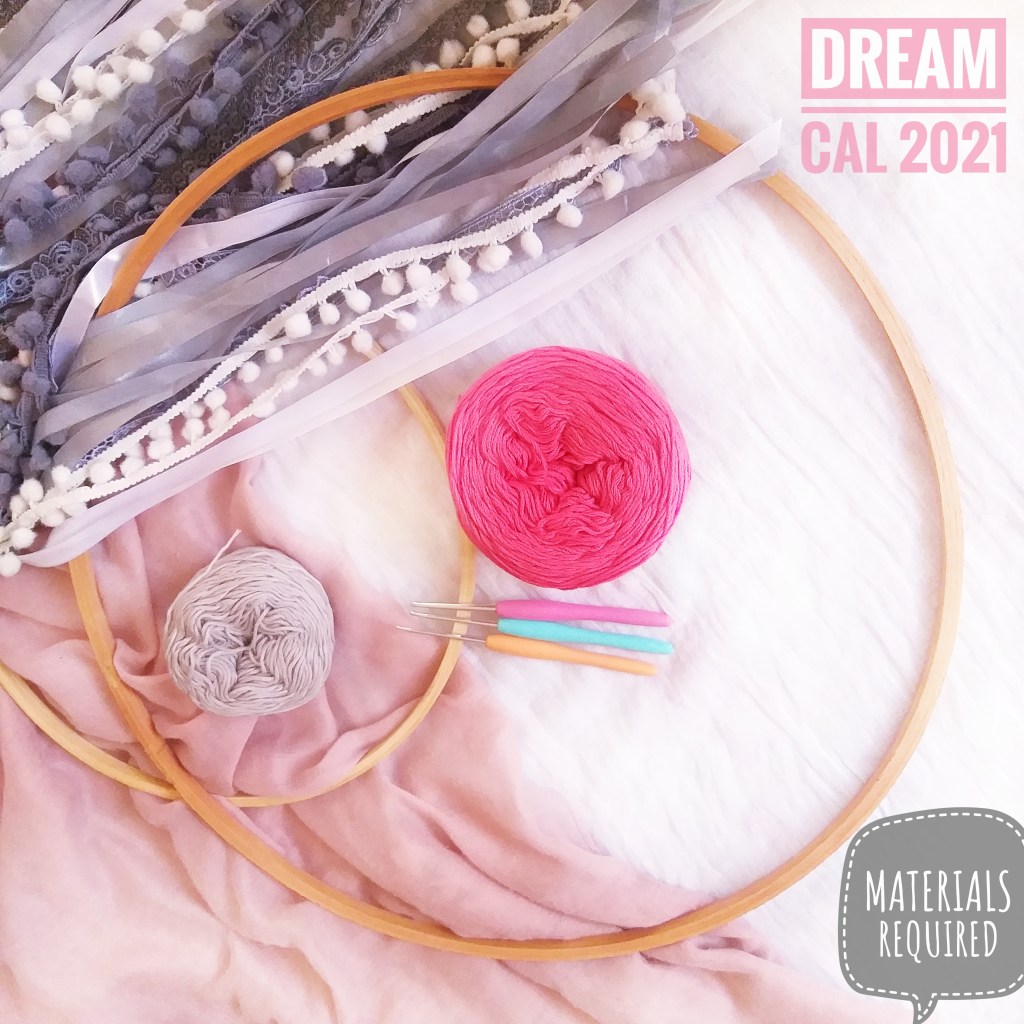
And it’s kick off!!! We are so excited to start the Dream CAL and hope you have collected all the materials required for the same!

We will be listing down the material list again for you to get started in case you havent got it yet!

We shall be providing the Written instructions as well as video tutorial for the CAL and our entire team is available to answer your queries over here or over the IYC FACEBOOK group!

So Week 2 is split into 2 parts for the convinience of the video tutorial and working. Each part has a seperate video tutorial, and we hope it will definitely be helpful. Kindly go through the written pattern in detail, especially the key, special stitches and the notes!!!

Lets Get Started!!!

MATERIALS :

  1. 3ply Cotton Yarn , 170 metres yardage.
  2. Hook : 2.5 mm
  3. Hoop : 18” metal / wooden hoop
  4. Hangings can be anything of your choice, like Satin Ribbons, Pompom Laces, Cotton Laces, feathers, macramé cords, etc
  5. Scissors
  6. Measuring Tape

The sample is made with the following materials :

  1. Yarn : Gulera 3ply soft cotton (60gms approx) from Pradhan Embroidery Stores
  2. Hook : 2.5 mm
  3. Hoop : 18” wooden embroidery Hoop
  4. Hangings :
  5. White satin ribbon : 1 roll
  6. Grey satin ribbon : 3 roll
  7. White pompom lace : 12m
  8. Grey pompom lace : 6m
  9. Dark grey cotton lace : 6m
  10. Light grey cotton lace : 6m

KEY :

R : round

MC : magic circle

Ch : chain

Sk : skip

Sts : stitches

Sp : space

Yo : Yarn over

Slst : Slip stitch

Hdc : Half double crochet

Dc : Double crochet

Tc : Treble crochet

QrTr : Quadruple treble

PS : Puff stitch

Fpdc : Front post double crochet

FpHdc : Front post half double crochet

Bpdc : Back post double crochet

Dc2tog : Double crochet two together

DC3tog : Double crochet three together

SKILL  LEVEL

Intermediate

GAUGE :

3” X 3” Square is 18 Dc x 9 rows.

TERMINOLOGY :

The pattern is written in US terminology.

SIZING MEASUREMENTS :

The completed doily when pinned in shape to block will measure upto 18 incjes diameter.

SPECIAL STITCHES :

QRTR : Quadruple Treble : Yarn over 4 times, insert the hook into R12 chain space and pull through, (YO and pull though 2 loops) 5 times.

PS : Puff Stitch : (YO  insert the hook into the stitch, yarn over and pull up a loop through that stitch ) 5 times, YO pull through the first 10 loops on the hook and YO pull through last 2 loops and close the puff.

NOTES :

  1. Ch3 is considered as 1Dc in all rows.
  2. Slst at the end of each round is to close the round. So slip stitch into the third chain of the first Ch3 of the respective rounds or slip stitch to the starting Bpdc stitche of each round.
  3. Ch1 before the Bpdc is not considered as a stitch.
  4. The number (a) written at the end of each round, indicates the number of stitches in the round.
  5. Number mentioned before a stitch is the number of stitches in the same stitch, and number mentioned after with the “x” is the number of repeats in the consecutive stitches. Eg : 3Dc x2 means, do 3 Double crochet into the same stitch and again 3 Double crochet into the next stitch as well.

PATTERN :

PART 1:

R1 :    MC, Ch3, 11Dc, slst    (12)

R2 :    Ch3+1Dc, (Ch2, sk 1 st & 2Dc into the next) X5, Ch2, slst    (24)

R3 :    Ch3, 2Dc, (Ch3, sk Ch sp, 1Dc, 2Dc) X5, Ch3, slst    (36)

R4 :    Ch3, 1Dc, 2Dc, (Ch4, sk Ch sp, 1Dc, 1Dc, 2Dc) X5, Ch4, slst    (48)

R5 :    Ch6, (skip 2 sts, 1Dc, 5Dc in the Ch4 sp, 1Dc, Ch3) x5, 1Dc, 5Dc in Ch4 sp, slst     (60)

R6 :    Ch1, 1Bpdc, Ch3, (1Bpdc, 1Fpdc x2, 3Dc, 1Fpdc x2, 1Bpdc, Ch3) x5, 1Bpdc, 1Fpdc x 2, 3Dc,    1Fpdc x2, slst    (72)

R7 :    Ch1, 1Bpdc, Ch3, (1Bpdc, 1Fpdc x2, 1Dc, 3Dc, 1Dc, 1Fpdc x2, 1Bpdc, Ch3) x5, 1Bpdc, 1Fpdc x2, 1Dc, 3Dc, 1Dc, 1Fpdc x2, slst    (84)

R8 :    Ch1, 1Bpdc, Ch1, (1Bpdc, 1Fpdc x2, 1Dc, 2Dc, 3Dc, 2Dc, 1Dc, 1Fpdc x2, 1Bpdc, Ch1) x5, 1Bpdc, 1Fpdc x2, 1Dc, 2Dc, 3Dc, 2Dc, 1Dc, 1Fpdc x2, slst    (96)

R9 :    Ch1, 1Bpdc, Ch1, (1Bpdc, 1Fpdc x2, 1Dc x4, 3Dc, 1Dc x4, 1Fpdc x2, 1Bpdc, Ch1) x5, 1Bpdc, 1Fpdc x2, 1Dc x4, 3Dc, 1Dc x4, 1Fpdc x2, slst      (108)

R10 :   Ch1, 1Bpdc, Ch3, (1Bpdc, 1Fpdc x2, 1Dc x11, 1Fpdc x2, 1Bpdc, Ch3) x5, 1Bpdc, 1Fpdc x2, 1Dc x11, 1Fpdc x2, slst     (120)

R11 :   Ch1, 1Bpdc, Ch7, (1Bpdc, 1Fpdc x2, 1Dc2tog, 1Dc x7, 1Dc2tog, 1Fpdc x2, 1Bpdc, Ch7) x5, 1Bpdc, 1Fpdc x2, 1Dc2tog, 1Dc x7, 1Dc2tog, 1Fpdc x2, slst      (132)

CHECK OUT THE VIDEO TUTORIAL FOR THE PATTERN TILL HERE!

PART 2:

R12 :   Ch1, 1Bpdc, Ch5, 1Tc (into 2nd Ch of Ch3 of R10), Ch5, (1Bpdc, 1Fpdc x2, 1Dc2tog, 1Dc x5, 1Dc2tog, 1Fpdc x2, 1Bpdc, Ch5,  1TC (into R10 centre of CH3), Ch5) x5, 1Bpdc, 1Fpdc x2, 1Dc2tog, 1Dc x5, 1Dc2tog, 1Fpdc x2, slst    (144)

R13 :   Ch1, 1Bpdc, Ch7, 1Fpdc into the Tc, Ch7, (1Bpdc, 1Fpdc x2, 1Dc2tog, 1Dc x3, 1Dc2tog, 1Fpdc x2, 1Bpdc, Ch7,  1Fpdc into the Tc, ch7) x5, 1Bpdc, 1Fpdc x2, 1Dc2tog, 1Dc x3, 1Dc2tog, 1Fpdc x2, slst    (156)  

R14 :    Ch1, 1Bpdc, Ch9, 1Fpdc into the Fpdc, Ch9, (1Bpdc, 1Fpdc x2, 1Dc2tog, 1Dc, 1Dc2tog, 1Fpdc x2, 1Bpdc, Ch9,  1Fpdc (into the Fpdc), ch9) x5, 1Bpdc, 1Fpdc x2, 1Dc2tog, 1Dc, 1Dc2tog, 1Fpdc x2, slst    (168)

R15 :    Ch1, 1Bpdc, Ch11, 1Fpdc (into the Fpdc), Ch11, (1Bpdc, 1Fpdc x2, 1Dc3tog, 1Fpdc x2, 1Bpdc, Ch11,  1Fpdc (into the Fpdc), ch11) x5, 1Bpdc, 1Fpdc x2, 1Dc3tog, 1Fpdc x2, slst (180) 

R16 :    Ch1, 1Bpdc, Ch5, 1QrTr x2 into the Ch5 sp of R12, Ch5, 1PS into the Fpdc, Ch5, 1QrTr x2 into the Ch5 sp of R12, Ch5, (1Bpdc, 1Fpdc x2, 1Dc, 1Fpdc x2, 1Bpdc, Ch5, 1QrTr x2 into the Ch5 sp of R12, Ch5, 1PS into the Fpdc, Ch5, 1QrTr x2 into the Ch5 sp of R12, Ch5) x5, 1Bpdc, 1Fpdc, x2, 1Dc, 1Fpdc x2,  slst       (192)  

R17 :     Ch1, 1Bpdc, (1Hdc, Ch1) x2 & 1Hdc into the Ch5 sp, Ch2, sk the 2QrTr and (1Hdc, Ch1) x2 & 1Hdc into the Ch5 sp, 1FpHdc into the PS, , (1Hdc, Ch1) x2 & 1Hdc into the Ch5 sp, Ch2, sk the 2QrTr and (1Hdc, Ch1) x2 & 1Hdc into the Ch5 sp, (1Bpdc, 1Fpdc, Ch5, sk 3 sts, 1Fpdc, 1Bpdc, (1Hdc, Ch1) x2 & 1Hdc into the Ch5 sp, Ch2, sk the 2QrTr and (1Hdc, Ch1) x2 & 1Hdc into the Ch5 sp, 1FpHdc into the PS, , (1Hdc, Ch1) x2 & 1Hdc into the Ch5 sp, Ch2, sk the 2QrTr and (1Hdc, Ch1) x2 & 1Hdc into the Ch5 sp) x5, 1Bpdc, 1Fpdc, Ch5, sk 3 sts, 1Fpdc, Ch2, 1Tc into the first Bpdc to close the round.    (204)

R18 :    Ch1, 1Sc into the same sp, (Ch8, 1Sc into the Ch2 sp, Ch8, 1Sc into the FpHdc, Ch8, 1Sc into the Ch2 sp, Ch8, 1Sc into the Ch5 sp) x5, Ch8, 1Sc into the Ch2 sp, Ch8, 1Sc into the FpHdc, Ch8, 1Sc into the Ch2 sp, Ch8, slst into the first Sc.      (216)

R19 :   (slst into the Ch8 sp, Ch1) x3, 1Sc into the same sp, (Ch8, 1Sc into the Ch8 sp, Ch9, 1 Sc into the Ch8 sp) x11, Ch8, 1Sc into the Ch8 sp, Ch9, slst into the first Sc     (228)

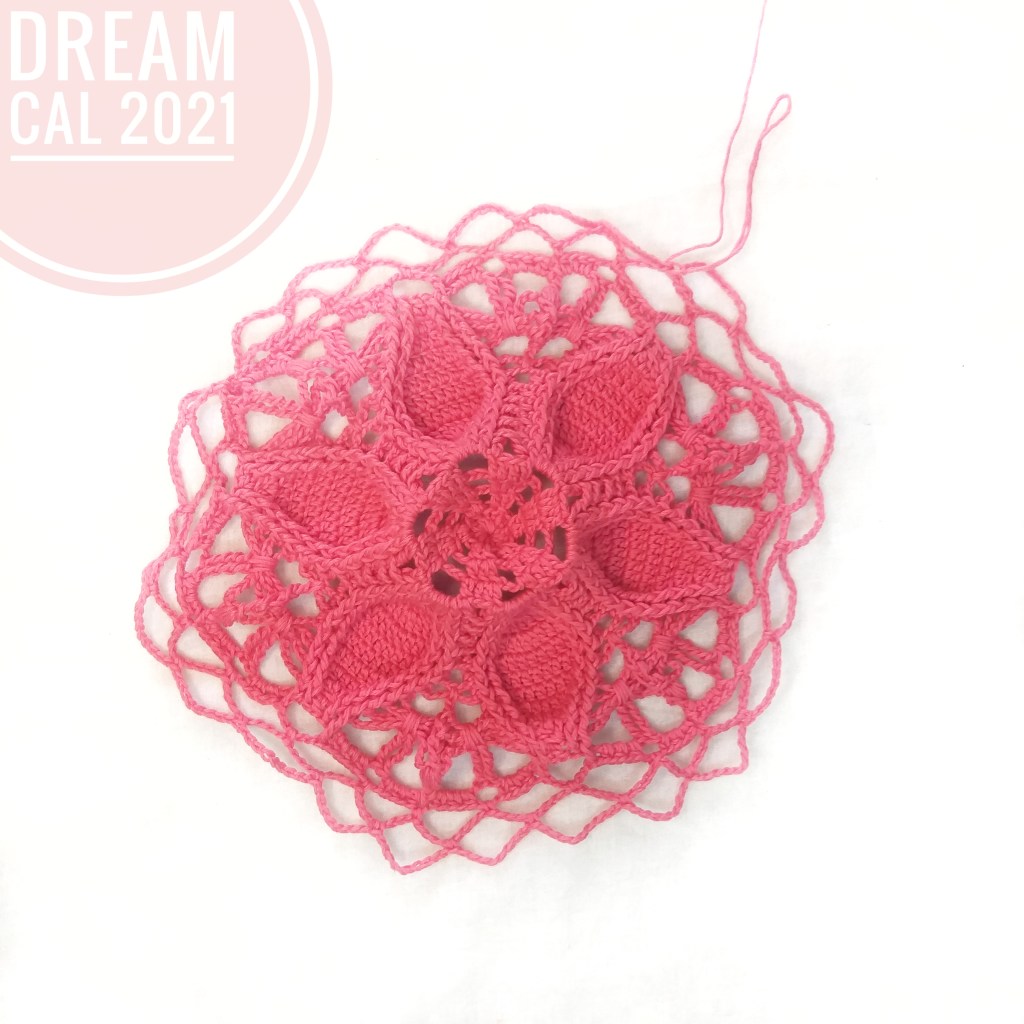
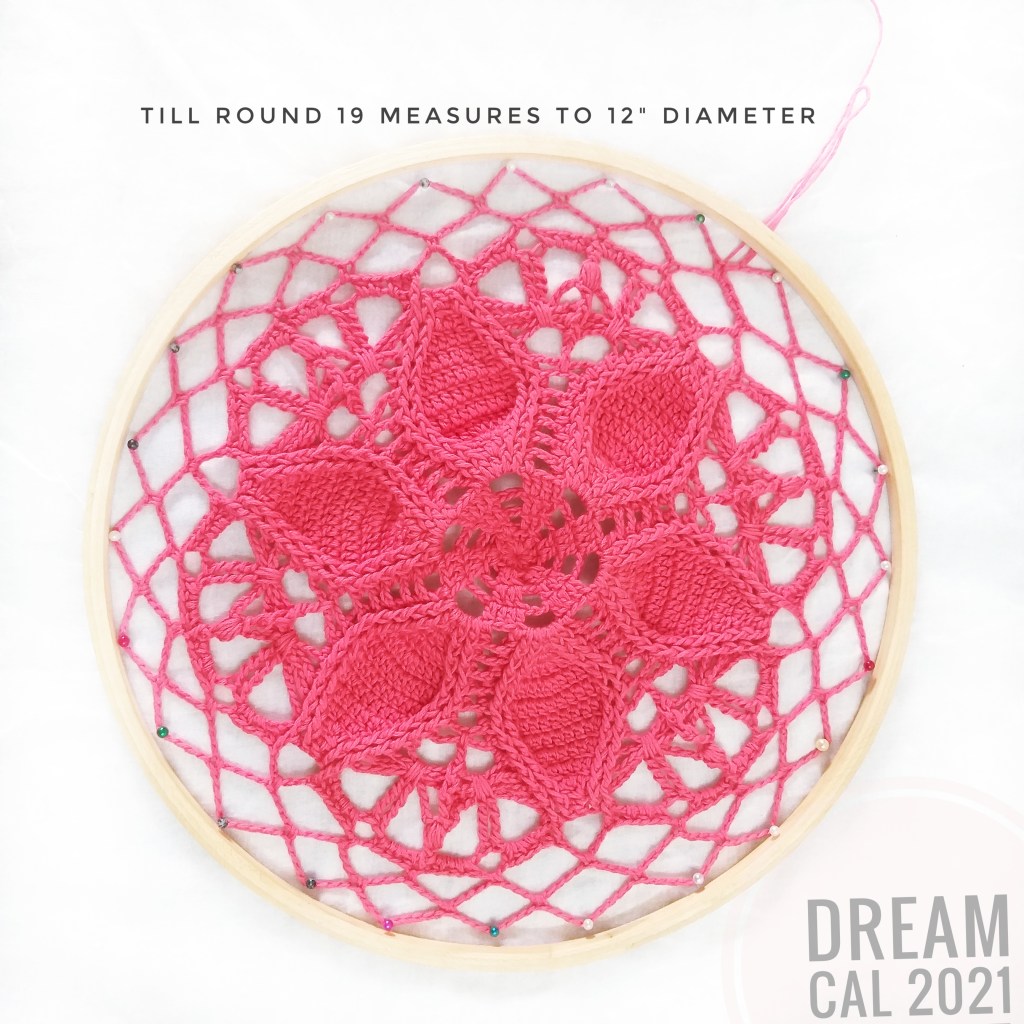
Once you complete Round 19, it should measure 12 inches diameter when pinned like the way you do for blocking.

Check out the video tutorial for Part 2 – Round 12 to 19

We cannot wait to see your progress, so dont forget to tag us @indiayarn.circle , the designer noumin @naore_the_blot and use the hashtag #dreamcal2021

Please feel free to comment below with your queries and suggestions.

Community Activity, IYC

Dream CAL 2021!!

Hi everyone!!! 

Are you ready to register for our next CAL? We have completed our Summer Cal and Winter Cal, and now we are here with our DREAM CAL 2021, we will be making a dreamy dreamcatcher with Crochet doily as focus.

This crochet along will be hosted by Noumin aka naore_the_blot 

Interested???  Just scroll to the end of this post and Click the register button. This is to help us keep the logistics straight so that we can award the certificates to all of you who complete the CAL.

If you wish to keep the design as a doily, you may do so. If you can’t find a big hoop to attach the crochet piece, you can alter it to fit the hoop you can get. 

We will have weekly release of various parts and there will be written and video instructions for the same.

It’s totally doable!!! Come on , join in, what are you waiting for???

Materials required : 

1. Hoop – 18″ diameter is preferred. (12″ and above will be considered fit for the certificate) .

2. Yarn – 3 ply cotton yarn (3ply acrylic also works fine, but cotton is considered suitable for dreamcatchers) .

3. Hook – 2.5mm.

4. Hangings – Satin ribbon, pompom lace, cotton lace, feathers, macrame cords (anything of your choice)

 170 meters  yardage .. (The sample is made using 3ply soft cotton from pradhan 60gms approx. )

or you can use any yarn and hook which meets the gauge below:

Gauge :

18 DC X 9 Rows = 3″ X 3″ square

Yarn Options:

Please check gauge before deciding with any of the yarn below

  1. Gulera 3ply soft cotton
  2. Anchor 4057
  3. 3ply yarnkart cotton
  4. 3ply kotton
  5. Hobby India
  6. Bliss cotton
  7. White Rose cotton

Now that you are all set with all the information, click below to register!!!

Also do not forget to join our facebook group and follow us in instagram to be updated every step of the way!

Community Activity, IYC

Winter KAL – Week 5 – Beaded headband

Hello crafters..

The final headband for the Winter KAL 2020 is here and today we are knitting in the round.

Magic Loop is a technique for working in the round that avoids the use of double pointed needles. Using longer-than-usual circular needles, you can knit projects even with very small circumferences.

For this pattern you will need to use circular needles and the project is also gauge specific.
Another addition is the use of beads.

You will need worsted weight yarn, a 4.5 mm circular needle, 24 beads, and a stitch marker.

Check the youtube tutorial for more details.

Gauge:

18 sts and 24 rows = 4″ (10cm) in St st

Special technique

K1 over the slipped sts and bead this st Take the right needle under the 3 slipped strands from bottom to top, knit next st on the left needle, bringing the loop back through the slipped strands of yarn to gather them tog, place bead onto this st using the crochet hook, and replace st on right needle.

Pattern:

Cast on 80 sts. Pm and join, being careful not to twist the sts.
Rnd 1: *K1, p1; rep from * around.
Rnd 2: Knit.
Rnd 3: *K1, p1; rep from * around.
Rnds 4, 6, and 8: *K5, sl 5 pwise wyf; rep from * around.
Rnds 5 and 7: Knit. Rnd 9: *K7, k1 over the slipped sts and bead this st, k2; rep from * around.
Rnds 10, 12, and 14: *Sl 5 pwise wyf, k5; rep from * around.
Rnds 11 and 13: Knit.
Rnd 15: *K2, k1 over the slipped sts and bead this st, k7; rep from * around.
Rnds 16, 18, and 20: *K5, sl 5 pwise wyf; rep from * around. Rnds 17 and 19: Knit.
Rnd 21: *K7, k1 over the slipped sts and bead this st, k2; rep from * around.
Rnd 22: *K1, p1; rep from * around.
Rnd 23: Knit.
Rnd 24: *K1, p1; rep from * around.

Check out the youtube tutorial for better understanding:

Happy knitting..

Community Activity, IYC

Winter KAL – Week 4 – Brioche Headband

Week 4 of the Winter KAL 2020 involves brioche knitting.

Brioche knitting is a family of knitting patterns involving tucked stitches, i.e., yarn overs that are knitted together with a slipped stitch from the previous row. Such stitches may also be made by knitting into the row below and dropping the stitch above.

This type of knitting leads to a thick and ribbed pattern which is perfect for shawls and sweaters and anything warm.

The headband has a very elegant and chic twist in the middle (a clever way to hide the seam!).

You can easily match your headband to your outfit.

Knit headband

The pattern is worked back and forth and is very easy to memorize, which makes it a quick project. You can also find a video tutorial of this headband at the end of the written instructions.

I hope you will enjoy knitting this headband with a twist!

To knit the headband you will need:

DK or worsted weight yarn, 4 or 5 mm knitting needles, tapestry needle

Pattern:

Cast on about 20 stitches (customisable) using long tail cast on

Row 1 (foundation row): Yarn over, slip 1 stitch purlwise, knit 2 together, repeat from * to * until the end of the row.

Row 2: Yarn over, slip 1 stitch purlwise, knit yarn over and the slipped stitch together, repeat from * to * until the end of the row.

Work row 2 for 20 inches or desired length.

Bind off loosely.

See the video for the twist

Fold into half, sandwich together and sew in all the four edges. Invert it to reveal twist.

Happy knitting!!

Community Activity, IYC

Winter KAL – Week 3 – Cable headband

It’s week 3 of the Winter KAL 2020 and we have our next knitting technique which is Cable knitting.

Cable knitting is a style of knitting in which textures of crossing layers are achieved by permuting stitches.

This headband has a simple 8 row repeat which is perfect to understand how a cable pattern is developed.

For this particular project you need DK or worsted weight yarn, 4 or 5 mm knitting needles, a cable needle or any substitute (thin rod, pencil, toothpick or any needle sized object).

Key:

C6F – Knit 3 stitches on to a cable needle and hold at front of work, Knit 3 then Knit 3 from cable needle
C6B – Knit 3 stitches onto cable neddle and hold at back of work, knit 3 then knit 3 from cable needle

Pattern:

Cast on 15 stitches
Row 1 : Knit
Row 2,4,6,8 : K3, P9, K3
Row 3 : K3, C6F, K3, K3
Row 5 : Knit
Row 7 : K3, K3, C6B, K3

Continue this pattern till piece is about 18 inches long.

You can check out the YouTube tutorial to learn how the cable stitches are made.

Happy knitting!

Community Activity, IYC

Winter KAL – Week 2 – Lace Headband

Hello knitters,
We hope you enjoyed week 1 of the India Yarn Circle knit along with @poojascrochet.

Our second week of the knit along will introduce you to another variation in knitting which is a lace pattern.

This involves making a lace pattern by incorporating yarn overs and joining stitches together.

For this pattern too you can use a dk weight yarn with 4 or 5 mm needles.

Method:

Cast on 11 sts.

Follow the arrowhead lace pattern (using chart or the youtube tutorial below) until the headband is approximately 18 inches long (or long enough to fit around your head when slightly stretched). Bind off and seam ends together.

To understand the working better, check out the video Tutorial below:

Hope you enjoy the project for this week. Please feel free to comment with your suggestions and queries.

Community Activity, IYC

Winter KAL – Week 1 – Part 2 – Seed Stitch Twist

Hope you are enjoying making the Seed stitch twist headband. This second part of the tutorial will teach you the finishing of the band and incorporating a twist.
Please share your photos on Facebook and Instagram and you can DM us for queries.
Happy knitting!

Community Activity, IYC

Winter KAL – Week 1 – Seed Stitch Twist Headband

Welcome to week 1!!! The first headband as a part of the KAL is a simple Seed stitch twist.

It involves only knit and purl stitches and is easily customisable to length and width.

The band is first made a rectangular piece and then joined along the length and with a twist at the shorter edge.

Method:

You have to first cast on an odd number of stitches.

The pattern repeat involves and alternating knit and purl repeat.

It is a single row repeat and every row starts with a knit.

The number of cast on stitches can be decided by you and should be double the final width of the headband.

The length is also customisable according to the circumference of the head (about 22 inches).

There is a short video tutorial in the link below to guide you along this process.

Happy knitting!

Feel free to leave your Queries and comments below or on our Facebook group.

Community Activity, IYC, Stitch it Up

Basics of Knitting

Let’s get started with basics.. knitting involves casting on stitches onto the knitting needles, knit and purl stitches and binding off to end the work. 

Check out these tutorials to learn basic knitting.

How to cast on Stitches:

The Knit Stitch:

The Purl Stitch:

How to Bind Off / Cast off:

Community Activity, IYC

A New Make Along!!

We are back with our next community craft along!!

This time we are having a knit along (KAL) and its perfect for beginners. A number of us find it easier to crochet than to work on two straght needle points, and some others want to revisit knitting which they put away years back. This KAL is perfect for all of you.

Now that we are approaching winter, lets make some warm winter accessories. Earwarmers are easily customisable to different designs and length, which makes them perfect for beginner knitters.

It is a set of 5 earwarmers/headbands which will be made over the period of 5 weeks. Each one is made with a different knitting style – cable, lace, twist, brioche, beads.

To participate in this KAL, you just need a few balls of stash yarn and a pair of corresponding knitting needles. DK to worsted weight acrylic or wool yarn is perfect to work with and easily matches 4mm or 5mm needles.

Click on the link below to register for this KAL!!