

We have successfully completed the two charts of pax shawlette and are at the very end of the pattern. Many have already completed the whole shawlette and we are very happy to see their finished objects.
The following is the explanation of the last two rows in simple English.
After completing chart B, you should have finished with one row of single crochet. You should have 451 sc.
Picot edging
Here the designer has designed the picot as (sc, ch2, sc) to be worked in the specified stitch.
Ch1, picot in the first stitch ( that is you make sc, ch2, sc in the same stitch), 1 single crochet in each of the next 4 stitches, picot, 1 sc in one each of next 2 sts, picot, 1 sc in one each of next 2 sts, picot, [1 sc in each of the next 8 stitches, picot, 1 sc in one each of next 2 sts, picot, 1 sc in one each of next 2 sts, picot]
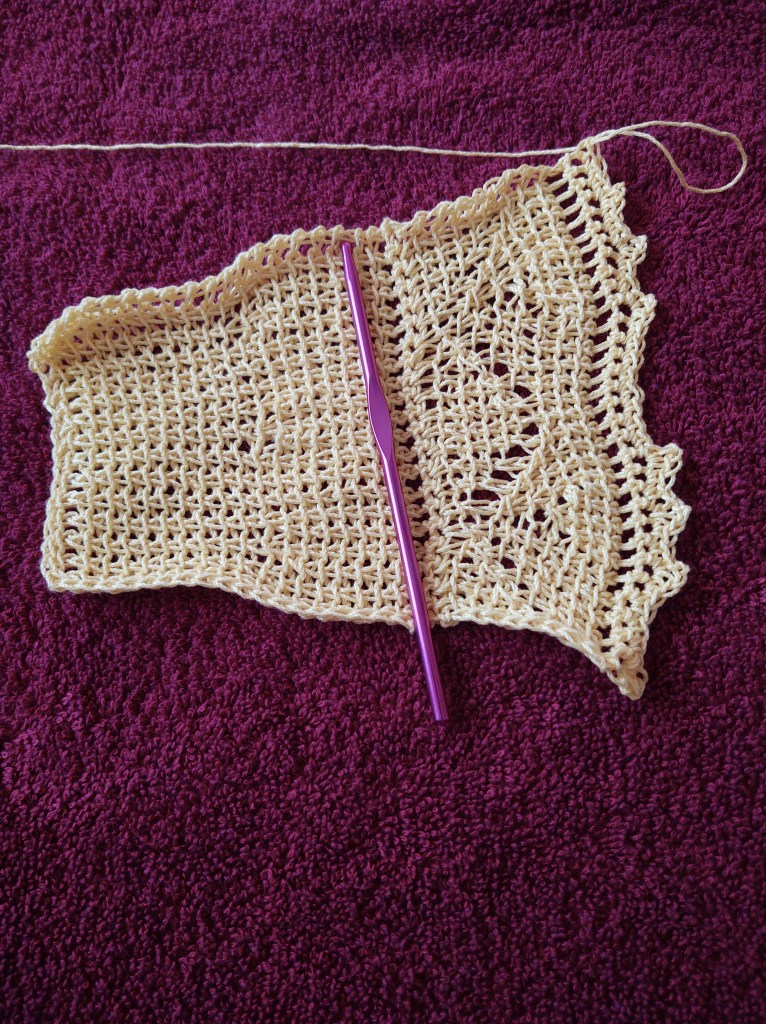
Repeat the instructions in the square bracket till you reach the last 4 stitches. 1 sc on each of the next 3 stitches, picot in the last stitch. Fasten off. Weave in the ends.
You can watch the video here for better understanding:
Ta da ! You are done! Give yourself a pat of the back for a job well done!
The next step is blocking.
For this step you will need , a sink or tub to hold, cold water, mild soap, towels, t pins, foam boards, steam iron or hair dryer
Blocking refers to the process of washing and pinning the finished product to the desired dimensions. The blocking technique varies for the type of material used.
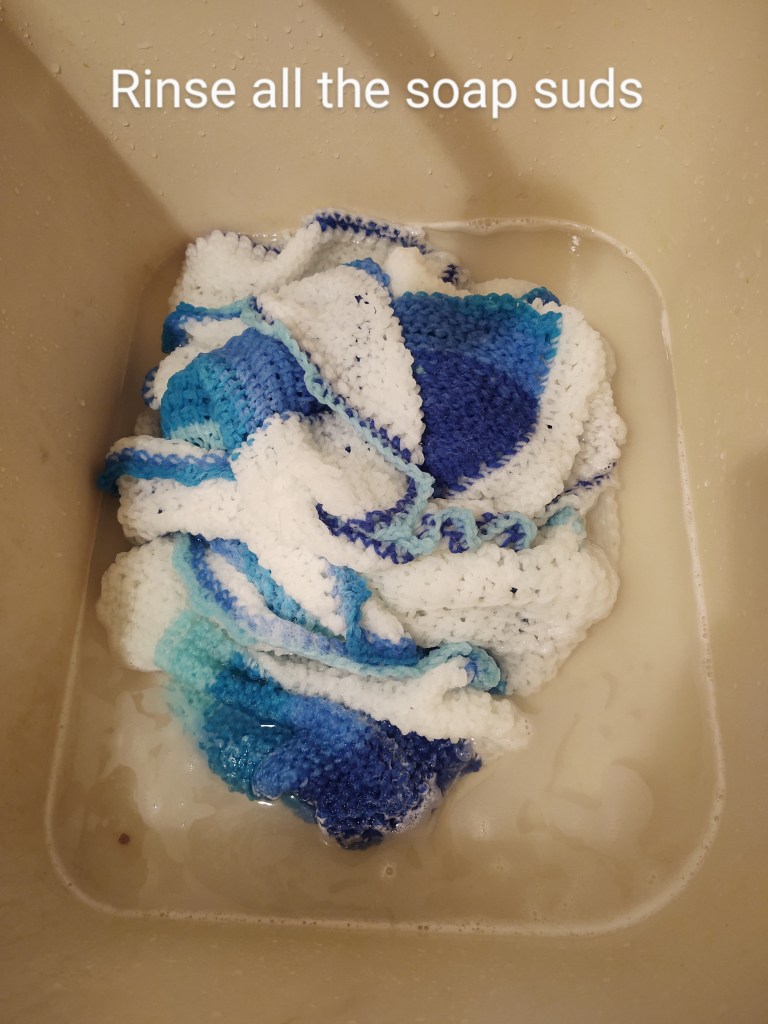
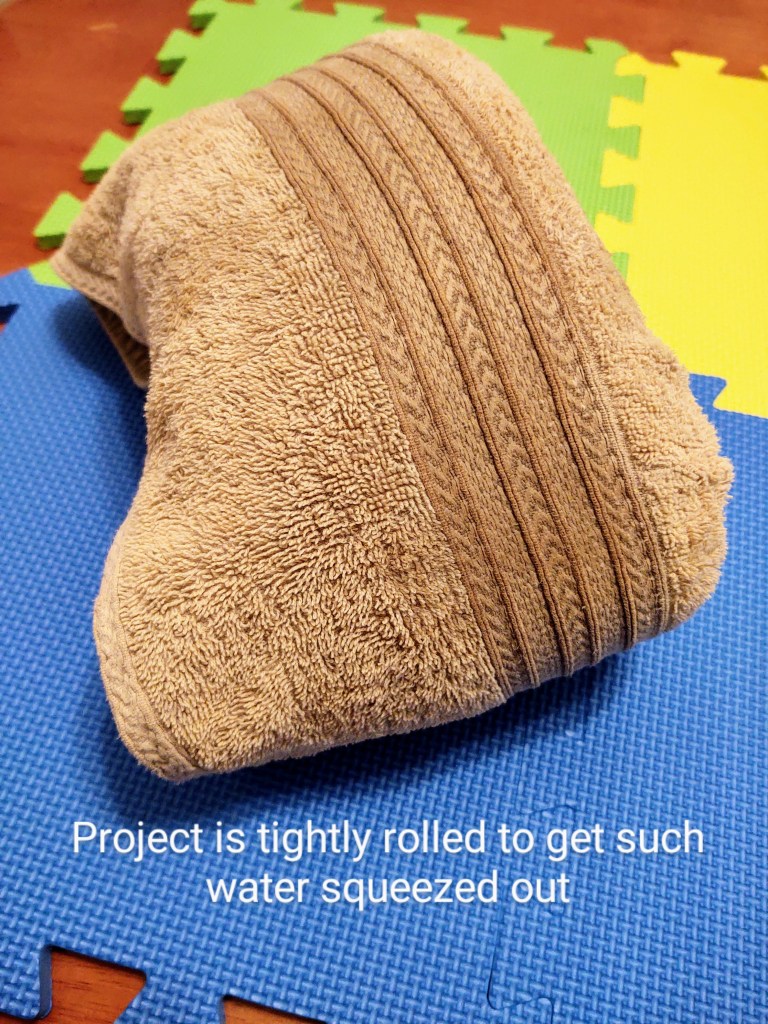
For acrylic you will gently wash the handcrafted piece in cold water and mild detergent. A few drops of the handwash soap or mild shampoo will do the trick. Rinse in water till the soap suds are removed. Do not wring( twist) the project to remove excess water. Squeeze out as much water as you can.
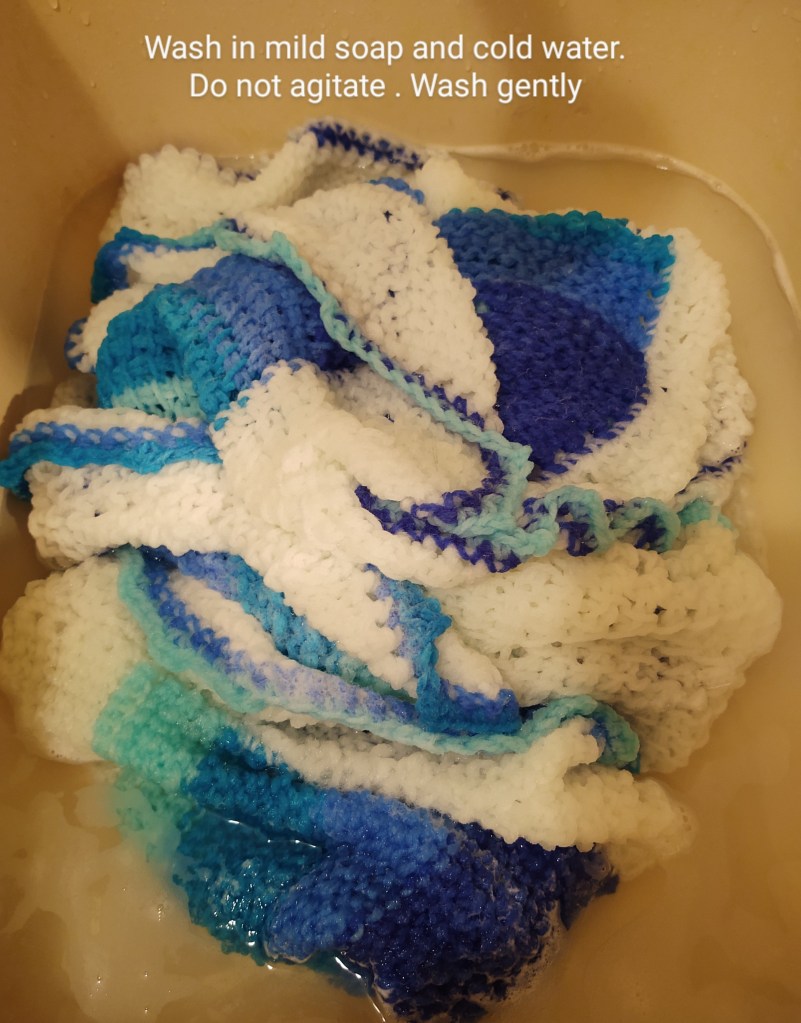
The project will become heavy with all the water it has absorbed.
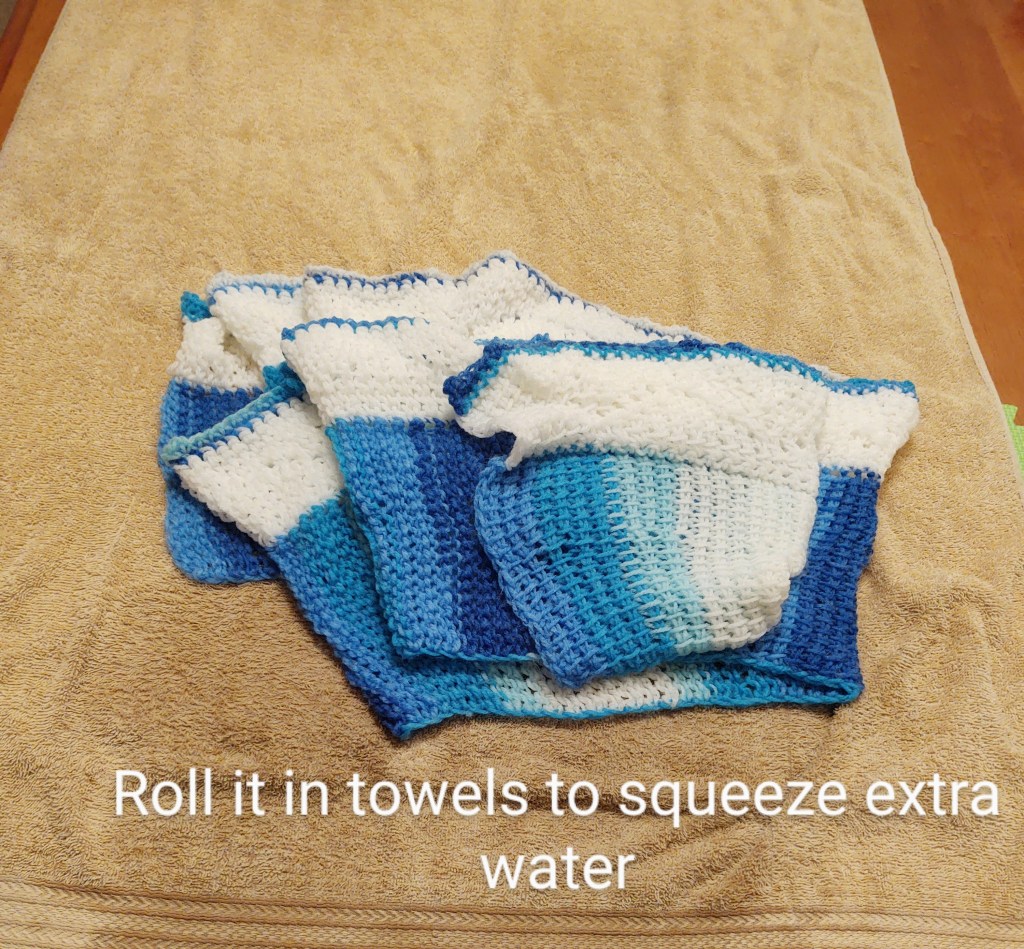
Now roll the piece in a thick towel. Use two towels if there is a lot of water to be removed.
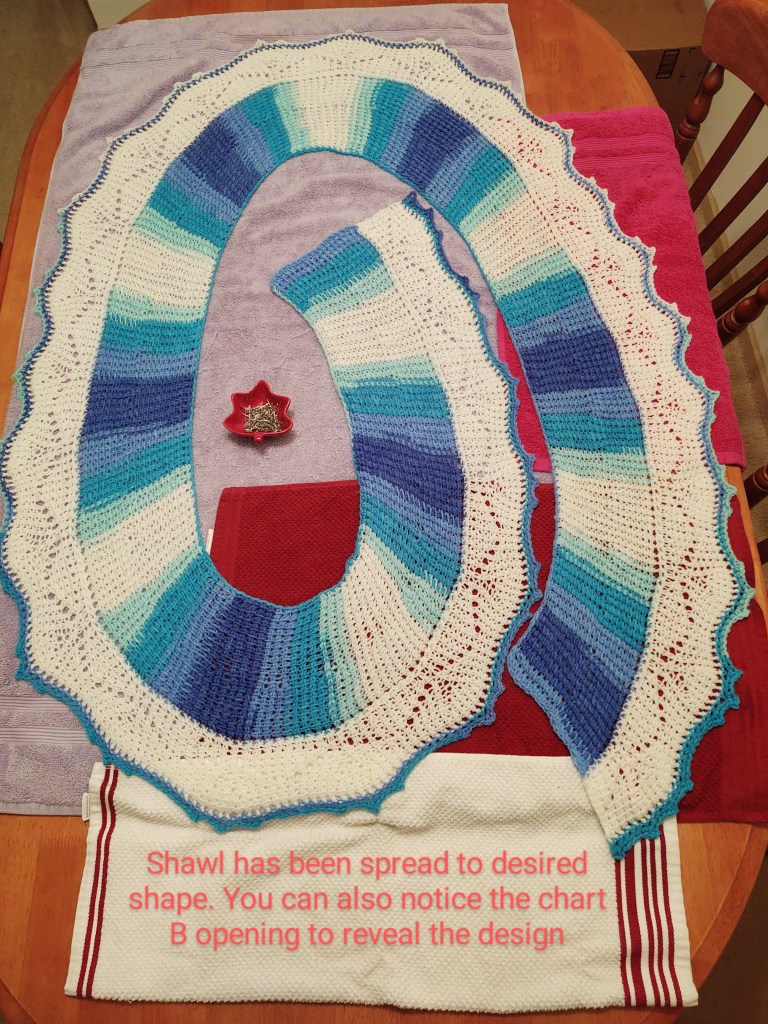
Arrange foam sheets ( or if you have a spare bed you can use that) and cover it with two to three layers of towel. Spread your finished project out and carefully shape the project with your hands to the desired shape.
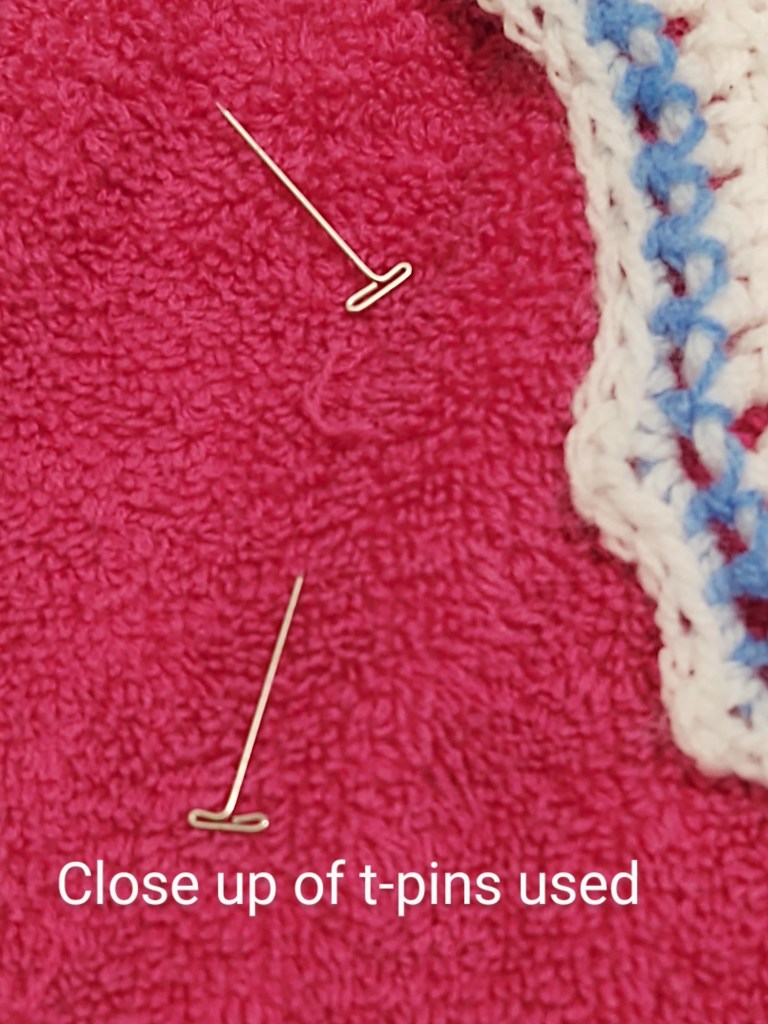
You will now take your t-pins and pin the points you want to be stretched. Usually one places the t-pins on the picots .

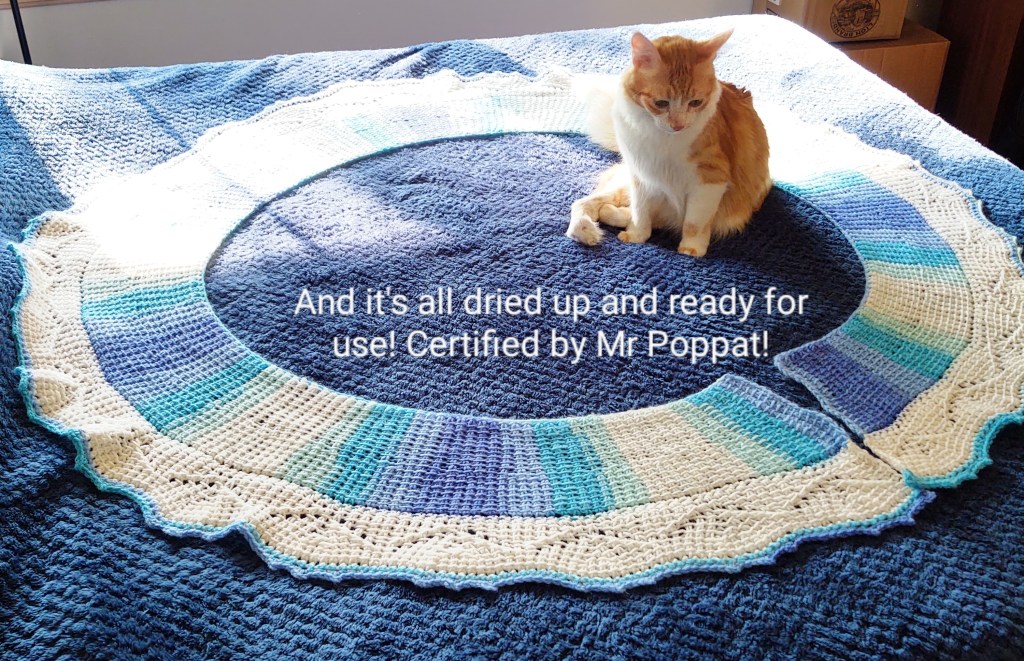
After you have adjusted the project to the shape you desire, you can leave it to air dry.

Once again if the material is acrylic, you can use steam to kill the fibres. This means that once the lace stitches open up you do not have to keep blocking everytime you wash.
Plug in the steam iron and use the steam to block acrylic. You should not place the iron box on the crochet piece. You should hover the iron box over the project a few inches at a time. Slowly move the iron box so that the entire shawl is blocked.
Leave it to air dry and once it’s done, remove the pins and take pictures, model it if it’s a wearable and show it off. Sit back and wait for compliments to flow your way!!
If you have used cotton , same principle but you can use starch to make your fo to have a crisp look.
For silk do not wash in water. Instead use a spray bottle and spray water to moisten the crochet / knit piece.
Then pin and let dry.
For wool if it says superwash then you can wash it and follow the same principle as acrylic. For non superwash wool , care must be taken to not agitate the fo as it will cause the wool fibres to fuse and felt.
Then pin and let dry.
You can check out the video below to understand blocking better:
Waiting eagerly to see all the FOs.
Good luck!
